 Skip to content


A Beginner's Guide to Creating a Macrame Mini Bag

If you're looking for a bag pattern that doesn't have fringe, you've come to the right place. Sometimes, you just want a simple, sleek design, right?
Macramé bags are super trendy right now, as are mini bags. That suits me perfectly since my one-year-old daughter absolutely loves my bags.
So, I decided to make her one! It's a mini cross-body bag with a cross-body strap and little tassel.
This minimalistic design is super simple, incorporating a Square knot pattern without any fringe. It's perfect for tiny people to use or to use as a mini bag, which is super on-trend.
You can also adapt this pattern to make a slightly larger adult version of the bag if you want. All you need is longer cord lengths and a few more knots :)
So, how did we make this bag without fringe?
Usually, you'd start knotting a macramé bag on one end and work your way around to the other end, all in one go. That way, you end up with fringe. We started at the flap with a row of Square knots.
This eliminates the fringe on that end. We did the same on the other end of the bag, having the two parts meet in the middle.
Here, the fringe ends up at the bottom of the bag, where you can tuck it in and conceal it. Cool, right?
What if you want some fringe at the bottom? Then, just seal the bag at the bottom, but let the fringe hang out instead of hiding it inside the bag.
If you're keen to learn how to make designs your own by adapting or altering them, or creating your own designs, check out our Bochiknot Macramé community on Patreon.
Pinterest Me for Later

If you're new to macramé, check out our YouTube playlist and blog library for tons more beginner-friendly tutorials.
We also offer a free 50 Knots and Sennits eBook, covering all the basics you'll need to master macramé and some more advanced knotting techniques.
New subscribers get a two-for-one deal on our Premium Cotton Cord. It's a great way to get your hands on high-quality cord for half the price.
What if you're not sure whether you like macramé enough to buy a whole bunch of stuff? Have a look at our Kami Wall Hanging starter kit.
This kit contains everything you need to make a small, beginner-friendly wall hanging. It comes with a step-by-step guide, video tutorial, and all the cords and supplies you need for the projects.
That's a really low-commitment way of checking out the art of macramé. What's super cool about this kit is that it covers the six basic knots of macramé that you'll encounter in most of the patterns you make.
Suppose you're already hooked on macramé and want to elevate your skill level from beginner to macramé master.
Why not join our Bochiknot Macramé community on Patreon? Here, you get exclusive access to weekly tutorials, tips and tricks, and one-on-one support from me to help you through tricky knotting problems.
You also get exclusive discounts on macramé cords and supplies to keep your hobby affordable :)
With that, let's get started!
This project should take 30-60 minutes, depending on your skill level.
Video Tutorial
Cord & Supplies

Materials:
- 3mm macramé cord
- 3 x swivel lobster clasps
- 1 magnetic bag clasp
You can find all the cords and supplies you need in our shop. I used a 3mm, single-strand twist cord from our Lush Bamboo range.
Cord Lengths:
Mini Bag:
- 4 x 150cm (59”)
- 4 x 140cm (55”)
- 4 x 130cm (51”)
- 2 x 120cm (47”)
- 18 x 100cm (39”)
- 2 x 60cm (24”)
- 2 x 325cm (128”)
- 2 x 25cm (10”)
Approximate Size of Completed Project
4.5" wide, 4" tall, with a 27" bag strap.
Macrame Knots Used:
- Square Knot
- Double Half Hitch Knot
- Lark's Head knots
- Gathering Knot
Step-by Step Instructions
- Take 2 x 150 cm cords folded in half and make a Square knot with the loop ends.
- Place the loop ends next to each other.

- Create the first half-knot.

- Make the second half of the Square knot in the opposite direction.

- Pull on the cord ends to tighten and neaten the knot.

- Take another 150 cm cord folded in half and add it to the right side for a Square knot.
- Place the loop end next to the first set of cords.

- Make the first half-knot in the same direction as the previous half-knot.

- Complete the Square knot.

- Repeat on the left side.

Step #3:
- Take 4 x 140 cm cords folded in half, add 2 diagonal Square knots to the right and 2 to the left.

- Repeat with 4 x 130 cm cords after that.

- Add one more Square knot on both sides with the 120 cm cords.

- Fill in the middle triangle with alternating Square knots.
- Make one Square knot beneath the first Square knot.

- Add one more Square knot with each consecutive row, filling in the pattern until you reach the bottom row.

- Make 16 rows of alternating Square knots.

- This completes the back of the bag and the front flap.
- Take 2 x 100 cm cords folded in half and make a Square knot with the loop ends.

- Repeat once more.

Step #8:
- Connect the 2 Square knots with an alternating Square knot underneath.

- Continue adding Square knots until the top row has 9 x Square knots.

Step #9:
- Add 11 more rows of Square knots underneath.

- This completes the front of the bag.
Step #10:
- Align the front and back parts of the bag.

- Take a 60 cm cord, weave it through the Loops on the sides. Crisscross the cords after each loop is weaved through.

- Close off with a Double Half Hitch (DHH) knot.

- Repeat on the other side.

Step #11:
- Flip the bag inside out and separate the side Square knot cords using the 2 weave cords.


- Take the next 2 cords down from both sides and make a Square knot.

- Make a total of 5 Square knots.

Step #12:
- Make 5 opposite Square knots on the other end.

Step #13:
- Cut off half the cords from both anchor cord groups.

- Overlap the remaining cords and finish off the row of Square knots.


- Cut off the excess cord from the anchor cords.

Step #14:
- Take a 30 cm scrap cord as an anchor cord for a row of DHH knots.


- Repeat the same on the other side.

Step #15:
- Close off the sides with another DHH knot.

Step #16:
- Trim off all excess cords.

Step #17:
- Take 2 x 325 cm cords and measure 30" on one end.

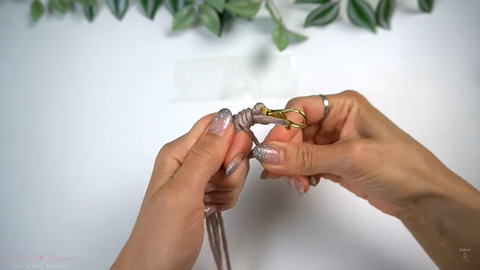
- Make a loop and attach both cords onto the lobster clasp with Lark's Head knots with the 2 shorter cords in the middle.

Step #18:
- Make a Gathering knot with a 25 cm cord.


Step #19:
- With the shorter cords in the middle, make consecutive Square knots until the pattern is approximately 26" in length.


Step #20:
- Attach the middle 2 cords onto a second lobster clasp with vertical Lark's Head knots.


Step #21:
- Make a Gathering knot with a 25 cm cord.

- Trim off the excess cord.

- Attach the straps to the sides of the bag.

- I added a tassel to accessorize the side of the bag. Find that pattern here.
- Sew the magnetic bag clasp onto the bag.

That concludes the mini bag tutorial.
Did you enjoy making this bag? Did you stick to the pattern or alter it to make it your own? Share with us on Instagram :)
Much love,

We hope you enjoyed following along and that you now feel confident enough to make your own.
Be sure to tag us in your photos on social media so we can admire your handy work. Happy knotting!
Looking to Get Started, But Don't Know Where to Begin?
Get 10%Off Our Macrame Kits
Use Coupon Code at Checkout: KAMI
If you are interested in learning more why not try our Kami Wall Hanging starter kit?

In this kit, you will learn the six basic knots of macramé while creating a small wall hanging.
The kit contains all the cords and supplies you need to complete the project, along with a step-by-step guide and video tutorial.
Visit our online store, Etsy, or Amazon to grab your kit.
If you're looking for more beginner-friendly patterns, look at our YouTube playlist and tutorial blog library.
Download My Free 50 Knot Ebook

To learn some new knots and intricate knotting techniques, you could also download our free 50 Knots and Sennets eBook.
Feel free to leave me comments, I would love to hear from you.


Leave a comment