 Skip to content


How to Measure Cord for Macrame Projects: The Golden Ratio
Table of Contents
- Macrame Tools
- Measuring Cord Lengths (The Golden Ratio)
- Golden Ratio 1: Using Your Project as a Guide
- Golden Ratio 2: Using the Same Knot Repeatedly
- A Practical Example
- Importance of Measuring Cord Accurately for Successful Macrame Projects
- Tips for Ensuring Accuracy in Macrame Cord Measurement
- 1. Slightly Overestimating the Length to Avoid Running Short
- 2. Keeping Track of Measurements for Multiple Cords in Complex Projects
- The Golden Ratio: How to Precisely Measure Cord for your Macrame Projects | Video Tutorial
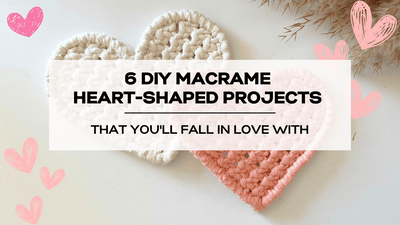
- Are you looking for more fun and simple DIY macrame patterns?
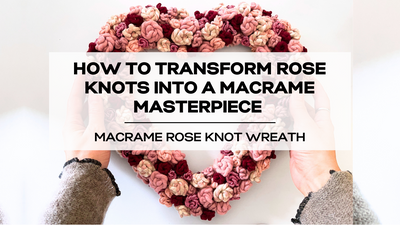
- How to Turn Knots into Exquisite Macrame Designs

The key to mastering the art of macrame lies not only in your creative vision but also in precise and thoughtful cord measurement.
Imagine starting a macrame project only to realize that you've run out of cords halfway through or that your carefully planned design is falling short of your expectations due to inaccurate measurements. To avoid such frustrations and ensure your macrame creations turn out just as you envision them, you must understand how to measure cord correctly from the very beginning.
In this comprehensive guide, we’re going to answer that basic question everyone has - "How do I measure macrame cord for my projects?" - and teach you how to use my ‘Golden Ratio’ which I developed after way too many trial and error rounds with the "Estimation Method".
This is specifically for those of you looking to advance your macrame skillset from following patterns to creating your own patterns.
We’ll delve into the world of macrame cord measurement, unraveling the mysteries of how cord thickness impacts your project's size and shape, and offering step-by-step instructions on measuring cord accurately.
You can think of this as Macrame Math 101.
I know I know...we all don't like math...but I promise you this will be simple to understand and extremely useful when it comes to creating your own macrame designs and projects.
We’ll look at 2 different calculations you can use to ensure you’re cutting exactly the right amount of cord.
Macrame Tools
In the world of macrame, precision is key. The delicate balance of macrame knots and intricate patterns demands an unwavering commitment to accuracy.
But what's the secret to achieving that precision? It's the tools you choose to use.
The most important aspect of any and every macrame project will always be the cord you use, we know that - but how do you get that cord ready for use for a variety of designs and macrame patterns?
Here are the essential tools that every macrame enthusiast should have in their arsenal to measure their cords with precision:

1. Ruler or Measuring Tape
At the very heart of every macrame project is the humble ruler or measuring tape (flexible tape measures such as those used for sowing work well).
Whether you're crafting a small piece or embarking on a grand design, having a reliable measuring tool is non-negotiable. It ensures that each cord is the exact length, bringing your artistic vision to life as you intended.
When you’re working out the measurements for your project, looking at the length of a cord and guessing the length won’t work - you need those exact measurements.
2. Scissors
A trusty pair of scissors is a macrame artist's best friend. When cutting your cords, precision is just as crucial as measuring.
Sharp scissors allow you to make clean, accurate cuts, ensuring that your cords are the correct length and that you can avoid unnecessary fraying.
3. Pen and Paper
Macrame is an art that thrives on attention to detail. Keeping track of your cord measurements can be invaluable for ensuring that each of those design elements in your project aligns with your vision. As you’ll see in the calculations below, it is vitally important to know the length, rather than to think you remember it being somewhere in the region of… You also want to make sure that you avoid remeasuring.
4. Calculator
Measure cord involves maths - there is no way around it.
So, when you need to calculate the exact lengths of cords for a project, a calculator becomes your trusted companion. It streamlines the process, helping you avoid errors and achieving those accurate cord measurements that you want and need.
Measuring Cord Lengths (The Golden Ratio)
As we’ve said, one of the most common questions we get here at Bochiknot, is “How do I measure my cords accurately?”
I had this question when I started in 2018 as well and found the answers I came across as lacking.
I didn't want to guess or follow a 'rule of thumb' - I wanted precision, so I developed The Golden Ratio, which I use for all my projects!
I know that in the same way macrame styles differ, so do our approaches - so I have two methods for you to choose from.
Step-by-step Guide: How to Measure Cord Lengths
Let's talk equations. My favorite fool-proof method of measuring your macrame cords involves a bit of math, but it's honestly an amazing tool once you master it!
Golden Ratio 1: Using Your Project as a Guide
- Step 1: Determine the desired length of your project.
- Step 2: Multiply that length by 4.5 to estimate the cord length needed.
- Step 3: If you plan to fold the cord in half (as you often do for attaching it to a dowel or object with Lark’s Head knots), multiply by 2.
The golden ratio is length × 4.5 × 2

Keep in mind that macrame isn't an exact science.
NOTE: Design aspects like cord size, project complexity, types of knot patterns, and knot tightness are all design factors that influence the required cord length.
For instance, if your project involves a lot of knots or various knot combinations, particularly intricate ones that use up a lot of cord (like Berry knots for example), you might want to lean towards a ratio of 5 times the project's length.
Conversely, if you expect more fringe than knots or you are using a very basic knot pattern, a ratio of 3 to 4 times the length could suffice.
Golden Ratio 2: Using the Same Knot Repeatedly
When you’re going to create a design plan where you’re using the same knots repeatedly, for example, a sennit or an alternating Square knot pattern, then this method may suit you better.
Step 1: Create a sample swatch using specific lengths of cord as “Z”
Step 2: Measure the length of the sample swatch and refer to it as "X".
Step 3: Divide the desired project length by X to get "Y," representing the multiplier you would need for your swatch size to achieve the desired project length.
Step 4: Multiply Z (sample swatch cord lengths) with Y to determine the length of cords needed for your project.
Step 5: If you plan to fold the cord in half (as you often do for attaching it to a dowel or object with Lark’s Head knots), multiply by 2.
The golden ratio is:
Desired project length ÷ X (swatch length) = Y (multiplier)
Then, take Z (cord length of swatch) x Y (multiplier) x 2 = CORD LENGTH NEEDED

Always add a little extra before cutting the cord to ensure you have enough as running out of cord mid-project can be frustrating.
A Practical Example
Theoretically, this is all great, right?
But I am sure you’re thinking - how do I apply this to a real pattern - Textbook vs. Real life?
Let's break down the cord measurement for the Macrame Rose Knot Heart-Shaped Wall Hanging project step by step together.
Suppose you're working with a 9" dowel and aiming for a wall hanging approximately 9" in length.
If you plan on using a basic knot pattern like the alternating square knot pattern for most of the pattern, your multiplier is 4 (you might use 4.5 or 5 for more complex knots).
Here's How You Calculate the Cord Length:
Step 1:
Multiply the dowel's length (9 inches) by your chosen multiplier (4 for basic knots):
9" × 4 = 36"
Step 2:
Because you'll fold the cords in half and attach them to the dowel, double the result from Step 1:
36" × 2 = 72"
Step 3:
If you want to include fringe at the bottom (about 4 inches), double that length too:
4" × 2 = 8"
Step 4:
Add the fringe length to the base length:
72" (baselength) + 8" (fringelength) = 80"
So, you'll need approximately 80 inches (or approximately 203 cm) of cord length.
This calculation ensures that you have enough cord for the main pattern and the fringe.
If you want to add a little extra for peace of mind, you can definitely do that as well.
Remember, it's always better to have a bit more cord than to risk running out during your creative project.
In the video, we adjusted the cord lengths down to 79” based on the needs of the completed pattern. 80" is very close to 79" - I'd say that's a fairly precise calculation.
Importance of Measuring Cord Accurately for Successful Macrame Projects

Now that you have the calculations we need to chat about what happens when you have either too much or too little cord in a macrame project.
Let's discuss the results and consequences of these two scenarios:
Scenario 1: Too Much Cord
Result: When you have an excess of cord, it can feel wasteful, especially if it's an expensive or limited resource, and extra cord may be cumbersome to manage, potentially causing tangles and workspace clutter.
Consequences: If you have a considerable amount of excess cord in a specific color or type, you may be limited in how you can use it for future projects unless you find ways to incorporate the same cord into multiple designs.
Cost: Depending on the cord's quality and cost, having too much cord can increase the overall expenses for your project.
Storage: Storing leftover cord can be challenging, taking up valuable space in your crafting area.
Aesthetic: An overabundance of cord can lead to a less sleek and tidy finished piece, particularly in smaller projects.
Reuse or Repurpose: Save the excess cord for future projects or use it for small decorative elements, such as fringe, tassels, keychains, or additional accents on your current project.
Scenario 2: Too Little Cord
Result: Running out of cord mid-project can be extremely frustrating and may require you to either undo your work and start over or compromise the design, and this can delay you when you’re trying to finish a project. Worse that the final piece might look incomplete or uneven if you can't finish it as planned.
Consequences: The most significant consequence is that you may not have enough cord to finish your macramé project as planned.
Frustration: The frustration of running out of cord can be discouraging, potentially leading to abandoned projects.
Re-work: To rectify the situation, you might have to unknot and rework parts of your project, which is time-consuming.
Design Alterations: In some cases, you might need to modify your design on the fly, which may not achieve the desired result.
Solutions: Make sure that you use the golden ratio we’ve shared with you to avoid this kind of disappointment. Adding an additional cord, either through knotting or splicing is rarely a neat solution, so it is better to avoid having to go that route.
Balancing Act: Finding the right balance between having too much and too little cord is crucial. While it's better to err on the side of having a bit more cord than needed, you also don't want to waste resources unnecessarily.
Over time, as you gain experience calculating your cord lengths, you'll develop a better sense of how much cord to measure for various projects.
Remember that the consequences of too much or too little cord can vary depending on the project's size, complexity, and your specific goals.
However, maintaining a good balance ensures smoother crafting experiences and more satisfactory final results in your macrame endeavors.
Tips for Ensuring Accuracy in Macrame Cord Measurement
When it comes to macrame, getting your cord measurements just right is essential for a successful project. We've already discussed the tools you need, but let's delve deeper into some practical tips to ensure you're measuring your cords accurately.
1. Slightly Overestimating the Length to Avoid Running Short
Running out of cord mid-project can be incredibly frustrating, and it's a situation you'll want to avoid at all costs.
To prevent this, consider overestimating the length of cord you'll need. By adding a little extra cord, you'll have a safety net in case you need it.
It's always better to have surplus cord for future projects or repairs than to find yourself in the middle of a project with not enough to finish.
2. Keeping Track of Measurements for Multiple Cords in Complex Projects
In more intricate macrame projects, you might be working with multiple cords, each requiring different lengths. To keep things organized and ensure accuracy, it's crucial to track your measurements diligently.
Here's How to do it Effectively:
- Label each cord with its intended use or position in the project.
- Record the measurements for each cord separately, either on paper or in a digital format. Note any variations due to knot types or patterns - if you’re making sennets and measuring according to the knot type then you’ll need to record each of these measurements - as the same measurement used for a Square knot would not necessarily work for a Double Half Hitch knot.
- If you're working with multiple cords of the same length, create a sample swatch to measure and calculate the total length needed.
By meticulously tracking your measurements and being prepared with an extra cord, you'll set yourself up for success in even the most complex macrame projects.
This attention to detail ensures that your finished piece will not only look stunning but also hold up beautifully over time.
Mastering the art of macrame requires more than just creativity—it demands precision in cord measurement - which is both an art and a science, and it's a fundamental skill that, when honed, empowers you to turn your creative visions into stunning, well-executed works of art.
The Golden Ratio really is your key to moving from beginner to master on your macrame journey.
Understanding the importance of precise cord measurement and avoiding the pitfalls of having too much or too little cord is essential for successful projects.
The precision you bring to cord measurement will be the foundation on which your macrame skills flourish.
So, embrace this knowledge, practice diligently, and come share your designs with us on Instagram and Facebook!
Happy knotting!
The Golden Ratio: How to Precisely Measure Cord for your Macrame Projects | Video Tutorial
Frequently Asked Questions
1. Does Cord Size Impact Cord Measurement?
Cord size does have an impact on cord measurements in macrame.
Thicker cords require longer lengths, and therefore, we would advise you to add about 25% for each mm of cord to achieve the same finished pattern as thinner cords, as they create bulkier knots.
Additionally, the density and appearance of macrame work can vary based on cord size, with thicker cords giving you a chunkier look and thinner cords making something more delicate.
You can find out all about cord sizes and materials in our Guide for Beginners.
Knot tension, personal knotting style, project complexity, and desired texture should all be considered when you choose your cords so that you can measure them correctly.
2. Does Cord material Impact Cord Measurement?
The material of the cord used in macrame can affect your cord measurements and needs to be chosen with the finished project in mind.
Different cord materials have different textures and levels of grip - some materials may be smoother and slide through knots more easily, while others may have a rougher texture and hold knots tighter, we planned for this when developing the golden ratio so you don't have to worry about this so long as you are using a good quality cord.
We would recommend sticking to a cotton cord, hemp cord, or nylon cord instead of using a cheaper cord that is stretchy for example due to potential stretching that could (and likely will) happen while you're knotting.
Are you looking for more fun and simple DIY macrame patterns?
Looking to expand the macrame skills you've learned?
We got you covered with more macrame DIY projects you can make in the comfort of your own home.
I have numerous diverse DIY macrame patterns that you can explore, ranging from distinctive wall hangings for home decor to timeless plant hangers suitable for all skill levels.
Browse my collection of DIY macrame patterns on Etsy.

The patterns come complete with step-by-step photos, written instructions, and helpful tips and tricks to assist you throughout your macrame journey.
How to Turn Knots into Exquisite Macrame Designs
Discover the art of macrame like never before!
Join our exclusive community of passionate macrame enthusiasts and unlock a world of creativity.
Gain access to a treasure trove of unique patterns, expert guidance, and a supportive network of fellow artists.

Whether you're a beginner or a seasoned knotter, our community is your gateway to mastering the art of macrame.
Elevate your skills, share your creations, and embark on a journey of inspiration together.
Don't miss out on this incredible opportunity.
Join our exclusive macrame community today!
Much love,


Leave a comment