


How to Measure Macramé Cord: Free Calculator + Golden Ratio Formula
Golden Ratio Cord Calculator
The proven macramé formula — enter your project details and never run out of cord again
These are standard macramé sizes. For a custom design, choose Custom Project and enter your own measurements.
Your cord estimate is ready ✓
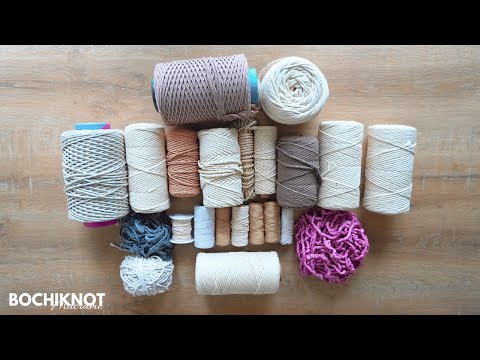
Which cord should you buy for your project?
Now that you know how much to cut, match the cord to the project. These are the three lines we use in every Bochiknot tutorial — pick the size your pattern calls for and you're set.
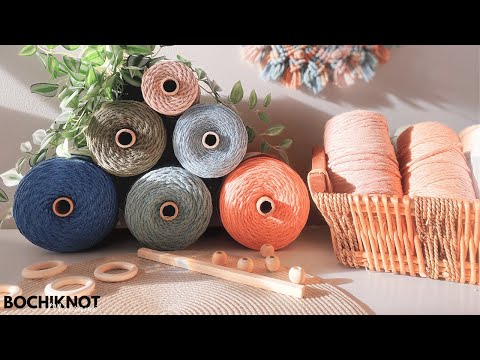
3mm cord
The detail size — keychains, jewelry, coasters, and smaller wall pieces. Crisp knot definition without bulk.
Shop 3mm cord →5mm cord
The statement size — wall hangings, plant hangers, and anything you want to work up fast with bold texture.
Shop 5mm cord →Single-strand cord
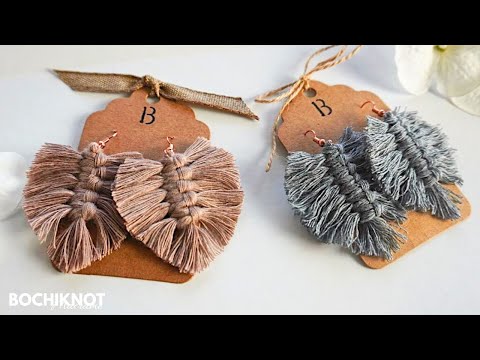
The fringe favorite — brushes out into soft, silky fringe for feathers, leaves, and boho wall art.
Shop single-strand cord →A note from Nicole 👋
Of all the questions I get from our community, the one that comes up most is not about knot techniques or cord types — it's this: "How do I know how much cord to cut?" I get it completely. Running out of cord at 80% through a project is one of the most frustrating things that can happen. I've been there — scissors in hand, half a wall hanging done, and not a metre of matching cord left. Not fun.
So I created what I call the Golden Ratio — my go-to formula for every single project I make. I know this post looks like it has a lot of numbers in it, and I won't pretend otherwise! But here's my promise: we're going to go through everything one step at a time, in plain language, with real examples. Think of it as a Grade 5 maths lesson — except the homework is making something beautiful. 😄
My advice: Don't try to read this all at once. Read one section, let it click, then move on. Bookmark this page and come back to it. Use the calculator. Take your time — there's no rush. By the end, measuring cord will feel as natural as the knotting itself. 🌿
Measuring macramé cord (also called calculating cord length, applying the macramé 4× rule, or using the cord length formula) is the process of determining exactly how much cord to cut before starting any macramé project. It works by multiplying the finished project length by a knot-complexity multiplier and then doubling for the Lark's Head fold — and is considered the single most critical calculation every maker needs to master, whether you're tying keychains, wall hangings, or plant hangers.

Trusted by 100,000+ on YouTube · 100,000+ on Instagram · 40,000+ Facebook community · 20,000+ on Pinterest
📎 Disclosure: This post contains affiliate links. If you purchase through these links, Bochiknot may earn a small commission at no extra cost to you.
✦ Free Cord Calculator
Enter your project details and get your cord lengths instantly — powered by Nicole's Golden Ratio formula.
📖 First time here? We'd recommend reading the full guide below at least once — understanding why the formula works will make you a much more confident maker, not just someone who types numbers into a box. Once you've read it, this calculator becomes a powerful tool you'll come back to for every single project. Bookmark this page and it's yours forever. 🌿
What's in This Guide
- The concept everyone gets wrong: filler cord vs. working cord
- The Lark's Head trap — the #1 beginner mistake
- Nicole's Golden Ratio Method 1: the core formula
- Golden Ratio Method 2: the test swatch method
- How to adjust for your personal knotting tension
- What to do when a pattern doesn't give cord lengths
- Too much cord vs. too little — what happens & what to do
- Before-you-cut checklist
- Frequently asked questions
The Concept Everyone Gets Wrong: Filler Cord vs. Working Cord
Before we touch a single number, there's one idea I need you to understand first — because getting this wrong is the #1 reason people end up with way too much of one cord and nowhere near enough of another. Don't worry, it's actually a simple idea once you see it. Think of your cords like a team: some do all the work, and some just stand in the middle looking pretty. 😄

In most macramé patterns, every cord plays one of two very different roles. Here's the simple version:
| Working Cords | Filler Cords | |
|---|---|---|
| What they do | Actively create the knots — they wrap, loop, and tie | Sit in the centre — they get knotted around, not knotting |
| Cord consumed | A lot — 4–6× the project length | Very little — only 1.5–2× the project length |
| In a square knot | The 2 outer cords | The 2 centre cords |
| Common mistake | Cutting them too short (most common reason for running out) | Cutting them at 4–5× and wasting metres of cord |
💡 Nicole's tip: Before you cut a single cord, just ask yourself: "Is this cord going to be knotting, or getting knotted around?" Working cords get the big 4–5× number. Filler cords just need your project length plus a little breathing room (1.5–2×). That one question will save you more cord — and more heartbreak — than anything else in this guide.
The Lark's Head Trap — The #1 Beginner Mistake (That Catches Almost Everyone)

I've seen this one trip up beginners more times than I can count — and honestly, I made this exact mistake myself when I was starting out. The tricky part is you don't realise it until every single cord is already too short to fix. Deep breath — read this section slowly and it won't happen to you.
Here's the scenario: you read that you need 4× the project length per cord. Your project is 18 inches / 46cm long. You do the maths — 18 × 4 = 72 inches / 183cm — and cut every cord to 72 inches. Makes sense, right? Then you go to attach your cord to the dowel using a Lark's Head knot… and you realise you have to fold the cord in half first.
Suddenly that 72-inch cord is now two 36-inch working strands. But you needed 72 inches of working length per strand — which means you should have cut 144 inches / 366cm per cord from the beginning. Every cord is now half as long as it needs to be. 😬
⚠️ The Lark's Head Rule — Remember This Always
When you attach cord to a dowel, ring, or base using a Lark's Head knot, you fold the cord in half first. This means each cord you cut gives you two working strands of half the cut length.
The formula already accounts for this — which is why it includes a ×2 step. Do not apply your multiplier and then forget to double. The full formula is:
Project length × multiplier × 2 = length to cut per cord
✨ You're doing great. The next two sections have formulas in them — but I promise you've already done the hard part. If maths isn't your thing, read slowly, look at the examples, and remember: the calculator below will do all of this for you. You've got this. 🌿
🎬 Prefer to watch? Nicole walks through the entire Golden Ratio method in this video — then use the guide below as your ongoing reference.
If you enjoy the video, subscribe to the Bochiknot YouTube channel for new tutorials every week.
The Golden Ratio — Method 1: The Core Formula
Alright — here's the formula. Take a deep breath. I promise it's not as scary as it looks. Read it once, read it again, and then look at the example below — that's the bit where it really clicks. This formula is what I use for every single project I make at Bochiknot, and once it's in your head, you'll never have to guess again.
THE GOLDEN RATIO — METHOD 1
Working cord length = Project length × Multiplier × 2
Where:
- Project length = the finished length of your piece (including fringe)
- Multiplier = 3–6× depending on knot complexity (see table below)
- × 2 = accounts for the Lark's Head fold (cord is halved when attached)
Choosing Your Multiplier
The multiplier is just the number you multiply your project length by — and the right one depends on how knotty your pattern is. More knots = more cord eaten up. Simple as that. Here's the cheat sheet:
| Project Type | Multiplier | Example |
|---|---|---|
| Mostly fringe / minimal knotting | 3–3.5× | Simple fringe wall hanging, tassel |
| Standard knotting (square knots, DHH) | 4–4.5× | Most wall hangings, plant hangers |
| Dense knotting / complex or textured patterns (Berry knots) | 5–5.5× | Detailed wall art, bags, dense patterns |
🔗 Not sure which cord to use? Before measuring, make sure you've chosen the right cord weight and construction for your project. The Complete Guide to Macramé Cord → covers everything you need to know. Ready to order? Shop Bochiknot macramé cord →
📐 Let's Do It Together — A Real Project, Step by Step
Formulas are great, but nothing beats seeing them work on a real project. Let's walk through the cord measurement for a small macramé wall hanging together — the same way I'd explain it to you in class.
The project: Small wall hanging on a 9" / 23cm dowel, hanging approximately 9" / 23cm long, using an alternating square knot pattern. Adding about 4" / 10cm of fringe at the bottom.
Cord: 3mm single-strand cotton cord from Bochiknot. Multiplier: 4 (alternating square knots = standard knotting).
STEP 1 — Apply the multiplier
Project length × multiplier = working cord length
9" × 4 = 36"
STEP 2 — Account for the Lark's Head fold
Remember — the cord gets folded in half when you attach it. So double everything.
36" × 2 = 72"
STEP 3 — Add the fringe
Fringe hangs from both sides of the fold, so double the fringe length too.
4" fringe × 2 = 8"
STEP 4 — Add it all together
Base length + fringe length = total cut length per cord
72" + 8" = 80" / 203cm per cord
STEP 5 — Round up with a 10% buffer
This is my favourite step — and the one I never skip. I always round up by about 10% to give myself room for creative changes or adjustments as I go. Extra knots, swapped patterns, small tweaks mid-project — they all need a little more cord than you planned.
80" × 1.10 = 88" / 224cm per cord (round up to 90" if you like a nice clean number!)
✅ Result: Cut every working cord to 88–90 inches / 224–229cm. That's it! The small amount of extra cord is worth the peace of mind — and gives you freedom to play with the design as you knot. (When I filmed the video for this project, I worked close to 80" based on the final pattern — the buffer just gave me room to breathe. 😄)
🎬 Watch Nicole make this exact project — the same small wall hanging we just measured together, step by step.
Golden Ratio Method 2: The Test Swatch Method
Method 1 works beautifully for most projects. But if you want the most accurate measurement possible — especially for a pattern you're designing from scratch — Method 2 is even better. Instead of using a fixed multiplier, you actually measure your own knotting to get your personal ratio. It only takes about 10 minutes, and honestly it feels very satisfying once you see it work.
A quick note before the steps: I've used some placeholder letters (X, Y, Z) to keep the formula tidy. Don't let those scare you — they're just names for numbers you'll fill in yourself. The worked example right after the steps will make everything clear.

THE GOLDEN RATIO — METHOD 2
Cord needed = (Project length ÷ Swatch length) × Swatch cord length × 2
Step-by-Step
- Cut a few test cords — cut them to a length you know exactly (e.g., 36 in / 90cm). Write this number down — it's your swatch cord length.
- Knot your swatch — knot your chosen pattern with those test cords until they run out. Measure how long the finished piece came out. Write that down too — it's your swatch length.
- Find your personal multiplier — divide your full project length by your swatch length. That's it. That number is your multiplier.
- Calculate your cord length — multiply your swatch cord length by the multiplier you just found. That's your working cord length.
- Don't forget the fold! — if you're attaching with a Lark's Head knot, multiply by 2 again. (We learned why in the section above. 😉)
- Add your safety buffer — add 10–15% to cover your personal tension and any finishing adjustments.
📐 Let's walk through it with real numbers: You cut test cords to 36 in / 90cm and knot a swatch. The finished swatch is 8 in / 20cm long. Your full project is 32 in / 80cm. Step 1: 32 ÷ 8 = 4 (that's your multiplier). Step 2: 36 × 4 = 144 in of working cord. Step 3: × 2 for the Lark's Head fold = 288 in. Step 4: add 10% buffer = ~317 in = about 26 ft / 8m per cord to cut. Done — no guessing involved.
💬 What the Bochiknot Community Says
"I used the Golden Ratio for the first time on my last wall hanging and every single cord was the right length. I used to always cut too short and end up splicing in new cord halfway through. This method genuinely changed everything for me."
— Michelle K., Bochiknot Facebook Community
"The filler cord vs. working cord section was the thing nobody had ever explained to me before. I'd been cutting all my cords to the same length for two years. I was wasting so much cord on fillers!"
— Tara M., @bochiknot Instagram community
🧮 Need the calculator? It's waiting for you at the top of this page ↑ — no need to scroll through the whole guide first.
Cords measured. Ready to make something beautiful? 🌿
Come share your project with 40,000+ makers in our Facebook community. Whether it's your first wall hanging or your hundredth plant hanger — we genuinely love seeing what you create.
Join the Facebook Community →How to Adjust for Your Personal Knotting Tension
Here's something I love about macramé — everyone knots a little differently. Your natural tension (how tightly or loosely you pull each knot) is completely unique to you, and over the course of a 200-knot project, even a small difference adds up. Neither tight nor loose is wrong — they're just yours. But it does mean the generic multipliers might be slightly off for you personally.
The fix is simple and actually quite fun — a little 10-minute experiment that tells you your own number. Once you know it, you'll use it forever.
The Personal Tension Test (10 minutes, done once per knot type)
- Cut 4 cords to exactly 36 in / 90cm each. (Any length is fine — just write it down.)
- Fold each in half and attach to a dowel with Lark's Head knots. You now have 8 working strands, each 18 in / 45cm long.
- Knot your chosen pattern — whatever you'll be using in your actual project — until the cords run out or you've made about 6 in / 15cm of fabric.
- Lay it flat and measure the finished length of your little swatch.
- Divide:
18 in (swatch cord length) ÷ swatch length = your personal multiplier - Write it down! This is now your number for that knot type. Use it instead of the generic table every time.
💡 Nicole's tip: I keep a small notebook with my personal ratios for each knot type and cord thickness I use regularly. After just 3 or 4 projects you'll have your own little reference that's more accurate than any formula I could give you — because it's your hands, your tension, your cord. That's the moment you really start to feel like an experienced maker.
What to Do When You Run Out of Cord Mid-Project
First of all — it happens to everyone. Seriously, even experienced makers run short sometimes. Maybe your tension was a little looser that day, or the pattern had a complex section you didn't account for. It doesn't mean you did anything wrong. Take a breath — here are your options:
Your Options When You're Running Short
| I still have a few inches left on each cord | → Simplify the remaining section — switch to a fringe finish or gathering knot rather than continuing complex knotting. |
| My cord ran out completely mid-project | → Join a new cord. The cleanest method: position the new cord end alongside the old one in the same knot, knot over both for 2–3 knots to secure, then trim the short end flush on the back. |
| I'm running short across all cords equally | → Your multiplier was too low for this knot type. Finish with a simpler section and note your actual ratio for next time using the personal tension test above. |
Nicole's reminder: Always add 10–15% to your calculated length before cutting. The small amount of extra cord costs almost nothing, and it gives you the flexibility to adjust, make mistakes, and finish cleanly. Running short on the last 5% of a project is genuinely one of the most frustrating experiences in macramé. The buffer is always worth it.
What to Do When a Pattern Doesn't Give Cord Lengths
This happens all the time — especially with free patterns you find online or older tutorial books. The pattern tells you what to make and how to knot it, but says nothing about how much cord to cut. Frustrating! But completely fixable.
Here are your three options, from quickest to most precise:
- Apply Method 1 yourself — measure the project dimensions from the pattern photo or description, identify the primary knot type, pick your multiplier, and calculate. You don't need the pattern to give you cord lengths — you can work it out yourself with the formula.
- Make a test swatch (Method 2) — especially useful if the pattern has an unusual knot you're not sure how to estimate. Knot a small sample using a known cord length, measure the result, and scale up. This gives you the most accurate answer of all three options.
💡 Nicole's tip: When a pattern shows a finished photo but no cord measurements, look at the image carefully. You can estimate the project's knotted length, identify which knots are being used (or guess by the texture), and apply the formula. You'll usually land within 10–15% of the "correct" answer — which is exactly what the buffer is there to cover. You've got more tools now than you realise. 🌿
Too Much Cord vs. Too Little — What Really Happens
Let's be honest about both scenarios — because understanding the consequences of each helps you make a smarter decision about your buffer before you cut.
📦 Too Much Cord
- Long working cords can be awkward to manage and may tangle
- Slightly higher cost upfront
- Leftover cord takes up storage space
- On small or delicate projects, a lot of excess can feel messy
✅ But it's always the better problem to have.
⚠️ Too Little Cord
- Running out mid-project is deeply frustrating (we've all been there)
- You may need to undo and re-knot sections
- Joining new cord mid-piece is rarely invisible
- The final piece may look incomplete or uneven
- In the worst case, you abandon a project that was almost done
❌ This is the one to avoid — the buffer is worth it every time.
💡 What to do with leftover cord: Don't throw it away! Scraps and leftover lengths are incredibly useful. Use them for:
- Practice knots and test swatches for future projects
- Keychains, tassels, and small decorative accents
- Fringe on bags or cushions
- Adding a pop of colour to a plain piece
- Teaching someone else — scrap cord is perfect for demos
Check the Bochiknot YouTube channel for project ideas that use shorter cord lengths perfectly.
Before You Cut — The Quick Sanity Check
You've done the calculations. You've got your cord in hand. Before the scissors come out — run through this list. It takes 60 seconds and it has saved many a project from an avoidable mistake. 😊
✂️ Pre-Cut Checklist
- ☐Have I identified which cords are working cords and which are filler cords? (Different lengths!)
- ☐Have I included the × 2 for the Lark's Head fold in my calculation?
- ☐Have I chosen the right multiplier for my knot type? (Spiral knots need 6–7×, not 4×!)
- ☐Have I added fringe length to each cord (doubled, since fringe hangs from the fold)?
- ☐Is my cord the right thickness for the pattern? If I've swapped thickness from the original spec, have I adjusted the length?
- ☐Have I added a 10% safety buffer to the final number?
- ☐Do I have enough cord on the spool to cut all the lengths I need? (Better to check now than halfway through cutting!)
All boxes ticked? You're ready. Go make something wonderful. 🌿
Frequently Asked Questions About Measuring Macramé Cord
What is the formula for macramé cord length?
The core formula is: Project length × Multiplier × 2 = cord length to cut. The multiplier varies by knot complexity — 3–4× for simple patterns, 4–5× for standard knotting (square knots), 5–6× for complex patterns (spirals, berry knots). The ×2 accounts for folding the cord in half when attaching to your dowel or ring via Lark's Head knot. Always add a 10–15% buffer to your final calculation.
What is the 4x rule in macramé?
The 4× rule states that working cords should be cut to approximately 4 times the finished project length — before accounting for the Lark's Head fold. So for a 20-inch project, your working cord length would be 80 inches per strand. Because cords are folded in half when attached, the cut length is 4× the project length × 2 = 8× the project length. It's a starting point — adjust to 5–6× for more complex knotting patterns.
How much cord do I need for a macramé wall hanging?
For a small wall hanging (12" × 18") using 3mm cotton cord: approximately 210 ft / 64m total. For a medium (24" × 36"): approximately 530 ft / 161m. For a large (36" × 48"): approximately 960 ft / 292m. These estimates assume standard square knot density at 4–4.5× multiplier with a 10% buffer. Add 30–40% for spiral or very dense patterns.
How much cord do I need for a macramé plant hanger?
For a basic plant hanger (~40 in / 1m finished length) using 3mm cotton cord: approximately 104 ft / 32m total, cut into 8 cords of 13 ft / 4m each. For a spiral plant hanger the same length, increase to 160 ft / 49m — spiral knots consume significantly more cord. For 5mm cord, add approximately 65% to all measurements.
What is the difference between working cord and filler cord in macramé?
Working cords are the cords that actively create the knots — they wrap, loop, and tie. They consume 4–6× the project length. Filler cords sit in the centre and are knotted around rather than knotting themselves — they consume only 1.5–2× the project length. In a square knot, the 2 outer cords are working cords and the 2 inner cords are fillers. Cutting all cords to the same length is one of the most common beginner mistakes.
Do I need to double the cord length for a macramé project?
Yes — when you attach cord to a dowel or ring using a Lark's Head knot, you fold the cord in half. This means your cut length needs to be double the working length you calculated. For example, if your formula gives you a 40-inch working length, cut the cord to 80 inches so each side is 40 inches after folding. This is the single most common miscalculation beginners make.
What multiplier should I use for different macramé projects?
Use 3–3.5× for mostly fringe or minimal knotting. Use 4–4.5× for standard knotting — square knots, double half hitches, most wall hangings and plant hangers. Use 5–5.5× for dense or complex patterns — berry knots, spiral patterns, detailed wall art, bags. When in doubt, use 4× and add a 15% buffer.
How does cord thickness affect macramé cord length?
Thicker cord creates bigger knots and consumes more cord per unit of finished length. The adjustment formula is: Adjusted length = Original length × (New thickness ÷ Original thickness). Switching from 3mm to 5mm cord means adding approximately 65% more cord. Switching from 3mm to 8mm means more than doubling your cord length. Always recalculate when changing cord thickness from a pattern's original specification.
What do I do if I run out of cord mid-project?
The cleanest fix is to join a new cord at the back of the work. Position the new cord end alongside the old one inside the same knot, knot over both for 2–3 consecutive knots to secure the join, then trim the short tail flush against the back. Alternatively, if you have a few inches remaining, switch to a simpler finish — a gathering knot or straight fringe — rather than continuing complex knotting.
How do I adjust cord length for my personal knotting tension?
Make a test swatch using a known cord length (e.g., 36 in / 90cm per strand), knot your pattern until the cord runs out, and measure the finished swatch. Divide the cord length by the swatch length to get your personal ratio. Use this ratio for all future projects with the same knot type. Your personal ratio will always be more accurate than a generic multiplier.
Can I use a free macramé cord calculator?
Yes — the free Bochiknot cord calculator at the top of this page uses Nicole's Golden Ratio formula to calculate exact cord lengths instantly. Enter your project type, dimensions, cord thickness, and knot style and it gives you the total cord needed, per-cord cut lengths, and the full formula breakdown. Bookmark the page for every future project.
How do I calculate cord length for a macramé keychain?
For a macramé keychain (typically 4–6 inches finished length), cut working cords to: project length × 4 × 2 = 32–48 inches per cord. Most keychains use 4–8 working cords. For a simple 4-inch daisy keychain with 6 cords, you need approximately 192 inches (16 ft) total. Nicole's free daisy keychain tutorial at bochiknot.com includes exact cord measurements.
Get 10% Off Your First Order
Join 10,000+ crafters. Free tutorials, new patterns & exclusive offers — straight to your inbox.
We respect your inbox. Unsubscribe any time.
From Nicole — before you go 🌿
Measuring cord is one of those things that feels fiddly and over-complicated when you first start — and then suddenly clicks into a simple habit. Once you've used the Golden Ratio two or three times, it becomes second nature. You stop guessing, you stop running out, and you stop wasting cord. The whole process just gets easier.
If you take one thing from this guide, let it be this: working cords and filler cords are not the same. That single distinction will save you more cord and more frustration than any other tip I can give you.
Now go measure your cord and make something beautiful. And when you're done — come share it with us in the Bochiknot Facebook Community or tag us on Instagram @bochiknot. I can't wait to see what you create. 🤍
Happy knotting,
Nicole
Nicole — Founder, Bochiknot
Nicole has been teaching macramé to a global community of crafters since 2018. With over 100,000 YouTube subscribers, 100,000 Instagram followers, and a 40,000-member Facebook community, she's passionate about making macramé approachable, creative, and technique-driven for makers of every level.
You might also like
More Tutorials from Nicole on YouTube


Leave a comment