 Skip to content


7 Ways to Start and End a Macrame Wall Hanging

Hey there, welcome to our user-friendly guide dedicated to the craft of wall hangings, with a particular emphasis on the proper techniques for commencing and concluding them with the perfect knots!
In this all-encompassing guide, we'll offer you a detailed walkthrough to start and finish your macrame wall hanging crafting adventure. Whether you're a total beginner or possess some prior knowledge, these seven techniques will set you on the path to designing your own exquisite wall hangings.
Prepare yourself to delve into the world of macrame and enhance your home decor with stunning wall hangings!
What is Macrame?

For those new to macrame, let's do a quick run down of what macrame is and how it has evolved over time.
Macrame is a captivating and centuries-old craft that centers around the art of knotting cords or ropes to create intricate and decorative patterns.
The term "macrame" is believed to have originated from the Arabic word "migramah" which means "fringe".
While its roots can be traced back to various cultures across the world, including Arabic, Chinese, and Native American, it gained significant popularity in the Western world during the 1970s when it became synonymous with bohemian and hippie aesthetics.
In macrame, artisans utilize a range of knotting techniques, including the square knot, half hitch, and double half hitch, to craft a diverse array of items, such as plant hangers, wall hangings, jewelry, and more.
The beauty of macrame lies in its versatility; it allows for endless creativity as crafters experiment with different knot combinations, cord colors, and patterns. Macrame has made a resurgence in recent years as a trendy and eco-friendly art form, with many enthusiasts incorporating it into their homes as stylish decor or fashioning their own handmade accessories.
Its enduring appeal lies in the therapeutic and meditative aspects of knotting, as well as the ability to produce beautiful, one-of-a-kind pieces that add a touch of boho-chic charm to any space.
Macrame Wall Hangings
Let's unravel some fun facts about macrame wall hangings, in case you need even more reasons to love them!
Macrame wall hangings are not just beautiful pieces of decor; they also have a rich history and some fascinating characteristics that make them unique. Let's explore a few fun facts about macrame wall hangings to pique your interest in this captivating art form.
Ancient Origins: Macrame, as an art form, dates back thousands of years, with evidence of its practice found in ancient civilizations such as the Egyptians and the Babylonians. It has a truly timeless appeal.
Modern Revival: Macrame wall hangings were rediscovered by artisans for the art's versatility, bringing a modern twist to classic knotting techniques and fostering a renewed appreciation for its intricate beauty and eco-friendly appeal. Macrame's revival in the 2010s reflected a growing desire for handcrafted, sustainable creations in an increasingly digital world where burn-out had become more and more common, making it a standout trend of the decade.
Eco-Friendly Craft: Macrame wall hangings often use natural materials like cotton, jute, or hemp cords, making them an environmentally friendly choice for home decor. This aligns with the modern trend towards sustainable and eco-conscious living.
Versatile Art Form: Macrame isn't limited to wall hangings; it can be used to create various items, including plant hangers, jewelry, and even clothing. Its versatility allows artists to explore a wide range of creative possibilities.
Meditative Craft: Many people find the process of creating macrame wall hangings to be meditative and relaxing. The repetitive knotting techniques can have a soothing effect, making it a perfect hobby for stress relief.
Unique Handmade Pieces: Each macrame wall hanging is a one-of-a-kind creation due to the intricacies of the knotting patterns. This uniqueness adds a personal touch to your decor and makes them stand out as artistic expressions.

Now that you know a bit more about macrame wall hangings, you might be inspired to explore this timeless craft or appreciate the depth of history and artistry behind these beautiful decor pieces.
What’s the Big Deal of Macrame Wall Hanging?
The choice of how to start and end a macrame wall hanging is crucial as it not only affects the aesthetics of the piece but also its structural integrity and ease of crafting.
The basic macrame knots, such as the Lark's Head Knot, Half Hitch Knot, Square Knot and some unique knots like the Triple Loop Knot and Cat's Paw Hitch, set the foundation for your design.
They determine the spacing, tension, and orientation of your cords, ensuring that your wall hanging begins with precision and symmetry. Depending on the knot you choose, you can create different textures and patterns from the very start.
This variety allows you to personalize your piece and tailor it to your desired style, whether it's a sleek and minimalist design or a more intricate, bohemian-inspired creation.
On the other hand, the knots used to end a wall hanging, such as the Gathering Knot, Overhand Knot, Barrel Knot, Figure 8 Knot, and Rain Knot, serve to secure the cords in place, preventing unraveling and maintaining the piece's overall stability.
These knots add that final touch of professionalism to your work, ensuring that it remains durable and long-lasting. Moreover, the choice of ending knot can also impact the visual appeal of the completed wall hanging, as it can be an opportunity to add a decorative element or even blend seamlessly with the design.
In essence, selecting the appropriate knots for both the beginning and end of your macrame wall hanging is a vital step in the crafting process, allowing you to achieve both functional and aesthetic goals while unleashing your creativity.
Macrame Knots You Need to Know

Macrame knots are the foundation of the whole art, and starting your wall hanging on the right knot will ensure its success!
Today we’re going to focus not only on how to start your wall hanging but also on how to end it, so this list may look long - but never fear, we are here to walk you through all of these knots.
Knot to start a wall hanging:
- Lark's Head Knot
- Half Hitch Knot
- Triple Loop Knot
- Cat’s Paw Hitch
- Square Knot
Knots to end a wall hanging:
- Gathering Knot
- Overhand Knot
- Barrel Knot
- Figure 8 Knot
- Rain Knot
I have compiled a FREE EBOOK guide, "50 Macrame Knots & Sennit Guide," that goes over step by step with pictures on how to make 50 different knots and sennits.
This guide will assist you in learning the knots and provide insights into creating unique knot sequences and pattern designs.
Important Macrame Terms for Beginners
Here are some helpful macrame terms you should know when following this pattern:
- Knots: Macrame involves various types of knots, such as the square knot, double half hitch knot, and the Lark's Head knot. Understanding these basic knot patterns creates the foundation of macrame, mastering these knots is what elevates your projects. In this blog we’re looking at fun ways to start and end your projects rather than focusing on full projects. Refer to the "Macrame Knots You Will Need To Know" section for the 10 knots we’ll be looking at.
- Cords: Cords are the primary material used in macrame. They are made of different materials like cotton, jute, nylon, or synthetic fibers. Macrame cord comes in various thicknesses and colors.
- Anchor cord: This refers to the fixed cord or structure to which other cords are attached or knotted, providing stability and support to the design.
- Working cord: This is the piece of cord that is actively used to create knots and patterns, manipulated and moved throughout the project to form the desired design.
Wall Hanging Cord & Materials
You'll need a few essential macrame materials and supplies to use when knotting your wall hanging that form the basis of all macrame - these can, of course, be added to, but for now, let's outline the basics.
The cord
The most crucial material is the cord. Macrame cords, sometimes called macrame rope can be made from various materials such as cotton, jute, or nylon, each offering a different texture and appearance.
Choosing a cord that is soft, sturdy, and suitable for your wall hanging is essential, ensuring durability and functionality.
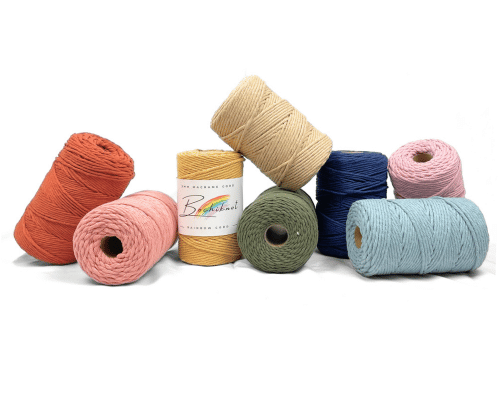
We have two favorite types of cord by Bochiknot:
The Rainbow Cord line:
- Our Rainbow cord line is certified 100% chemical-free and eco-friendly as the cords are made from recycled cotton materials.
- There is a variety of sizes, types, and color offerings to choose from.
- We love using the Rainbow cords because they are smooth, soft, and sturdy, making them easy to work with.
The Foundation Cord line:
- Our Foundation cord line is made from 100% organic natural cotton.
- The cords are unbleached and are a beautiful natural off-white color.
- The Foundation cord is the ultimate cord for all skill levels due to its super soft texture and sturdy twist, capable of sustaining multiple re-knots.
Other Macrame Supplies
When it comes to crafting a wall hanging that's ready for mounting, the choice of your base material is crucial. Wooden dowels, metal rods, and even driftwood are some of the most common supplies used for this purpose.
These materials provide a sturdy foundation for your design, allowing you to create a balanced and well-supported wall hanging.
The choice between them often comes down to personal preference and the aesthetic you want to achieve, with wooden dowel rods offering a classic look, metal rods adding a touch of modernity, and driftwood imparting a rustic and natural feel to your creation.
Whichever material you choose, it will play a pivotal role in bringing your wall hanging to life and ensuring it's ready for effortless mounting on your desired spot.
For beginners, we recommend a 12” wooden dowel which is perfect for your smaller wall hangings.
Essential Macrame Tools
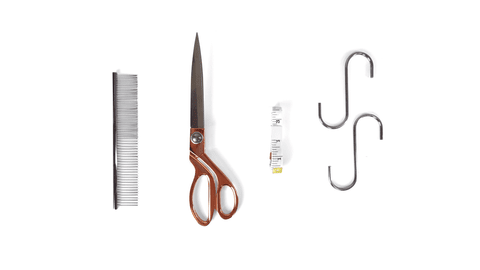
There are a few tools that can be considered indispensable in the world of macrame, they enable you to measure accurately, cut cleanly, and maintain the integrity of your work, ensuring your macrame projects turn out beautifully.
- Measuring tape: A measuring tape ensures that you can accurately measure and cut your cords to the desired lengths, helping maintain consistency and symmetry in your macrame project. It's especially crucial for larger or more complex designs where precise measurements are essential.
- Scissors: Sharp scissors are a must for cleanly cutting a cord or rope, ensuring that the ends are neat and fray-free. This is crucial for achieving a polished look in your macrame creations.
- Tape: Tape can be used to secure the ends of cords while you work on your project. It prevents fraying and helps maintain tension in your knots, making your macrame work smoother and more professional-looking. It can also serve as a helpful marker for specific measurements or patterns, or to keep your project in place on a board while you work.
Macrame, as an art, is not very ‘tool heavy’, while there are lots of tools you can use these three are the only three we would say you can’t go without! If you’re interested in learning about more tools check out our Macrame Tools blog.
Recommended Cord Lengths

When it comes to macrame wall hangings, one of the initial questions that often arises is, "How much cord should I prepare for my macrame designs?"
Well, here's a helpful tip to kickstart your project:
Typically, cord lengths of around 300 cm (approximately 118 inches) serve as an excellent starting point for exploring various techniques to initiate your wall hanging.
These lengths offer flexibility and an ample supply of material, whether you're experimenting with the Lark's Head Knot, Half Hitch Knot, Triple Loop Knot, Cat's Paw Hitch, Square Knot, or other knotting methods.
However, we recognize that specific projects may require different cord lengths, and this is where the concept of the "golden ratio" becomes relevant.
In our guide, "How to Precisely Determine Cord Lengths for Your Macrame Wall Hangings," we delve deeper into the process of calculating the optimal cord lengths for your particular wall hanging project.
So, whether you're watching the instructional video tutorial or reading the accompanying blog post, you'll be well-prepared to embark on your macrame journey with the perfect cord lengths, ensuring your creative vision comes to life beautifully!
7 Different Ways to Start Your Macrame Wall Hanging

From the sophistication of the Lark's Head Knot to the versatility of the Half Hitch Knot, the intricacy of the Triple Loop Knot, the charm of the Cat's Paw Hitch, and the classic appeal of the Square Knot, we've got your wall hanging journey covered.
Join us as we explore the realm of macrame and find the ideal starting knot or knot pattern for your wall-hanging masterpiece.
Whether you're drawn to the elegance of the Lark's Head Knot or the simplicity of the Square Knot, we're here to guide you on your creative path in the world of macrame wall hangings.
1. Lark's Head Knot
- Attach all the cords onto the object you would like to use for your wall hanging (we used a wooden dowel) using left-side knots and then start your wall hanging.


2. Lark's Head Knot with 2 Sections
- Attach cords onto the dowel (or a rod of your choice) using Lark's Head knots.
- Separate the Lark's Head Knots into two even sections with the aim to attach the separate panels in the middle eventually for a V-shaped pattern.
- Start your project.


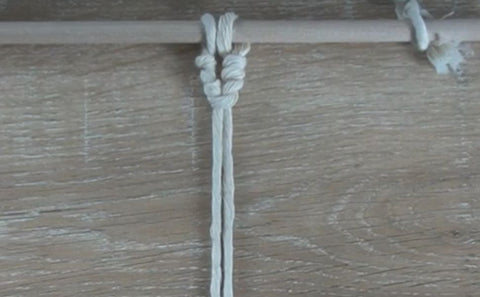
3. Lark's Head Knot Plus Half Hitch Knot
- Make a Lark's Head Knot and then take both cords and make a Half Hitch knot on both sides.
- Make as many knots as required to fill your dowel.
- Start your project.


4. Triple Loop Knot
- Take three individual cords and fold them in half.
- Gather the loop ends and make a Square knot using the outer left and outer right cords, leaving you with three loops at the top.
- Once the knot has been made we're going to mount all cords onto the dowel using double half-hitch knots.
- Start your project.


5. Cat’s Paw Hitch Knot
- Take a strand of cord and fold it in half to attach it onto the dowel like you would to make a Lark's Head knot.
- Take the strand of cord on the right and wrap it around the middle loop three times.
- Repeat the same with the left cord-end.
- Pull on the cord ends to tighten.
- Start your project.

6. Lark's Head Scallop
- Take a long strand of cord and attach it to the dowel on one end using a (vertical) Lark's Head knot.
- Leave a gap, and then using the same cord-end make another (vertical) Lark's Head knot onto the dowel.
- Repeat this for as many ‘scallops’ as you want on the dowel.
- To continue with this method, attach your other cord(s) to the little scallops using Lark’s Head knots.


7. Square Knot Triangle
- Attach 10 strands of cord onto a dowel with Lark’s Head knots.
- Separate the Lark’s Head knot into groups of two, totaling 5 groups.
- Under each group of (4) cords, make a Square knot.
- Then a few inches down make an alternating square knot row.
- Continue with these alternating square knot rows leaving a few inches of space in between each row and continue until you reach the row with only one square knot.
- To start the body of the macrame piece once all the square knot rows are made all you have to do is take your cords and attach them to any space in between the square knot rows depending on what kind of design or pattern you want to make.


Now that we've explored the essential knots to kickstart your macrame project, let's shift our focus to another crucial aspect of this craft: the knots that bring your creations to a graceful close.
Just as the beginning knots set the tone and structure of your design, the ending knots are the finishing touches that secure your work, ensuring durability and adding that final flourish to your macrame masterpiece.
Join us as we delve into the art of concluding your projects with style and precision.
7 Ways to Start a Macrame Wall Hanging | Video Tutorial
7 Different Ways to End Your Macrame Wall Hanging
From the graceful finish of a fringe to the whimsical touch of feathers secured with a Gathering knot, and the added flair of beads anchored with an Overhand knot, we've got the perfect endings for your macrame wall hanging project.
Explore the art of macrame as we delve into various concluding techniques, including the sturdy Barrel Knot, the intricate Figure 8 Knot, the unique Rain Knot, and the decorative charm of tassels.
Your wall hanging's final details can truly transform its overall appearance and character. Whether you opt for a simple and elegant finish or desire to add an artistic flourish, we're here to help you complete your macrame masterpiece with style and finesse.
1. Fringe
- If you are using a 3-Ply cord then unravel the cord before combing through the cord
- If you are using a Single-Strand cord comb directly through the cord.


Ending a macrame project with a fringe adds a touch of bohemian charm and softness, giving your creation a relaxed and inviting aesthetic.
It can also serve to highlight the intricate knotwork in the body of the piece, creating a visually pleasing transition from the main design to the trailing ends.
2. Feathers using a Gathering knot
- Take the feather and attach it to the end of a cord by using a Gathering knot.
- Tie the Gathering Knot using a thinner string (hemp cord/ embroidery thread/ 1mm cotton cord)


Ending a macrame project with feathers using a gathering knot introduces a touch of natural elegance, infusing your piece with a rustic and earthy vibe.
It also provides a unique and eye-catching texture, creating a striking contrast to the cordwork and enhancing the overall visual appeal of your creation.
3. Beads using an overhand knot
- Tape the end of the cord and then string the beads through the cord.
- Once the beat is through make an overhand knot to secure the bead in place.

Ending a macrame project with beads using an overhand knot allows for personalized embellishment, adding a dash of sophistication and individuality to your piece.
The beads can introduce color, texture, and visual interest, while the overhand knot ensures a secure and stylish finishing touch, making your macrame work stand out.
4. Barrel Knot
- Make a loop and wrap the end through the middle a few times and then pull on the knot to tighten.

Ending a macrame project with a barrel knot provides a sturdy and reliable closure, ensuring the longevity and durability of your creation.
Its sleek and compact design adds a polished and clean finish, making it an excellent choice for a minimalist and modern aesthetic.
5. Figure 8 Knot
- Make a figure 8 and pull the end of the cord through both holes.

Ending a macrame project with a figure 8 knot offers a secure and decorative conclusion, perfect for adding a touch of symmetry and flair to your design.
Its distinctive shape and firm hold make it an ideal choice for both functional and aesthetic purposes, ensuring your work remains visually appealing and well-anchored.
6. Rain Knot
- Wrap a strand of cord around another strand making a loop on both ends of the cords, then pull to tighten.

Choosing to end a macrame project with a rain knot introduces a unique and intricate finishing touch, adding an element of texture and complexity to your design.
The rain knot's appearance mimics cascading raindrops when tied at varying intervals which lends a sense of fluidity and movement to your piece, making it an eye-catching choice for those seeking an artistic and whimsical conclusion.
7. Tassels
- Take two cords and make one overhand knot.
- Then using a few additional strands of cord, pull them through the loop=. To secure this tassel make a gathering knot using another strand of cord as the working cord.
- Cut off excess cords and trim the tassel.

Ending a macrame project with tassels imparts a touch of boho chic and flair, elevating your piece with a playful and trendy edge.
Tassels add a sense of movement and dynamism to your creation while serving as decorative accents, enhancing its overall aesthetic appeal.
Ending your macrame wall hanging requires thought and these are just a few of the great ways to add the perfect finishing touch to your greenery.
From classic options like fringed ends to more intricate choices such as incorporating beads or feathers, the possibilities are as diverse as your botanical selections.
Whether you prefer a rustic, bohemian, or minimalist style, these ending techniques allow you to infuse your plant hanger with personality and charm, elevating your plant display into a true work of art. So, embrace your inner macrame artist and let your plant hangers flourish with style and creativity.
7 Ways to End a Macrame Wall Hanging | Video Tutorial
Time To Get Knotting!
The art of macrame wall hangings not only invites creative expression but also highlights the importance of thoughtful beginnings and graceful endings. As you've followed along with this blog, you've likely recognized that how you commence and conclude your macrame projects significantly influences their overall look and durability.
The process of choosing unique mounting knots or starting knot patterns isn't just about aesthetics; it's a chance to set the tone for your wall hanging, frame the piece, define its character, and explore different textures.
By carefully selecting a starting knot, you can craft a piece that resonates with your artistic vision, whether it's a sophisticated Larks Head Knot or a versatile Square Knot.
Likewise, the ending knots serve a dual purpose of securing your creation and adding that final touch of finesse.
Whether you opt for a classic Fringe, embellishments like Feathers or Beads, or decorative elements such as Tassels, these choices not only ensure the longevity of your wall hanging but also allow you to infuse your personal style into every fiber.
In essence, starting and ending knots are the bookends of your macrame masterpiece, framing it with craftsmanship and creativity. They're a testament to the mindful and artistic nature of macrame, offering not just a visually pleasing result but also a fulfilling and meditative journey.
As you continue to explore this timeless craft, may you find inspiration in the boundless opportunities it presents and the satisfaction of creating beautiful macrame wall hangings that uniquely reflect your spirit.
Happy knotting!

Are you looking for more fun and simple DIY macrame patterns?
I have numerous diverse DIY macrame patterns that you can explore, ranging from distinctive wall hangings for home decor to timeless plant hangers suitable for all skill levels.
Browse my collection of DIY macrame patterns on Etsy.
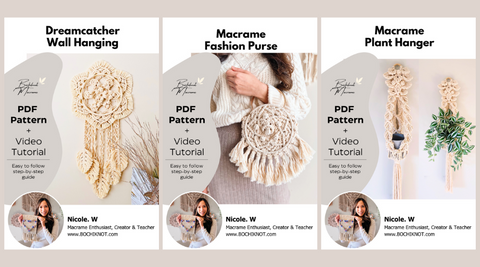
The patterns come complete with step-by-step photos, written instructions, and helpful tips and tricks to assist you throughout your macrame journey.
Are you looking to advance your macrame skills, create elegant designs, and learn unique knot patterns?
Discover the art of Macrame like never before!
Join our exclusive community of passionate macrame enthusiasts and unlock a world of creativity.

Access a treasure trove of unique and complex patterns, macrame tutorials, expert guidance, and a supportive network of fellow artists.
Whether you're a macrame beginner or a seasoned knotter, our community is your gateway to mastering the art of Macrame.
Elevate your skills, share your creations, and embark on a journey of inspiration together.
Take advantage of this incredible opportunity.
Join our exclusive macrame community today!
Much love,


Leave a comment