 Skip to content


13 Tips to Advance Your Macrame Skill Set
Table of Contents
- Important macrame terms
- Important Macrame Knots and Techniques
- How to make your pieces symmetrical
- Neat Knotting - Square Knots
- Tip 1: Pull on the inner anchor cords once the knot is complete so that there are no scrunched-up cords.
- Tip 2: Adjust the knots made after every row or section made by loosening or tightening the knot further.
- Tip 3: Try your best to keep the tension consistent - either loosely tight or tightly snug.
- Neat knotting - Double Half Hitch knots
- Tip 1: Follow the direction of the anchor cord for straight Double Half Hitch knots.
- Tip 2: Remember to tighten the first Half Hitch knot too.
- Tip 3: Adjust the knots and pull on the anchor cord to tighten.
- Tip 4: Use a spacer for even spacing and straight lines.
- Tip 5: For quick untying of Double Half Hitch knots, pull out the anchor cord.
- How to Add Macrame Cord to a Project If You Run Out
- Adding Cord to a Square Knot Pattern
- Adding Macrame Cord to a Double Half Hitch Knot
- Tips to get the perfect fringe
- Tip 1: Prep the fringe by (a) cutting off long strands of excess cords and (b) unravel the individual strands if you're using a 3-ply cord.
- Tip 2: To straighten curly or crimped fringe, use a steamer to steam the fibers.
- Tip 3: Before you start cutting the fringe, brush through the fibers very well.
- Tip 4: Use tape as markers to hold down the fringe and shape along the edge of the tape for a clean-looking fringe.
- Tip 5: To hold the shape of the fringe, use hairspray or fabric stiffener on the fringe.
- How to tuck loose cord ends
- Tucking in loose cord ends on the sides of a project:
- Tucking in other loose cord ends:
- Tucking in the fringe for a fringe-free finish:
- Alternative method for tucking in fringe:
- Time to start knotting!
- Are you looking for more fun DIY macrame patterns?
- How to Turn Knots into Exquisite Macrame Designs
At Bochiknot, we share more than just pattern tutorials with you. Our goal is to share our knowledge with regard to all facets of macrame. In stage 2 of the macrame journey so far, we’ve taught you more about different macrame cords and embellishments and different ways to apply and incorporate them, and also how to start advancing your skills from beginner to macrame master with intricate knot patterns.
In this blog, we want to take you back to refining some fundamental techniques so that you know your designs will continue to look amazing.
Important macrame terms
- Cords: Cords are the primary material used in macrame. They are made of different materials like cotton, jute, nylon, or synthetic fibers. Macrame cords come in various thicknesses and colors.
- Anchor cord: This refers to the fixed cord or structure to which other cords are attached or knotted, providing stability and support to the design.
- Working cord: This is the strand of cord actively used to create knots and patterns, manipulated and moved throughout the project to form the desired design.
- Knots: Macrame involves various knots, such as the Square knot, Double Half Hitch, Lark's head knot, and Endless Falls knot. Understanding these basic knot patterns creates the foundation of macrame.
- Tension: This refers to the tightness or looseness of the cords while working on a project. Achieving consistent tension is vital for maintaining a uniform appearance in your knots.
- Spacer: A tool or object used to maintain consistent spacing between knots or cords. It helps achieve evenness and precision in patterns.
Important Macrame Knots and Techniques
There are two basic macrame knots that stand out in their importance: The Square knot and the Double Half Hitch knot.
These common macrame knots serve as building blocks for countless macrame projects, from intricate friendship bracelets and Christmas ornaments to complex wall hangings and dream catchers, but at times, you may wonder, are there any tips for perfecting these important knots?
And what happens when you find yourself in the middle of a project, and your cord lengths start running out?
When making a project, running out of cords part way through is a common issue that can derail your creative flow.
In this blog, we'll emphasize the significance of Square knots and Double Half Hitch knots, offering valuable tips for mastering these essential macrame techniques - and more importantly, we'll explore how to rescue your project when you are running out of cords and need to attach new strands to, ensure that your projects remain uninterrupted and your creativity unhindered.
To round things off, we'll also look into finishing touches, teaching you how to create the perfect fringe and seamlessly tuck in loose cord ends (if any).
Join us on this journey through the world of knots, fringe and everything in between and discover you can be your own saviors in times of need, while also learning the art of putting the final, elegant touches on your macrame creations.
How to make your pieces symmetrical
Symmetrical knotting is a vital aspect of macrame for several reasons:
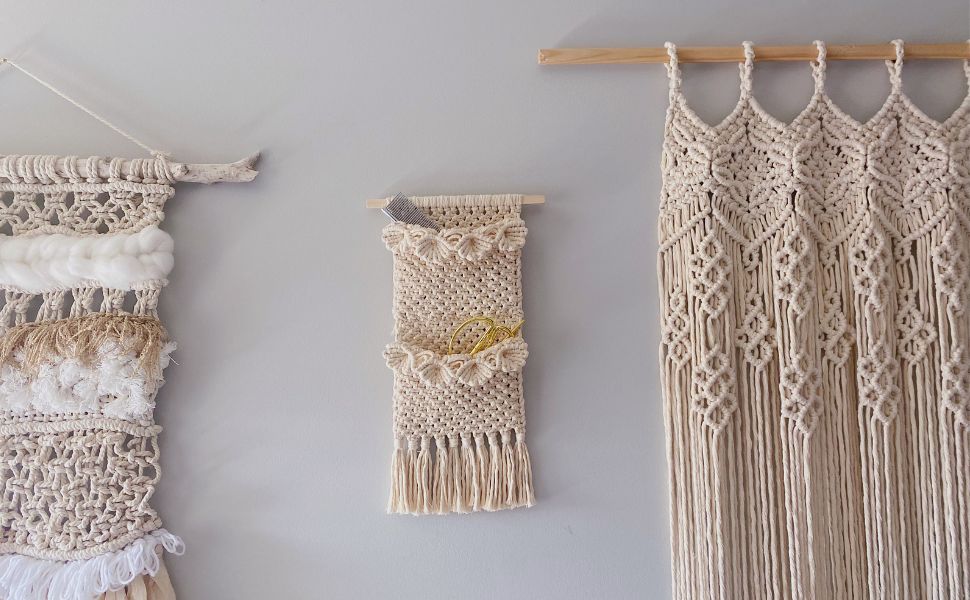
First and foremost, it adds a sense of balance and beauty to your creations, making them visually appealing. Whether you're crafting wall hangings, plant hangers, or jewelry, symmetrical knots bring order and harmony to your designs, elevating their aesthetics.
Additionally, symmetry ensures that your patterns remain consistent, which is especially important for complex projects, helping your knots align perfectly for a uniform look. Beyond aesthetics, symmetrical knotting also contributes to the structural integrity of your macrame pieces. It helps evenly distribute weight and tension, making your creations more durable and reliable, whether they're supporting plants or decorating your walls.
Mastering symmetrical knotting is essential for achieving both artistic expression and professionalism in macrame, resulting in beautiful and long-lasting pieces.
Neat Knotting - Square Knots
In this section, we'll explore valuable tips and techniques to help you master the art of creating clean and precise Square knots. Whether you're a beginner or an experienced macrame enthusiast, these insights will enhance the quality of your work, ensuring your knots are both visually appealing and structurally sound.
Tip 1: Pull on the inner anchor cords once the knot is complete so that there are no scrunched-up cords.

One crucial tip for creating clean Square knots involves ensuring that you pull on the inner anchor cords right after completing each knot. This action is essential to prevent any cords from becoming scrunched up, especially above or inside the Square knot. Frequently, during the knot-making process, the anchor cords tend to wrap themselves within the outer cords, causing potential issues. By tugging on the inner anchor cords immediately after each knot, you can maintain an even, smooth appearance in your knots.
Tip 2: Adjust the knots made after every row or section made by loosening or tightening the knot further.

Our second tip focuses on adjusting your knots, particularly after completing a row or section. It's vital to look at your work after every few knots and either loosen or tighten each knot as needed to ensure they are uniform and consistent with one another.
The overall difference between a loose and tight knot may be minuscule - and hard to spot when you're only making 3 or 4 knots but once you replicate the tightness across the entirety of the pattern (all knots), there will be a noticeable difference even in simple projects! Missing this step can result in a project with slightly uneven knots, so taking the time to refine each knot in your macrame piece is crucial for achieving a clean and tidy finish.
Tip 3: Try your best to keep the tension consistent - either loosely tight or tightly snug.

Lastly, maintaining consistent tension throughout your macrame project is essential for achieving those neat square knots. You can choose either to keep your knots loosely tight or tightly snug, depending on your preference and knotting style.
We prefer to maintain a slightly tighter tension because this generally results in neater knots and reduces the need for extensive adjustments after each knot is completed.
Consistency in tension is the key to creating a polished and professional-looking macrame piece.
By following these tips, you can significantly improve the appearance of your Square knots and elevate your macrame skills, if you want to follow along and practice with us step by step you can watch our 3 Macrame Neat Knotting Tips for Square Knot Patterns video.
Now that you've gained a deeper understanding of the essential techniques for achieving impeccable Square knots, you're well on your way to creating stunning macrame pieces. With proper tension, adjustments, and a mindful approach to your knots, you'll consistently produce work that is clean, neat, and professional.
Neat knotting - Double Half Hitch knots
In this section, we'll delve into the techniques and tips that will empower you to create impeccable Double Half Hitch knots, adding a touch of finesse to your macrame projects. These insights will ensure your knots are straight, even, and visually appealing, elevating the quality of your work.
Tip 1: Follow the direction of the anchor cord for straight Double Half Hitch knots.
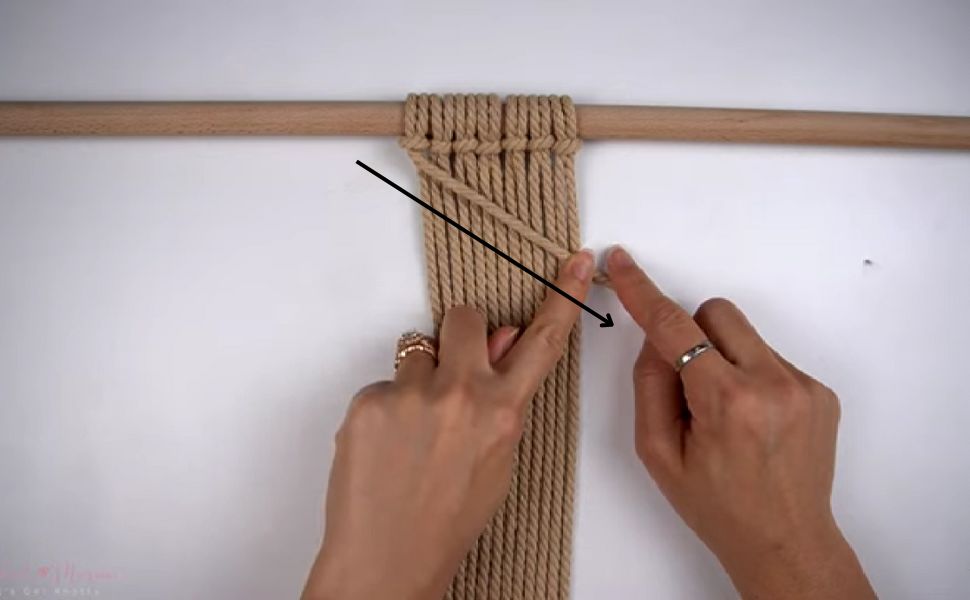
To ensure your Double Half Hitch knots are straight and even, it's essential to follow the direction of the anchor cord. Whether you're creating horizontal or diagonal rows, keep holding the anchor cord in line with the direction of the knots you want to make. This practice will help you achieve straight and neat rows of Double Half Hitch knots without any unwanted twists or irregularities.
Tip 2: Remember to tighten the first Half Hitch knot too.
It's easy to overlook the importance of tightening the first Half Hitch knot when working quickly. But it's important to remember that the first knot needs proper tightening, just like the subsequent ones. Ensure that you pull on the working cord before proceeding to the second Half Hitch knot. This will result in both Half Hitch knots being equally tight, creating a clean and uniform Double Half Hitch knot.
Tip 3: Adjust the knots and pull on the anchor cord to tighten.

To maintain the neatness of your Double Half Hitch knots, don't forget to adjust the knots and pull on the anchor cords regularly. This can be done either after every knot or every few knots. By making these adjustments, you can avoid the frustration of starting over due to uneven knots. It's a simple step that can make a significant difference in the appearance of your macrame work.
Tip 4: Use a spacer for even spacing and straight lines.
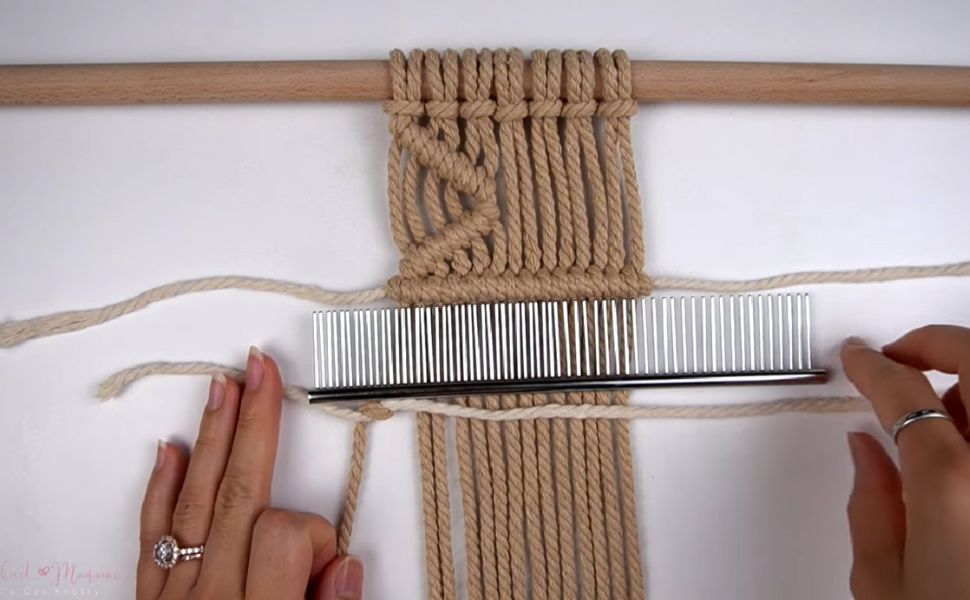
If you’re going to create rows of Double Half Hitch knots with equal spacing and straight lines, then a spacer can be your best friend. You can use items like dowels, rulers and combs as spacers, depending on your size preference. Putting the spacer underneath the working area allows you to achieve consistent spacing and a straight row of knots, ensuring a polished and tidy appearance.
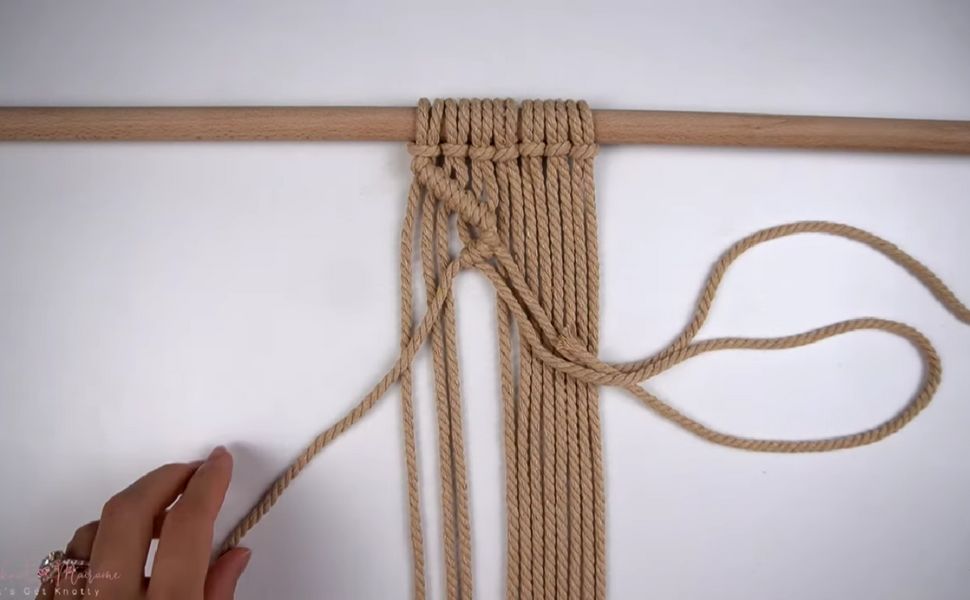
Tip 5: For quick untying of Double Half Hitch knots, pull out the anchor cord.
If you ever need to undo a row of Double Half Hitch knots, there's a handy trick to make the process more efficient. To untie an entire row, simply pull out the anchor cord. This way, you won't have to painstakingly untie each knot one by one, saving you time and effort.
These tips will help you master the art of creating neat and tidy Double Half Hitch knots, enhancing the overall quality of your macrame projects, if you want to go through them and follow along with detailed instructions you can find all of these tips and tricks in our Tips to Tie Double Half Hitch Knots video.
Now that you know how to make great knots, let us look at another issue you may run into and something that definitely feels like something that could ruin your macrame projects: Running out of cord.
Now that you've equipped yourself with the knowledge and techniques to create flawless Double Half Hitch knots, your macrame projects are bound to impress. With straight, even knots that are neatly spaced, you're well on your way to achieving a polished and professional look.
How to Add Macrame Cord to a Project If You Run Out
Running out of cord in the middle of a macrame project can be frustrating, but with these tips, you'll be better prepared to tackle two common scenarios: running out of cord while making Square knots and running out of cord when making Double Half Hitch (clove hitch) knots. These situations can happen to anyone, but understanding these solutions can help alleviate the stress and prevent the need to restart a project. Keep in mind that it's always a good practice to have an extra cord on hand when starting a project, as it's easier to trim excess than to find yourself short on cord.
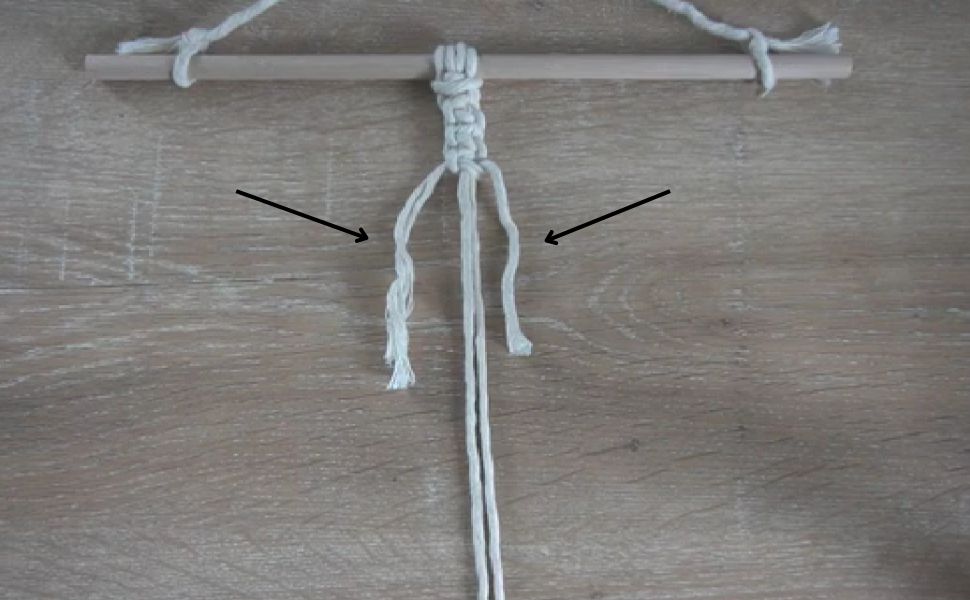
Adding Cord to a Square Knot Pattern
The first step in fixing a problem, like running out of cord, is to identify the problem right?
Before you can add a new cord you need to identify which of the cords is too short:
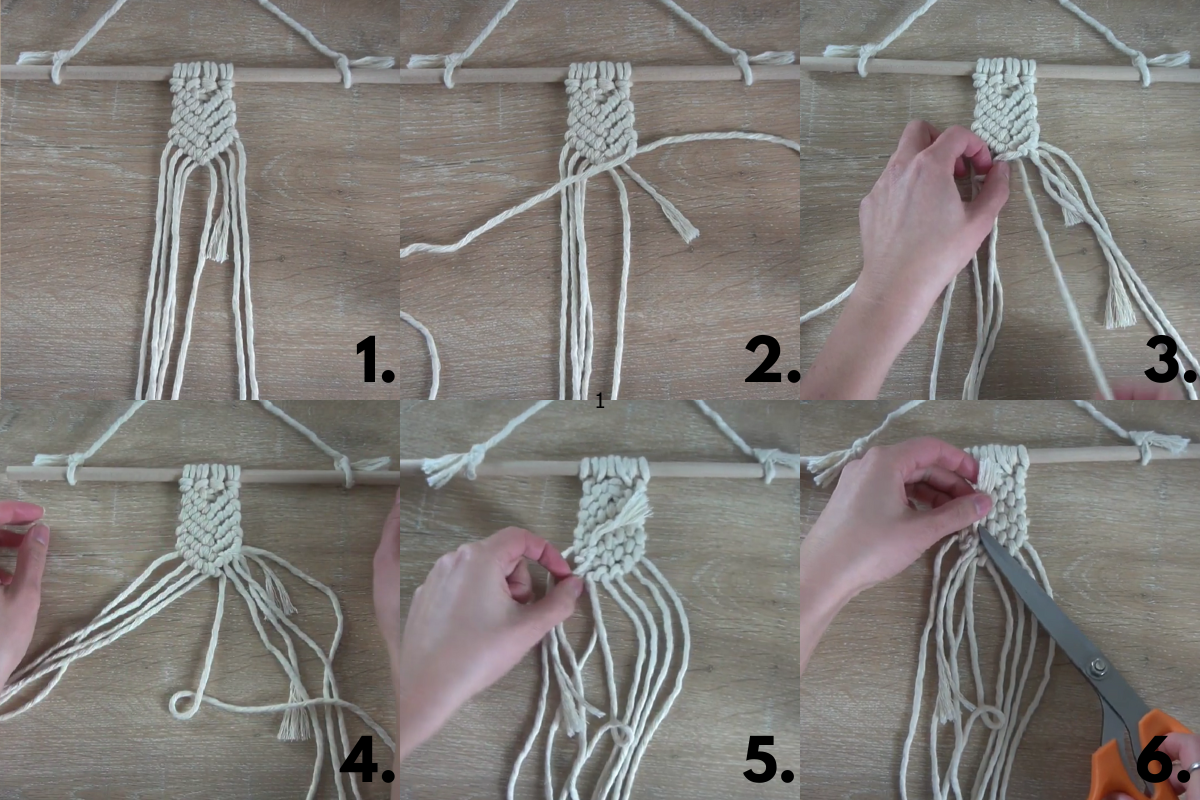
Adding Cord to a Square Knot Technique 1:

Step 1: Add in a longer strand of cord that matches your existing cords.
Step 2: Make a Square knot right underneath where the last Square knot was made, using all four cords from the last Square knot as anchor cords in this new Square knot.
Step 3: Carry on making more Square knots until the shorter cords are hidden within these new knots.
Adding Cord to a Square Knot Technique 2:
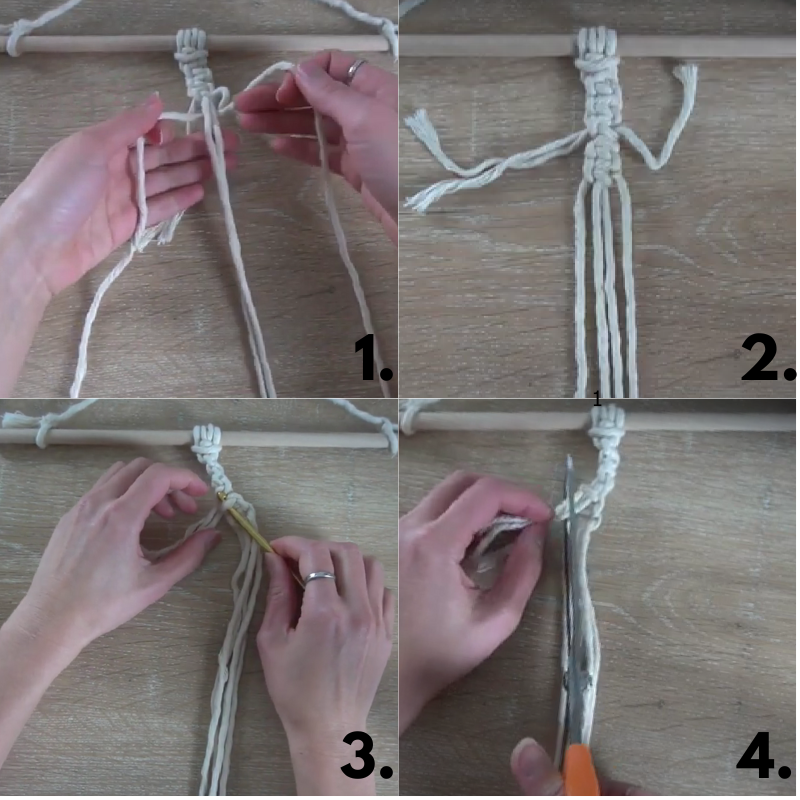
Step 1: Add in a longer strand of cord that matches your existing cords.
Step 2: Make Square knots with the new longer cord using the original anchor cords.
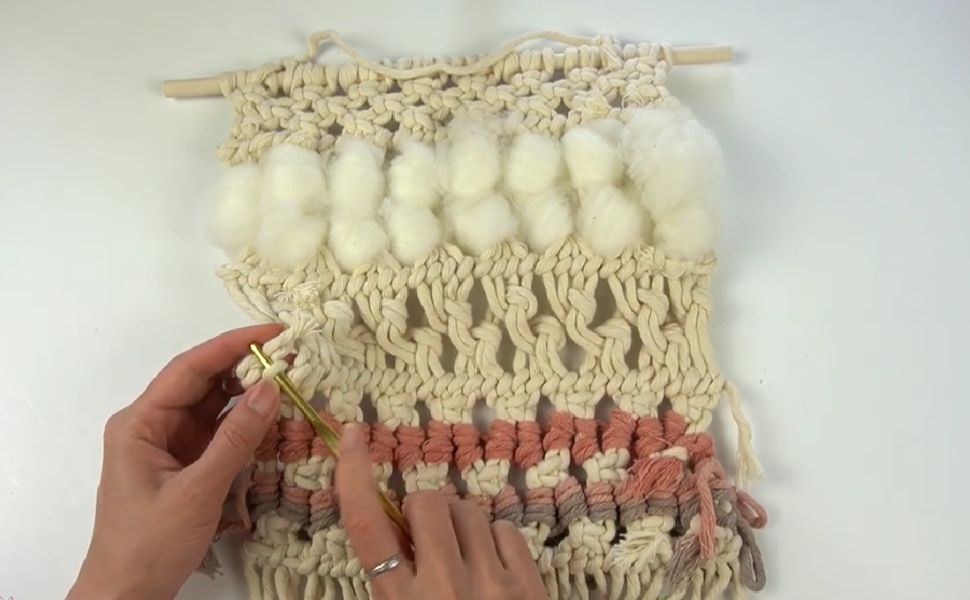
Step 3: Use a crochet hook to tuck the short cords in behind the new Square knots.
Step 4: Trim any excess cord once you've completed this process.
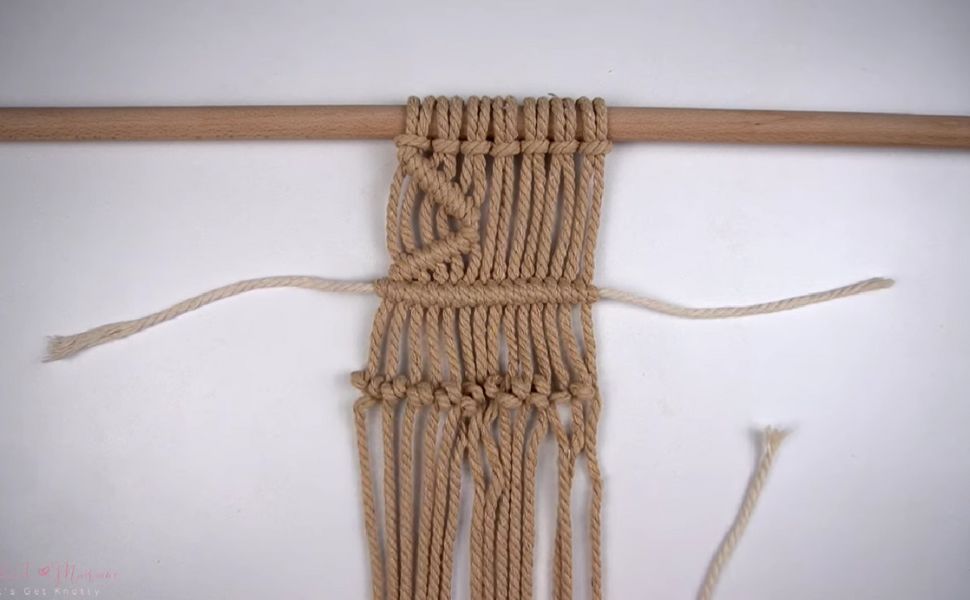
Adding Macrame Cord to a Double Half Hitch Knot
Step 1: Identify the shortest cord.
Step 2: Make the first Double Half Hitch knot as usual, using the shorter cord.
Step 3: When you reach the point where the cord is too short to continue, take a longer cord that matches and make a double half-hitch knot, keeping a shorter end at the back.
Step 4: Continue the pattern by making a row of double half-hitch knots.
Step 5: When the pattern is finished turn it upside down and tie a Double Overhand knot at the back to keep both the old cord and the new cord together.
Step 6: Trim the excess cord.
By following these steps, you can seamlessly add an additional cord to your macrame project in both Square knot and double half-hitch knot scenarios. This allows you to continue your project without interruptions and ensures a polished appearance. To follow along and practice with us, you can watch our How to Add Cord When You Run Out video.
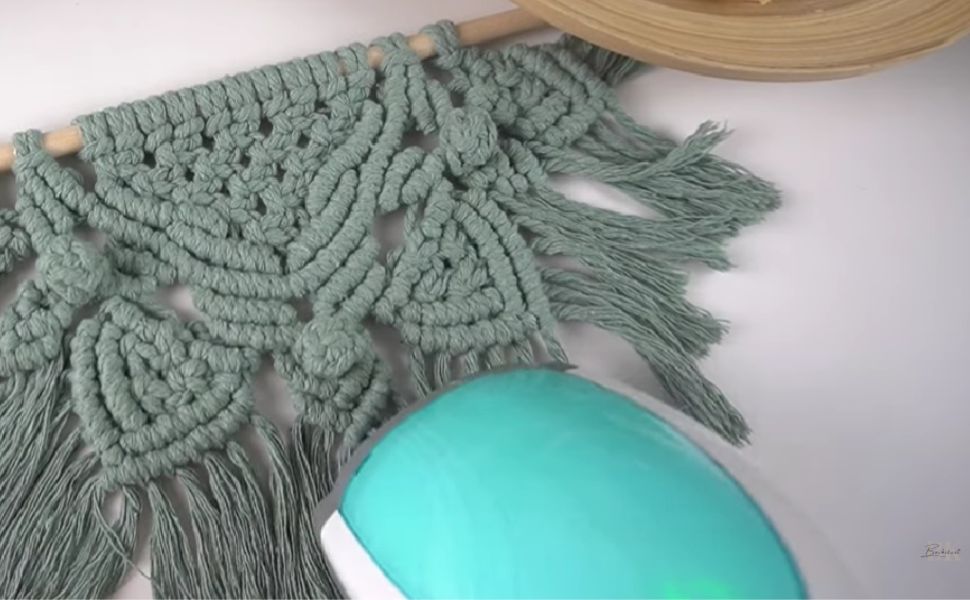
Tips to get the perfect fringe
In this section, we'll share invaluable tips to help you achieve that flawless and beautiful fringe for your macrame projects. Whether you're creating wall hangings, dream catchers, or any other macrame masterpiece, these tips will guide you in preparing, straightening, and shaping your fringe to perfection.
Tip 1: Prep the fringe by (a) cutting off long strands of excess cords and (b) unravel the individual strands if you're using a 3-ply cord.


Before you start shaping your fringe, it's crucial to prepare it properly. If there are long strands of excess cord ends, trim them to your desired length for your fringe. If you're using a 3-ply cord, remember to unravel the individual strands. This makes it easier to comb and shape the fringe effectively.
Tip 2: To straighten curly or crimped fringe, use a steamer to steam the fibers.
If your fringe ends up curly or crimped, use a steamer to straighten the fibers. Steam heating the cord can help eliminate curls and crimps, resulting in straight and fluffy fringe. Remember to comb the fringe while steaming to maintain its straightness.
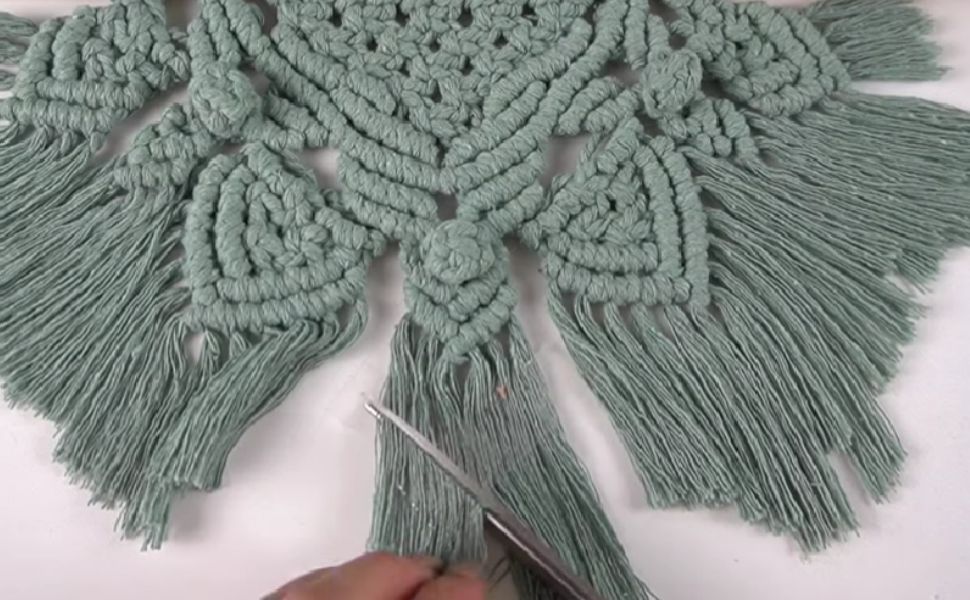
Tip 3: Before you start cutting the fringe, brush through the fibers very well.
Ensure your fringe is thoroughly combed before you begin shaping it. Brush through the entire length of the fringe, starting from the bottom, to untangle and straighten it. This step is crucial to achieve neat and even fringe.
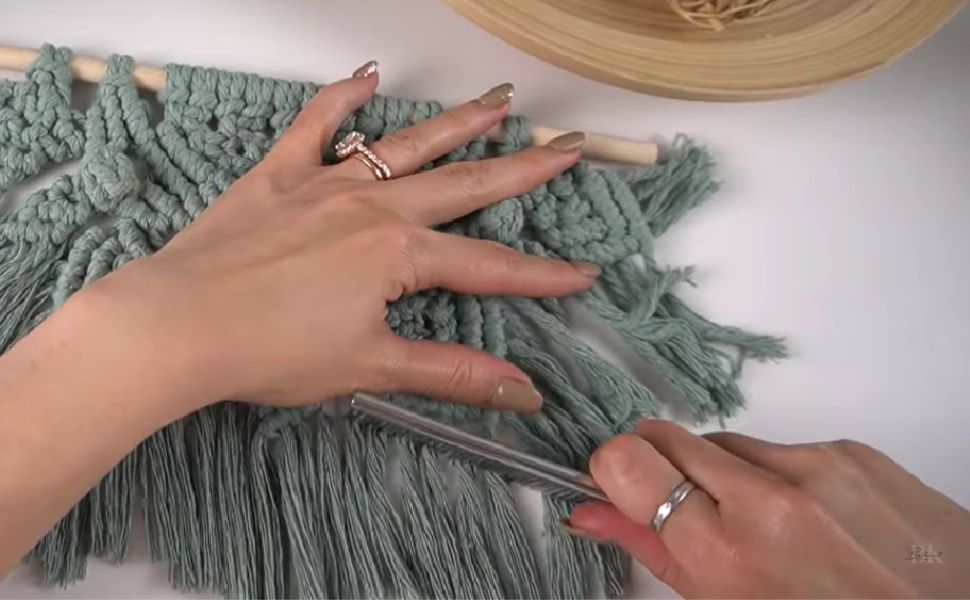
Tip 4: Use tape as markers to hold down the fringe and shape along the edge of the tape for a clean-looking fringe.
For precise and clean-looking fringe, use tape as markers. Place the tape along the area you want to cut, and it will hold the fringe in place. This prevents the fringe from shifting while you trim it, resulting in well-defined and even fringe.
Tip 5: To hold the shape of the fringe, use hairspray or fabric stiffener on the fringe.
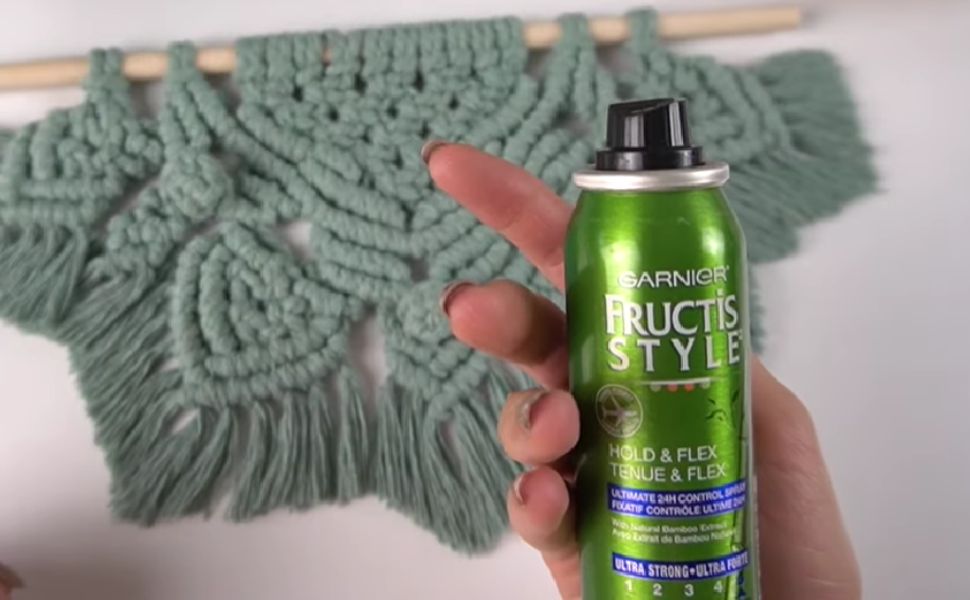
If you want your fringe to maintain its shape and look well-defined, consider using hairspray or fabric stiffener. These products help bind the individual fibers together, keeping the fringe in place, especially when the wall hanging is hung. Remember to reshape and brush the fringe as you apply the hairspray.
These tips will help you achieve the perfect-looking fringe for your macrame projects, follow along with our Ultimate Guide Macrame Fringe when you're ready to practice!
You're now equipped to craft the perfect fringe for your macrame projects. Whether you're aiming for a sleek, straight look or a fluffy, textured one, these techniques will help you achieve your desired result. So, pick up your comb, steamer, and hairspray, and embark on your fringe-shaping journey with confidence.
Not all projects end with a fringe though, so it is import to know how to tuck in your loose cords as well!
How to tuck loose cord ends
While many macrame projects end with fringe, there are instances where you may prefer a clean, fringe-free finish. We’ve found a handy technique for ending a macrame project without fringe by using a crochet hook to tuck in those loose cord ends.
Tucking in loose cord ends on the sides of a project:
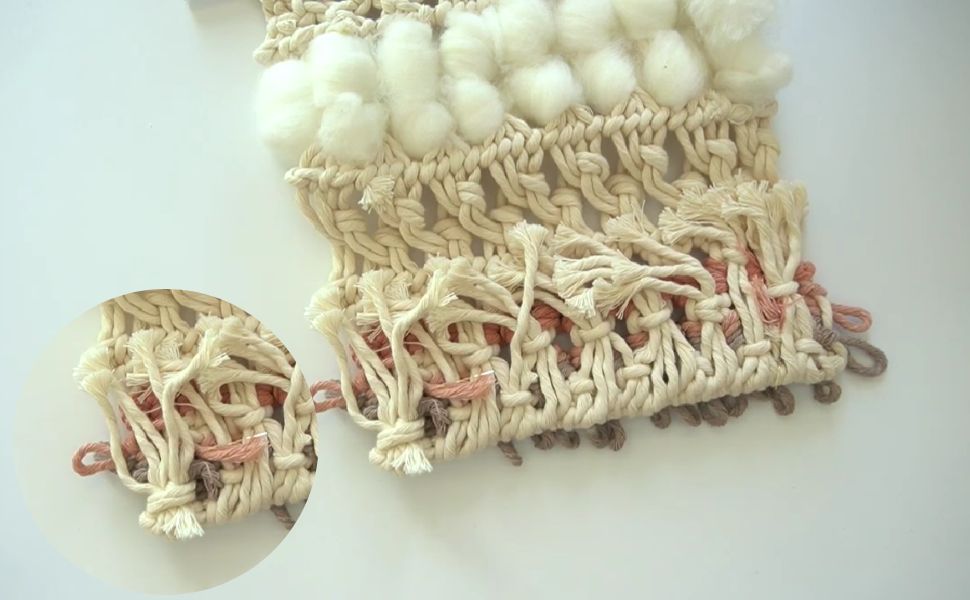
When you have made rows of Double Half Hitch knots and added cords to the project you often have small ends of your anchor cords on the side of the project that need to be tucked in.
Lay your macrame project face down to reveal the backside, and then using a crochet hook, weave the loose cord end through a few loops on the same horizontal level where the Double Half Hitch knots were made. Make sure you weave the cord through two or three knots for added security. Once the cords are tucked in, trim any excess cord with scissors if necessary.
Tucking in other loose cord ends:
In addition to the side cords, you may have loose cord ends from attachment add-ons or weaving cords through your macrame project.

Tuck these cords in through the double half-hitch knots on the back or through other loops found in the pattern such as the Square knots. Once the cords are tucked in, trim any excess cord with scissors if necessary.
Tucking in the fringe for a fringe-free finish:
To eliminate fringe at the bottom of your macrame project, use the same technique as you did on the sides of the project.

Using your crochet hook weave all of your fringe cords up at the back into the knots and loops you make while knotting the pattern.
Alternative method for tucking in fringe:
An alternative way to achieve a fringe-free finish, when you don't have knots to tuck your fringe into is to use a gathering knot directly on the front of your project.
Start by weaving a separate strand of cord through the gathered cords, and then make your Gathering knot around the fringe you would like to tuck up.
Ending a macrame project without fringe and tucking in loose cord ends is a handy technique to have in your macrame toolkit - and important to practice so make sure you visit our How to Tuck in Loose Cord Ends with NO FRINGE video.
This method allows you to achieve a polished, clean look for your macrame creations. Whether you prefer fringe or a fringe-free finish, mastering this skill will help you create beautiful and professional macrame pieces. Remember, practice makes perfect, so don't be afraid to experiment and perfect your tucking technique.
Time to start knotting!
From mastering essential knots to dealing with common challenges like running out of cord. We've explored the beauty of symmetrical knotting, the precision of Square knots, the finesse of Double Half Hitch knots, and the art of achieving the perfect fringe.
We've even shared essential techniques to rescue your project when you run out of cords, ensuring that your creativity remains unhindered.
At Bochiknot, we are committed to providing you with the knowledge and skills you need to excel in the world of macrame. We believe that every knot, every fringe, and every finishing touch should reflect your creativity and craftsmanship. Our goal is to empower you to create macrame pieces that are not only visually appealing but also structurally sound.
As you embark on your macrame journey, remember that practice makes perfect.
Each knot you tie, each fringe you shape, and each cord you tuck is an opportunity to practice and refine your macrame skills, ultimately allowing you to express and showcase your unique style. So, keep experimenting, keep creating, and never be afraid to push the boundaries of your creativity.
Are you looking for more fun DIY macrame patterns?
Looking to expand the macrame skills you've learned?
Check out our collection of patterns and projects you can try.
Browse my collection of DIY macrame patterns on Etsy.

The patterns come complete with step-by-step photos, written instructions, and helpful tips and tricks to assist you throughout your macrame journey.
How to Turn Knots into Exquisite Macrame Designs
Discover the art of macrame like never before!
Join our exclusive community of passionate macrame enthusiasts and unlock a world of creativity.
Gain access to a treasure trove of unique patterns, expert guidance, and a supportive network of fellow artists.

Whether you're a beginner or a seasoned knotter, our community is your gateway to mastering the art of macrame.
Elevate your skills, share your creations, and embark on a journey of inspiration together.
Don't miss out on this incredible opportunity.
Join our exclusive macrame community today!
Much love,


Leave a comment