 Skip to content


Small Space, Big Vibe: DIY Macrame Wall Hanging
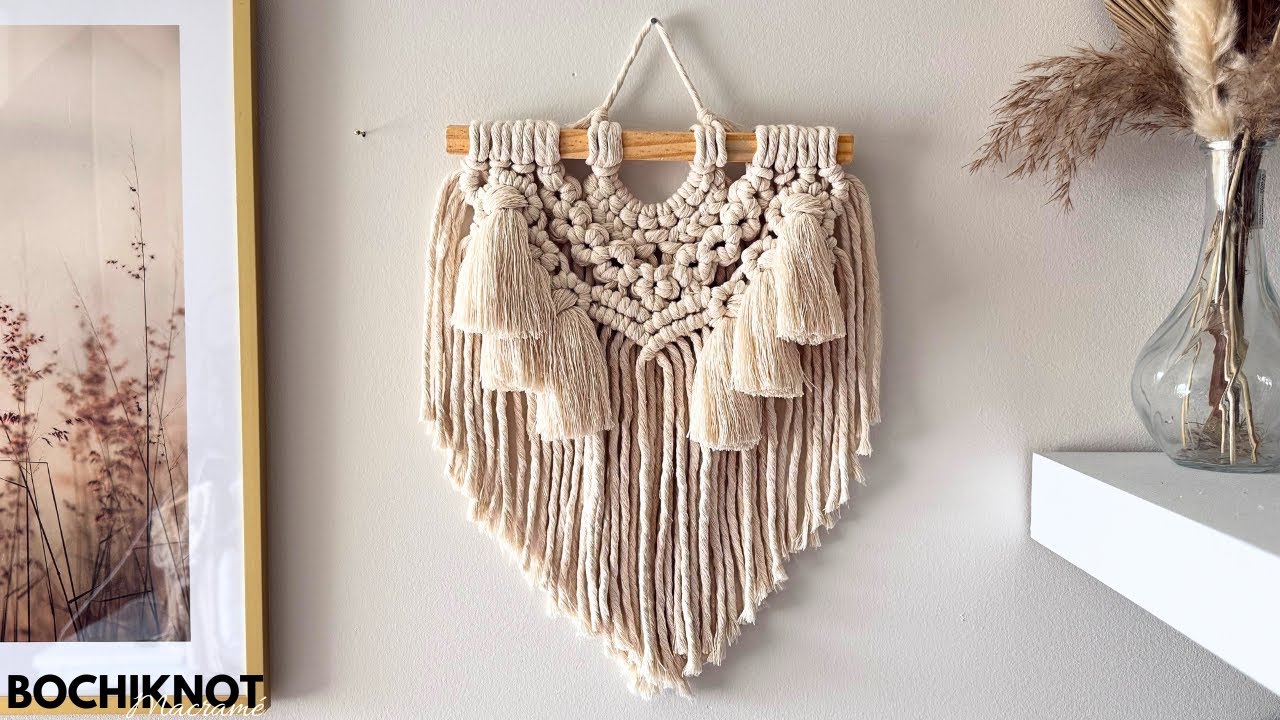
Small spaces often get overlooked when it comes to décor, but they hold huge potential. With the right texture and a handmade touch, even the simplest wall can become a statement.
A few basic macramé knots and minimal materials are all it takes to turn an empty corner into something cozy, stylish, and full of personality.
This beginner-friendly macramé project is ideal for apartments, small rooms, or anywhere you want to add warmth without clutter. It’s an easy way to introduce texture, movement, and a handcrafted feel into your space without overwhelming it.
Follow along with the full tutorial below to learn each knot step by step, gather your materials, and create a macramé wall hanging that adds instant character to your home—no large walls or advanced skills required.
Getting Started: Materials and Tools
What you'll need:
- 4mm single-strand cotton macrame cord (natural color recommended; recycled cotton single-strand twist works well)
- 9" wooden dowel
Essential Macrame Tools
You will also need some essential macrame tools:

DIY Macrame Wall Hanging Details
Skill level
-
Beginner to lower-intermediate
Completed size
-
Approximately 10 in wide by 12 in tall (adjustable by fringe length)
Completion time
-
2 - 3 hours
Materials needed
- 4mm single-strand cotton macrame cord (natural color recommended; recycled cotton single-strand twist works well)
- 9" wooden dowel
Cord Lengths Needed
- 1 × 40 cm (16")
- 1 × 100 cm (39")
- 2 × 180 cm (71")
- 2 × 100 cm (39")
- 6 × 170 cm (67")
- 8 × 35 cm (14")
- 8 × 70 cm (28")
- 10 × 20 cm (8")
Interested in More Macrame Knots?
If you want to add more knots to your macrame designs, check out my free resource, "50 Macrame Knots & Sennit Guide."
It's packed with easy, step-by-step instructions to help you improve your skills and try new creative projects.
Access it here.

Small Space, Big Vibe: DIY Macrame Wall Hanging | Video Guide
*Note: We recommend following the tutorial video for more detailed instructions and to achieve the best results.
This will provide additional guidance and clarity as you work through each step.
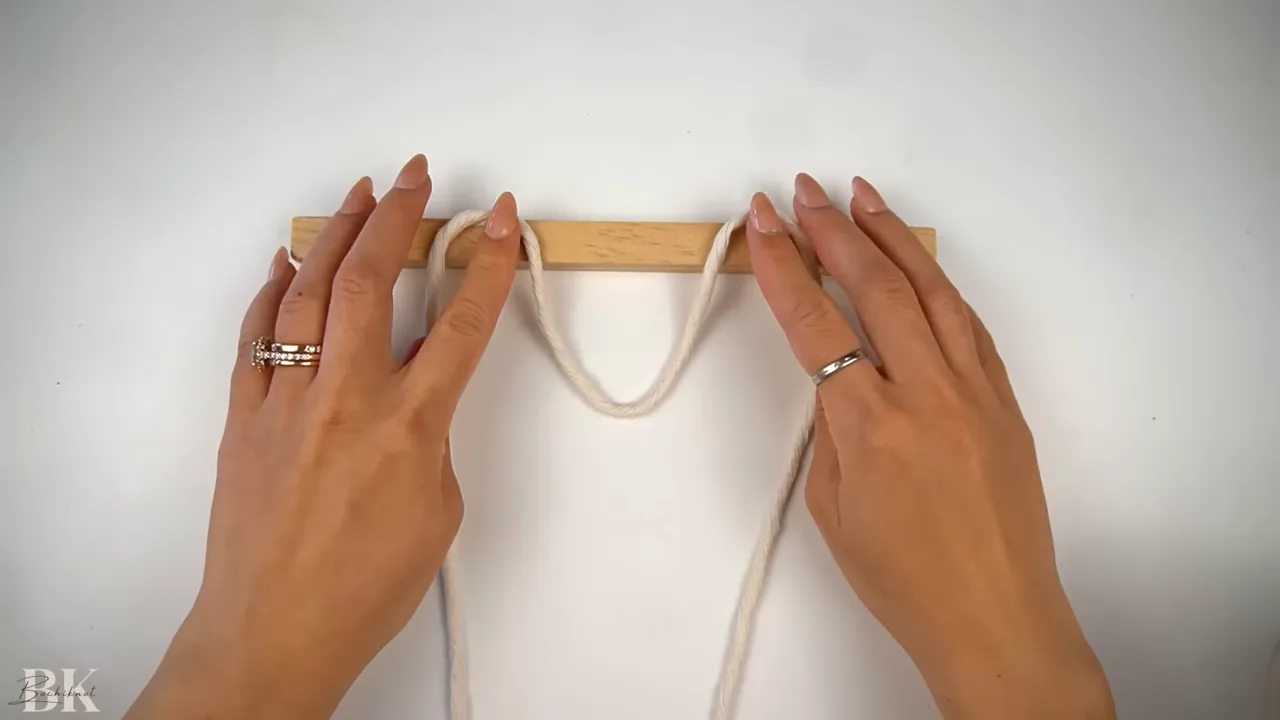
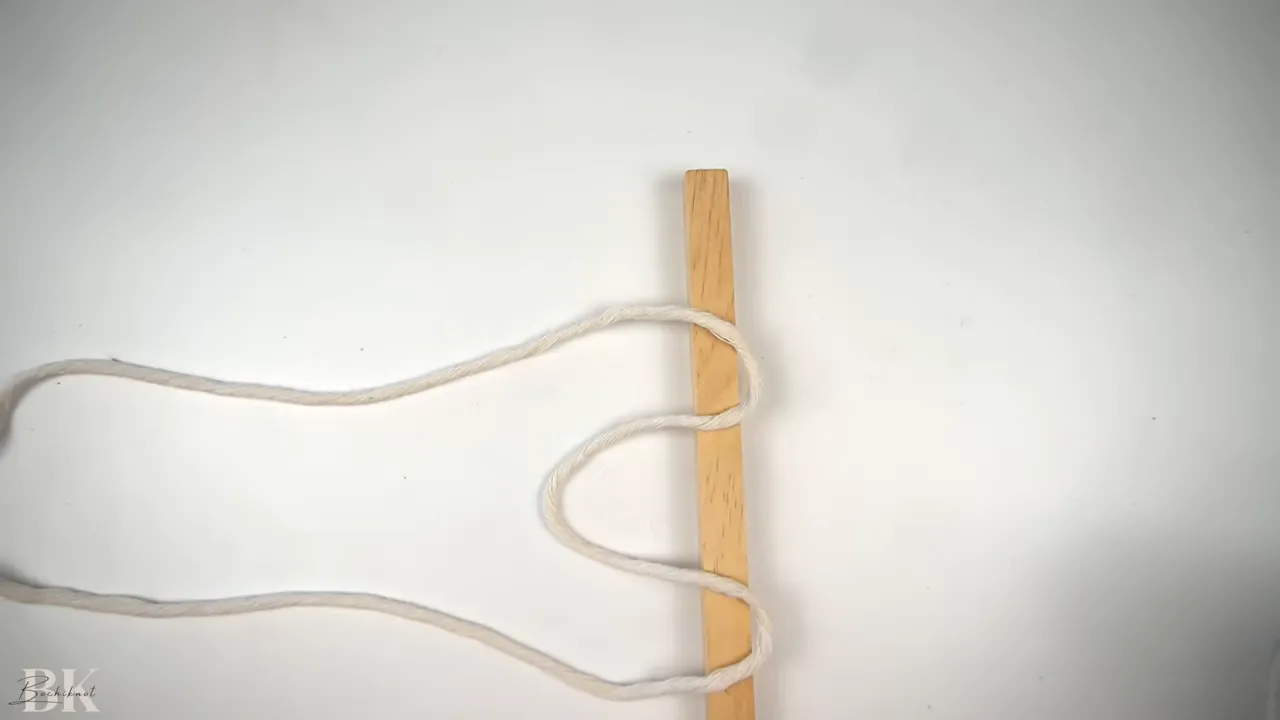
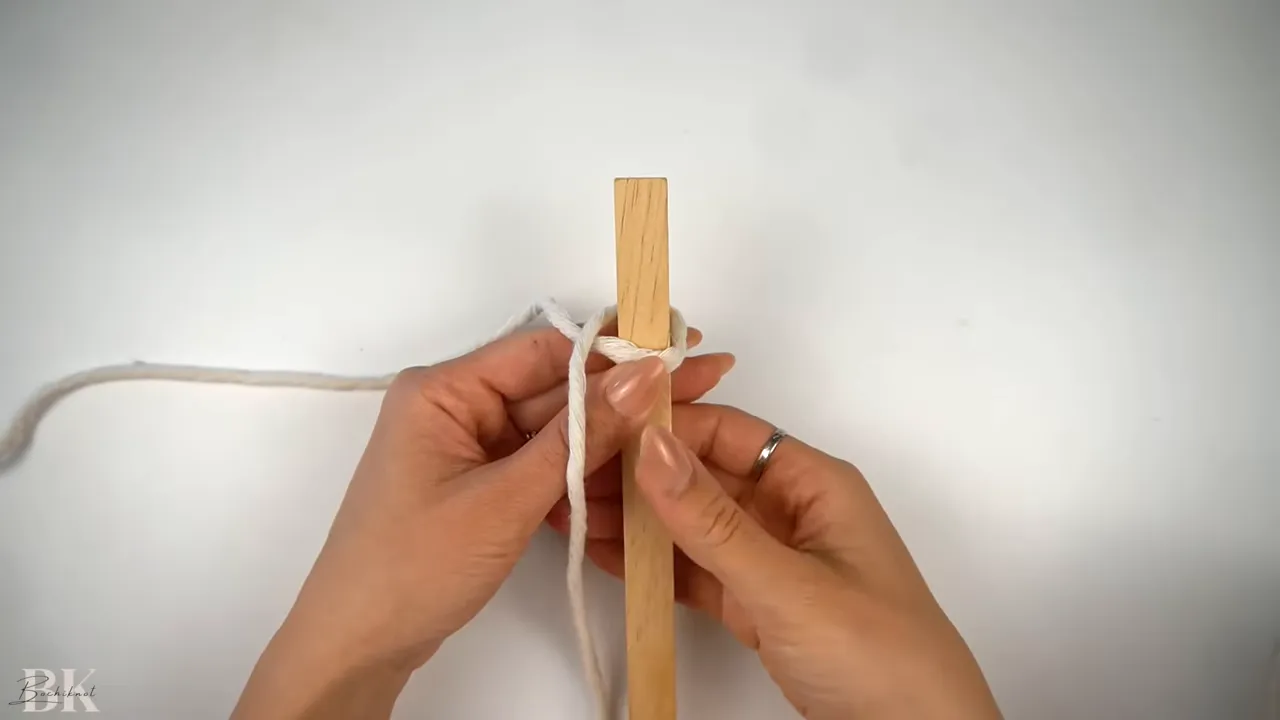
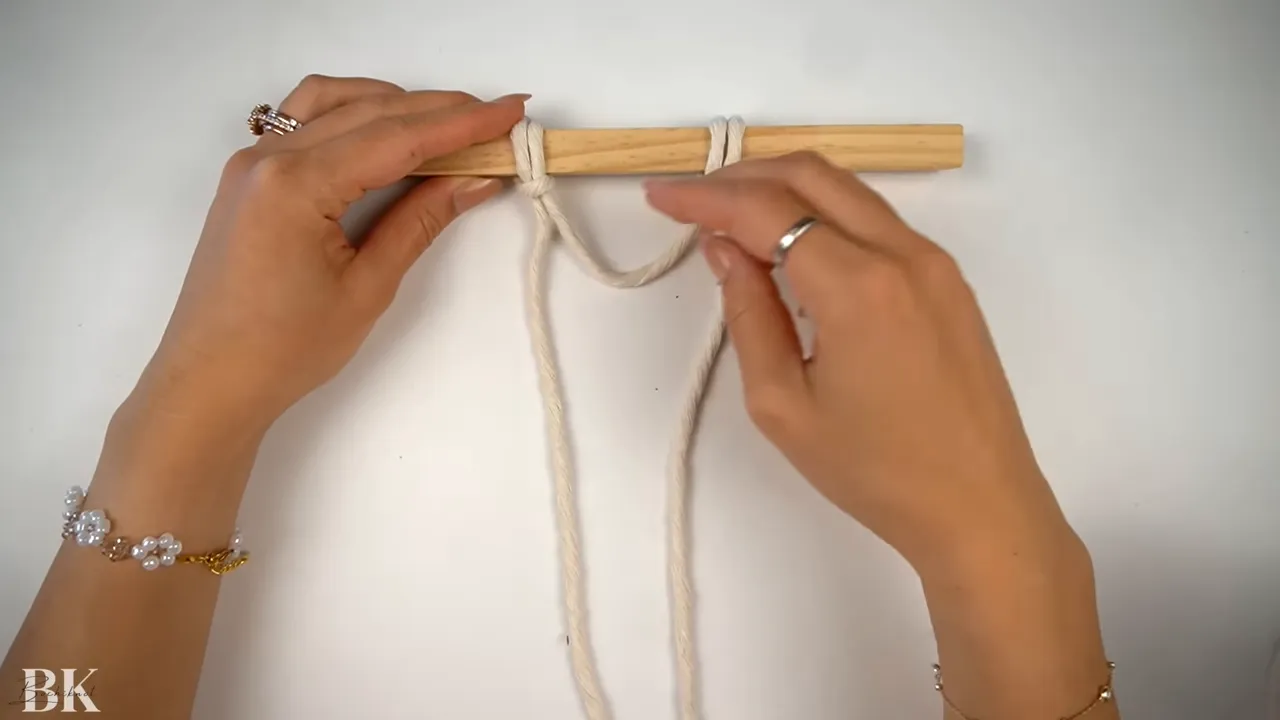
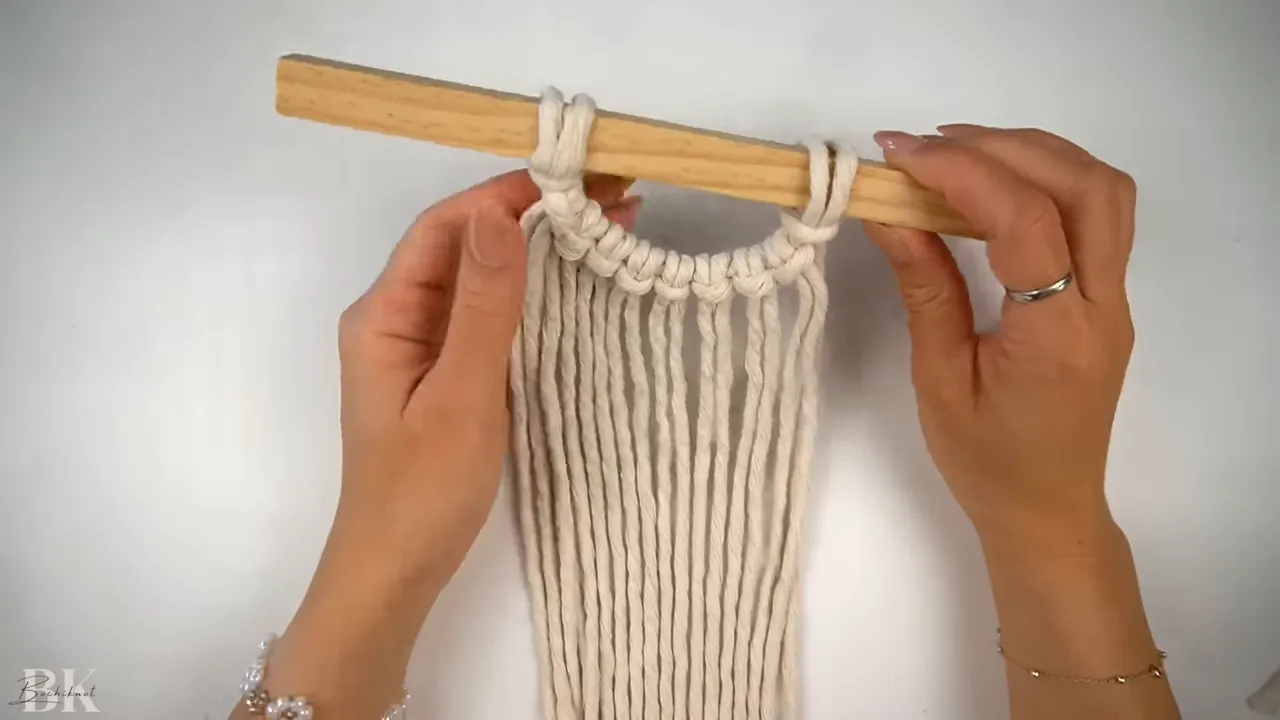
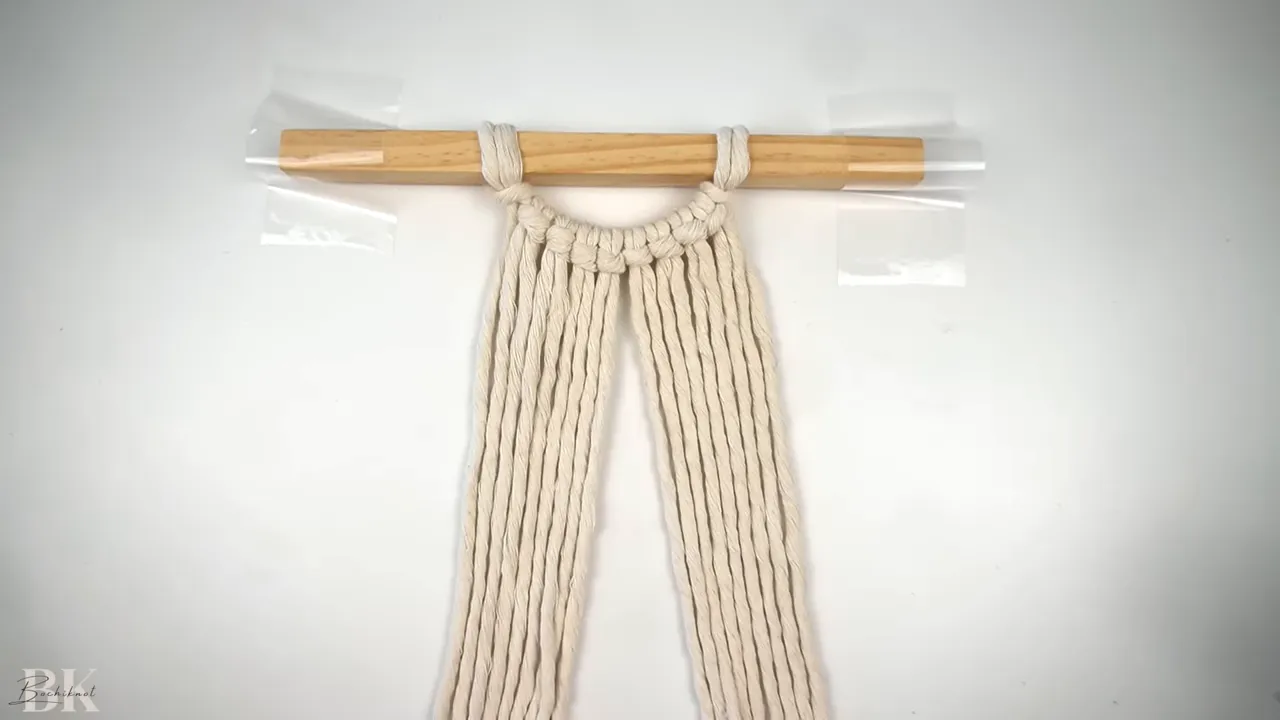
Step 1: Prepare the cord and set the central loop
- Fold a 100 cm cord in half and create two vertical Lark's head knots on the dowel to form a central U-shaped loop. Aim for a loop roughly 12 cm tall (about 4.5 in).
- Adjust cord ends until they sit even. This central loop becomes the anchor for the next rows.
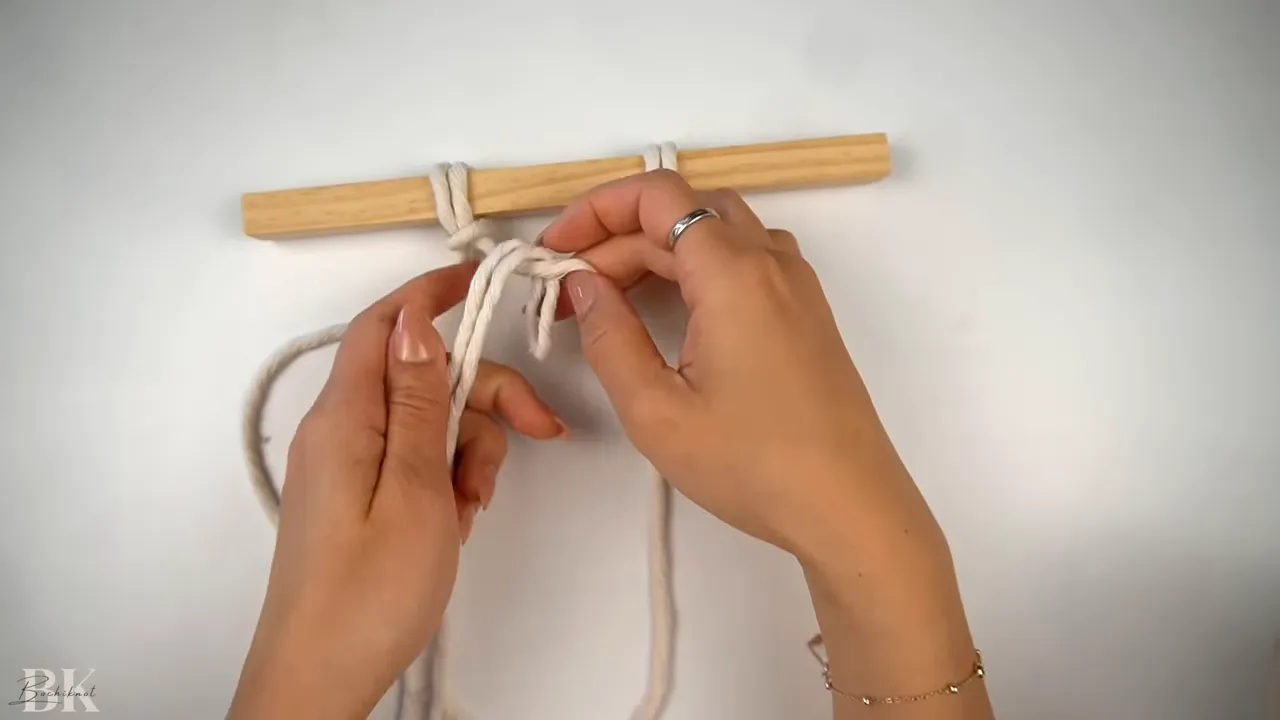
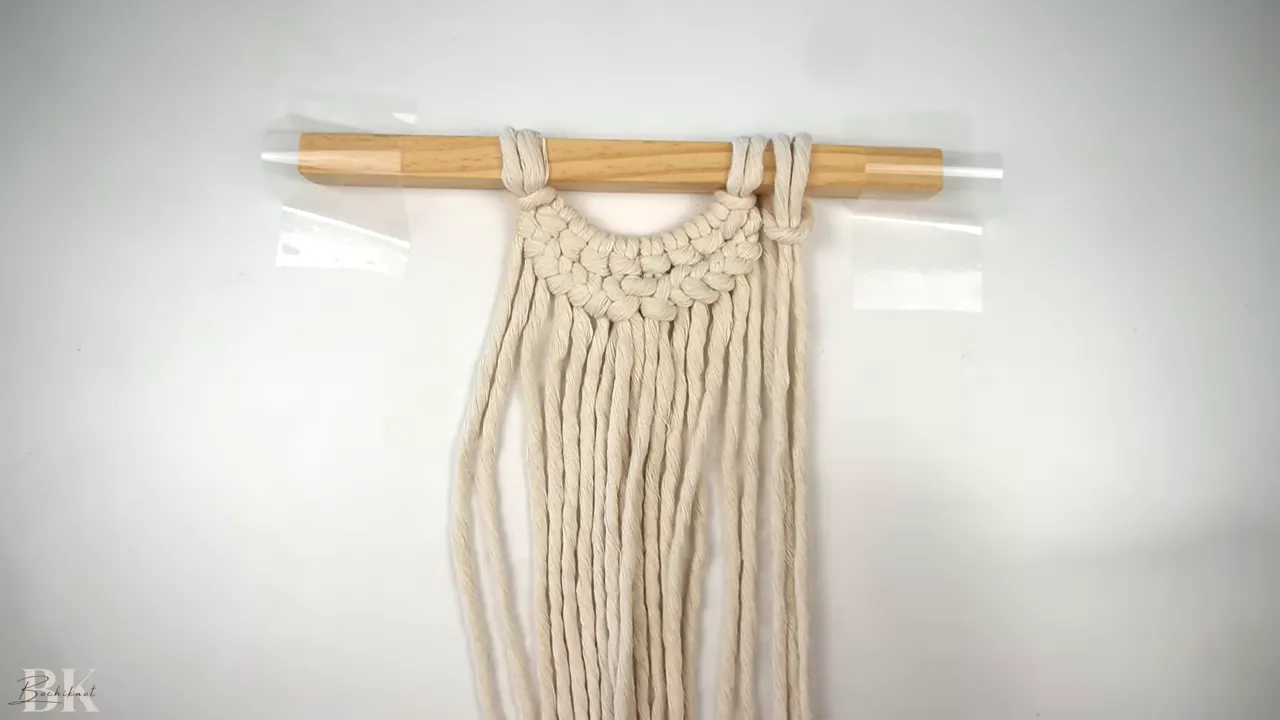
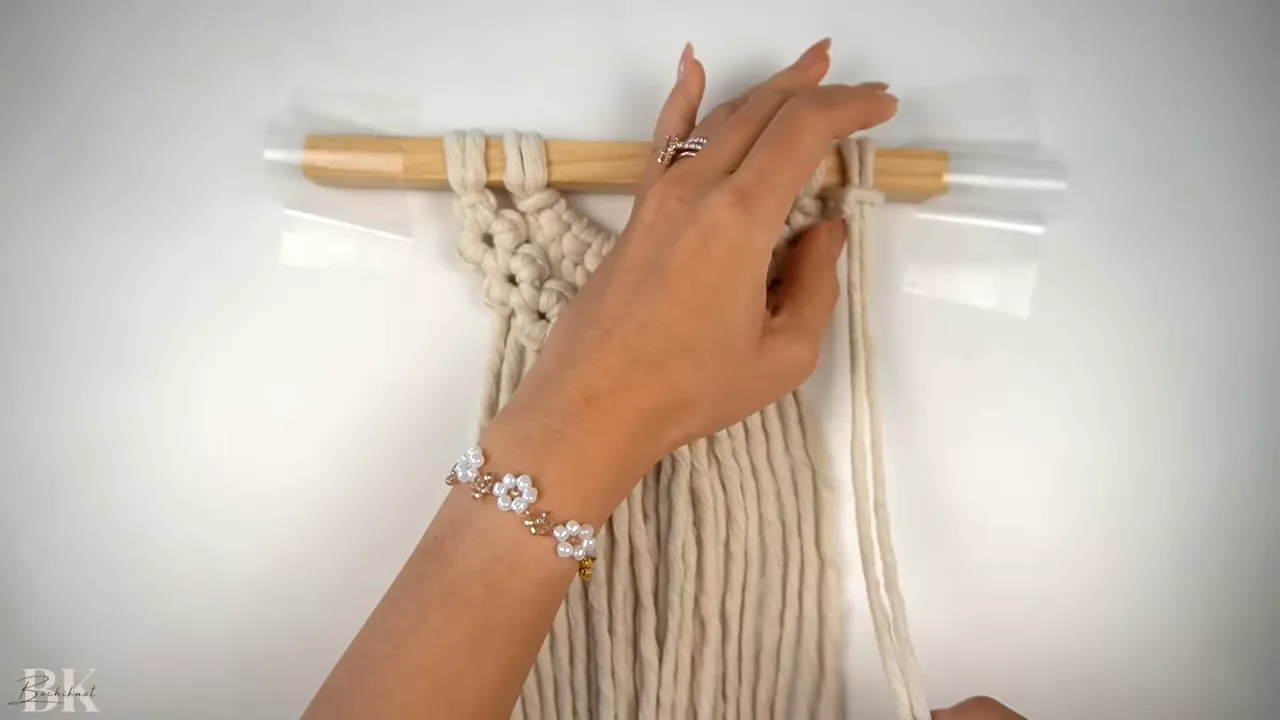
Step 2: Attach eight 70 cm cords around the center loop
- Fold each 70 cm cord in half and attach with Lark's head knots onto the central loop — two knots at a time on either side until you have eight cords total (four per side).
- Push the knots together so they sit snug and even any uneven ends by tightening at the top.
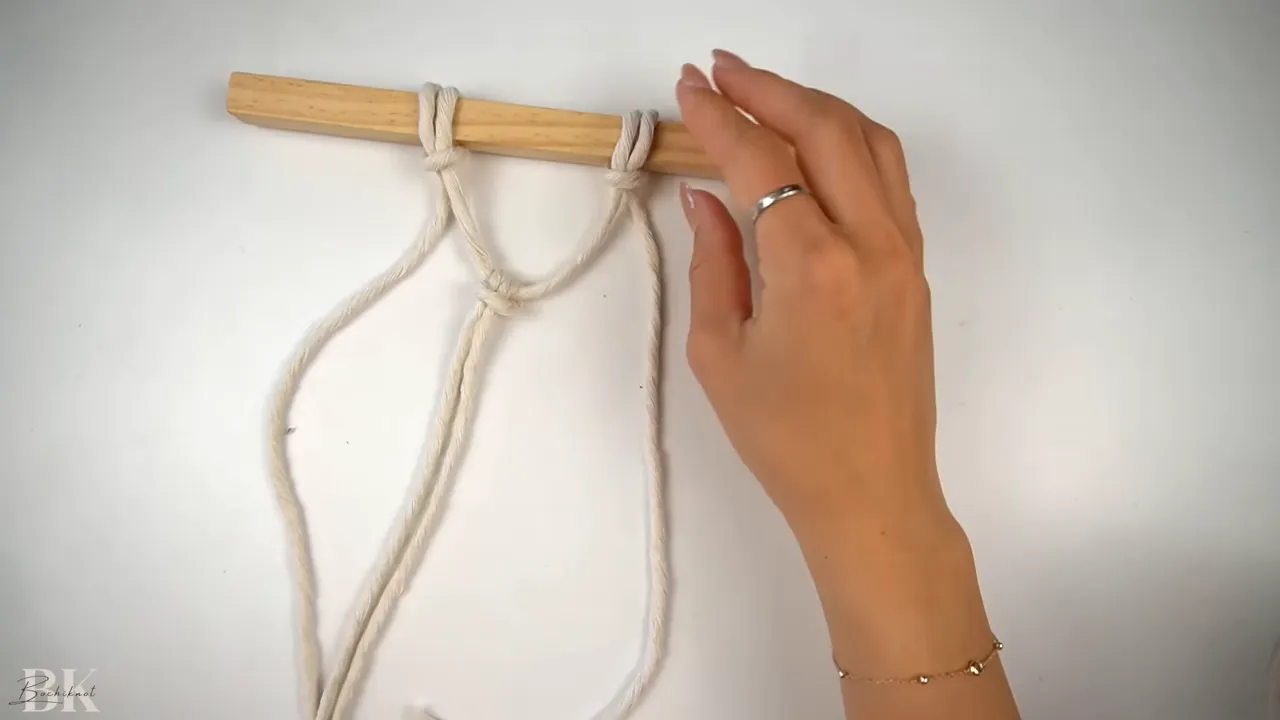
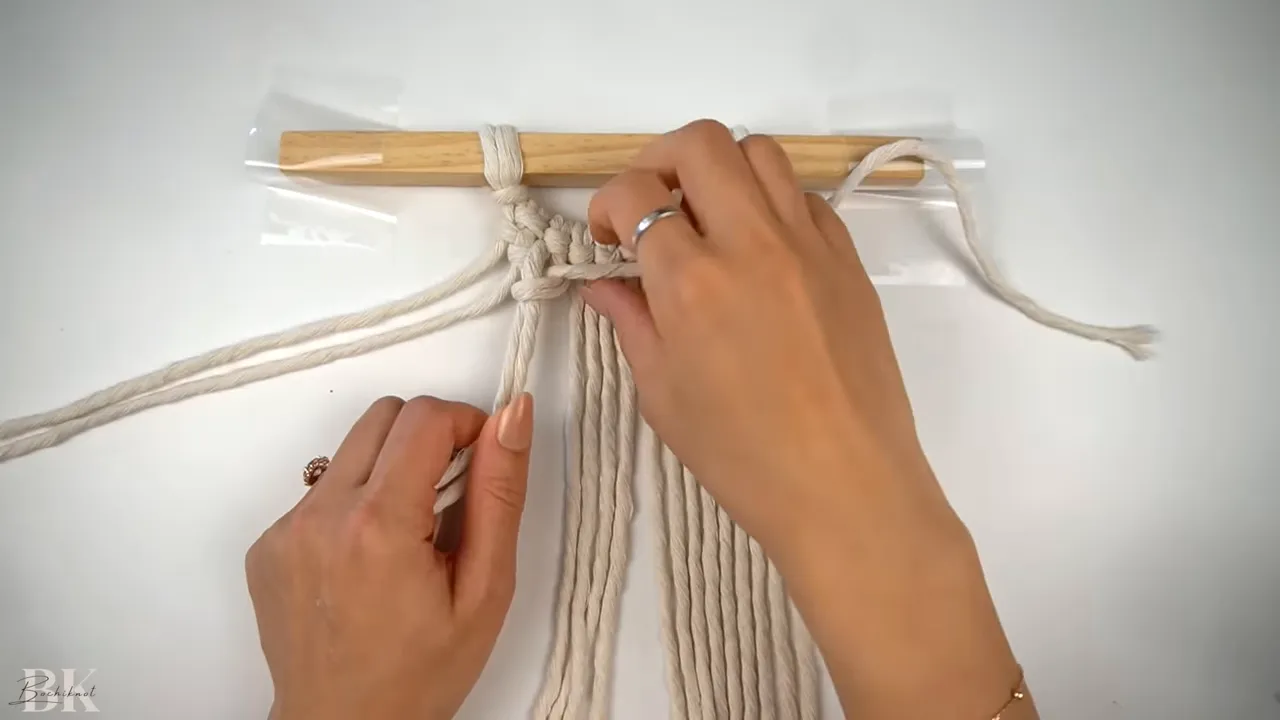
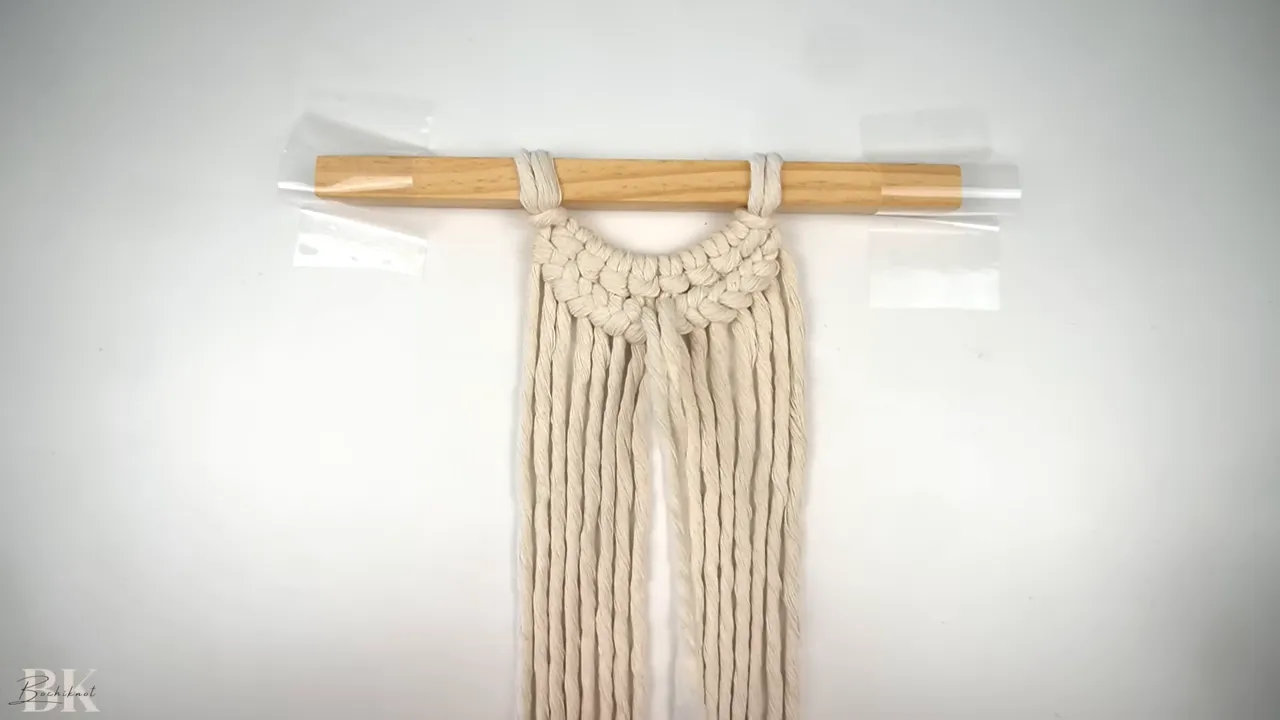
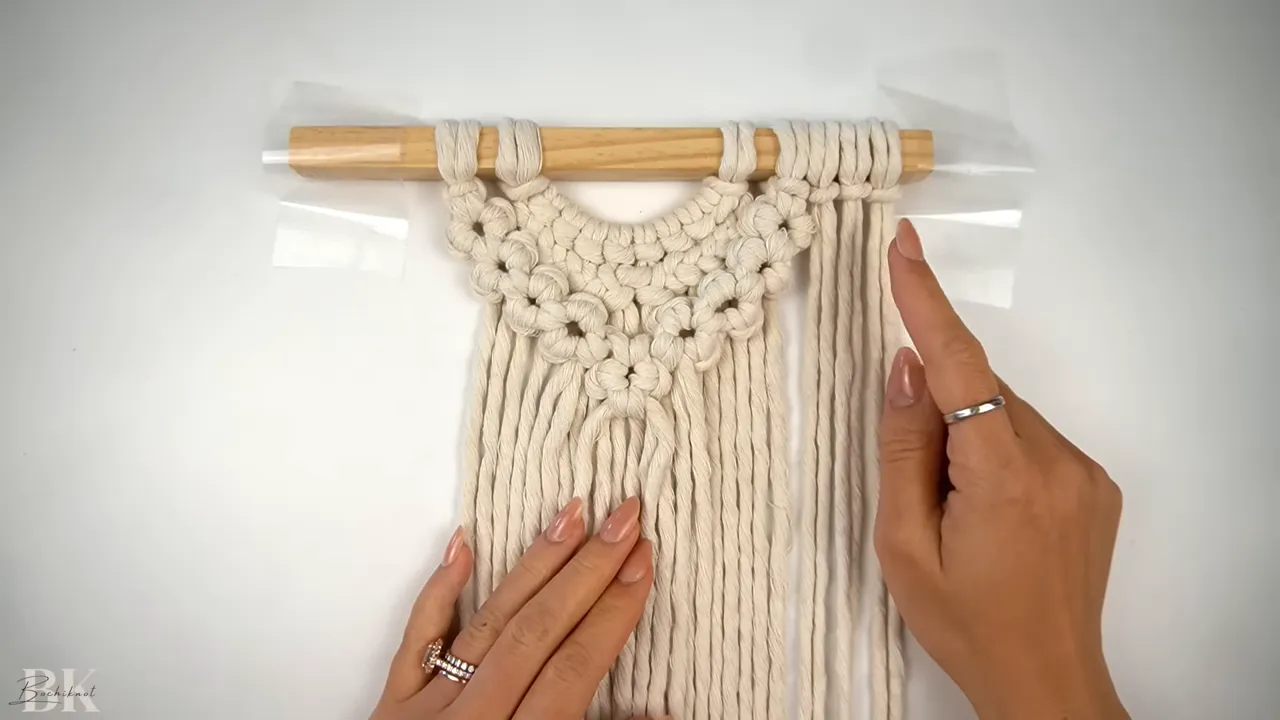
Step 3: Make the weave braid (left and right) and tuck the working ends
- Split the vertical cords in half. On each side, make a small woven braid using repeated half-hitch knots: hold two cords, use the third as the working cord, bring it over and through the loop, then repeat by dropping one cord and using the next.
- Work left and right so the two braids meet in the middle. When you reach the center, tuck the last working cords through the opposite side's Lark's head gaps so their ends sit at the back.
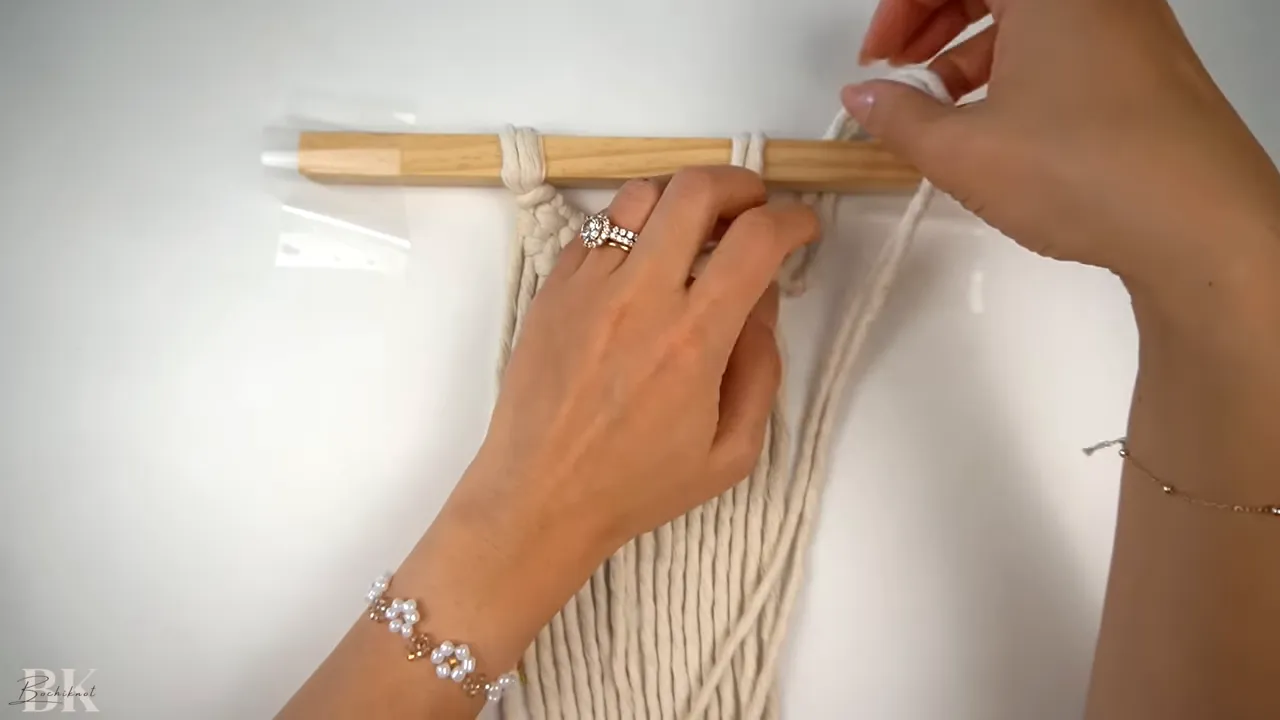
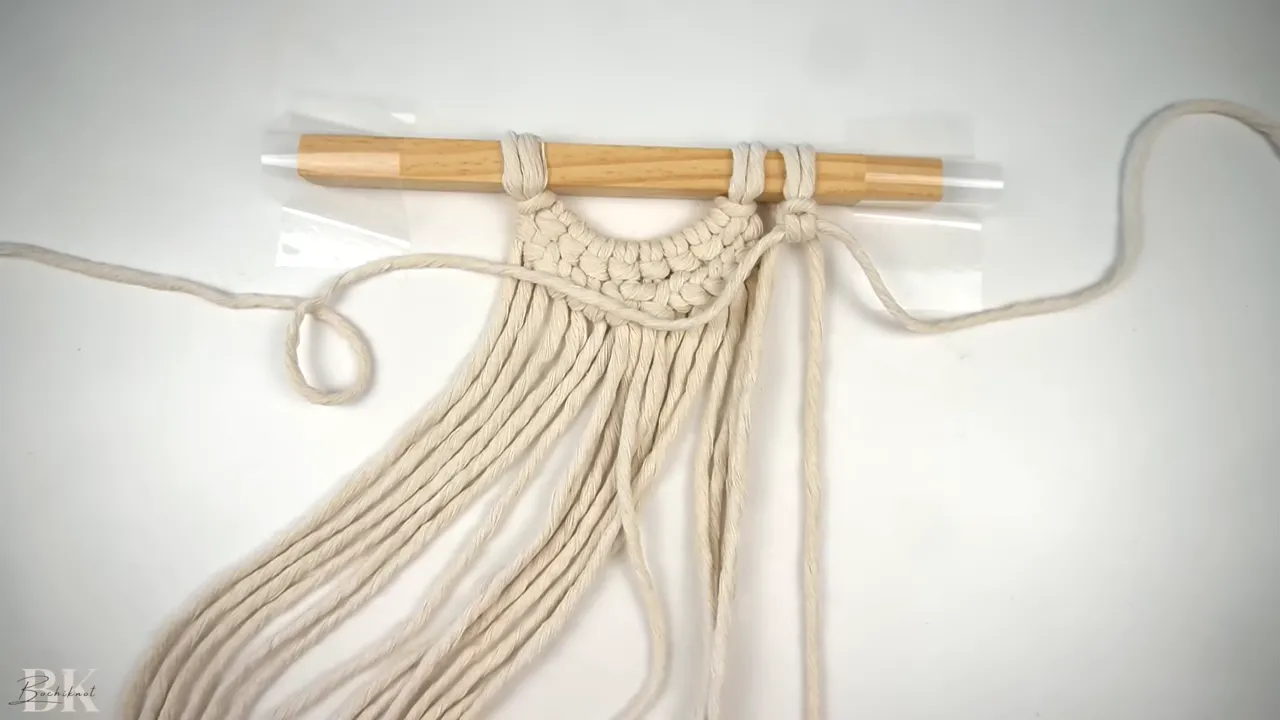
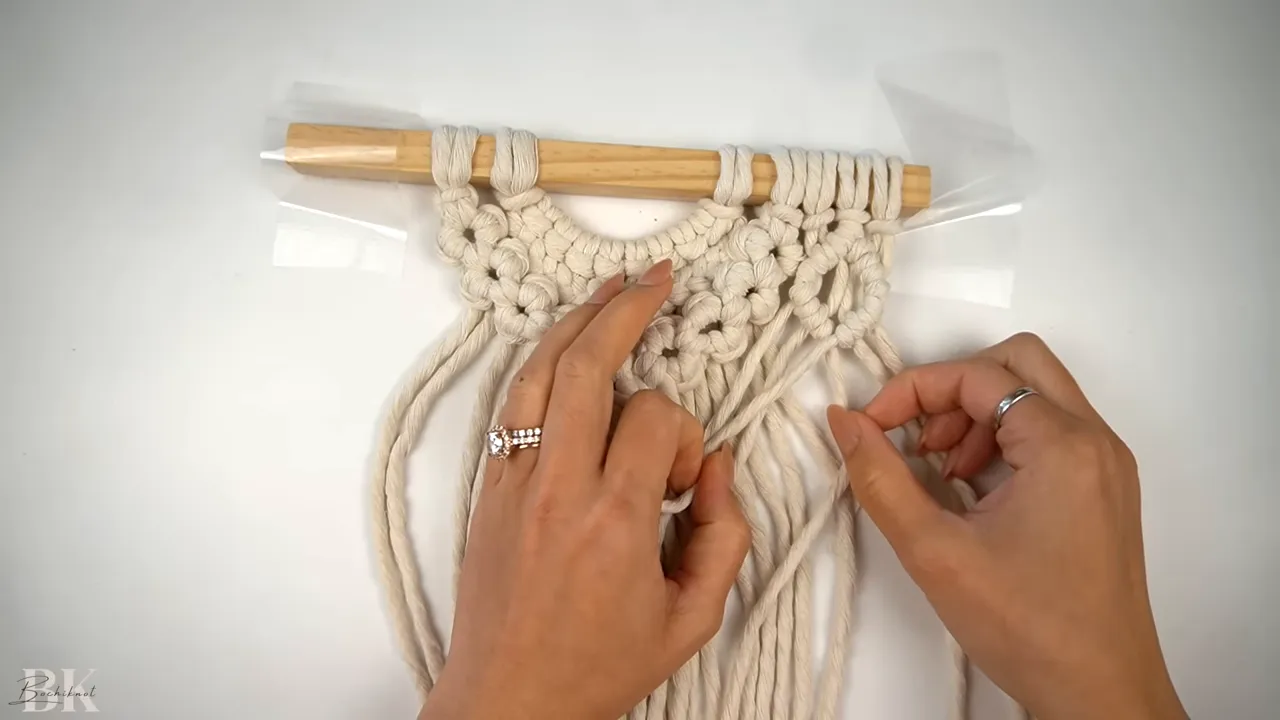
Step 4: Start the Aztec Sunbar section (right side setup)
- Fold an 180 cm cord in half and Lark's head it onto the dowel at the right side. Pull it down, but do not fully tighten.
- Thread a 100 cm cord through that Lark's head so the ends are matched and retighten the vertical cords. These paired shorter cords will act as anchor cords while the adjacent cords are the working cords for the Aztec sunbar repeat.
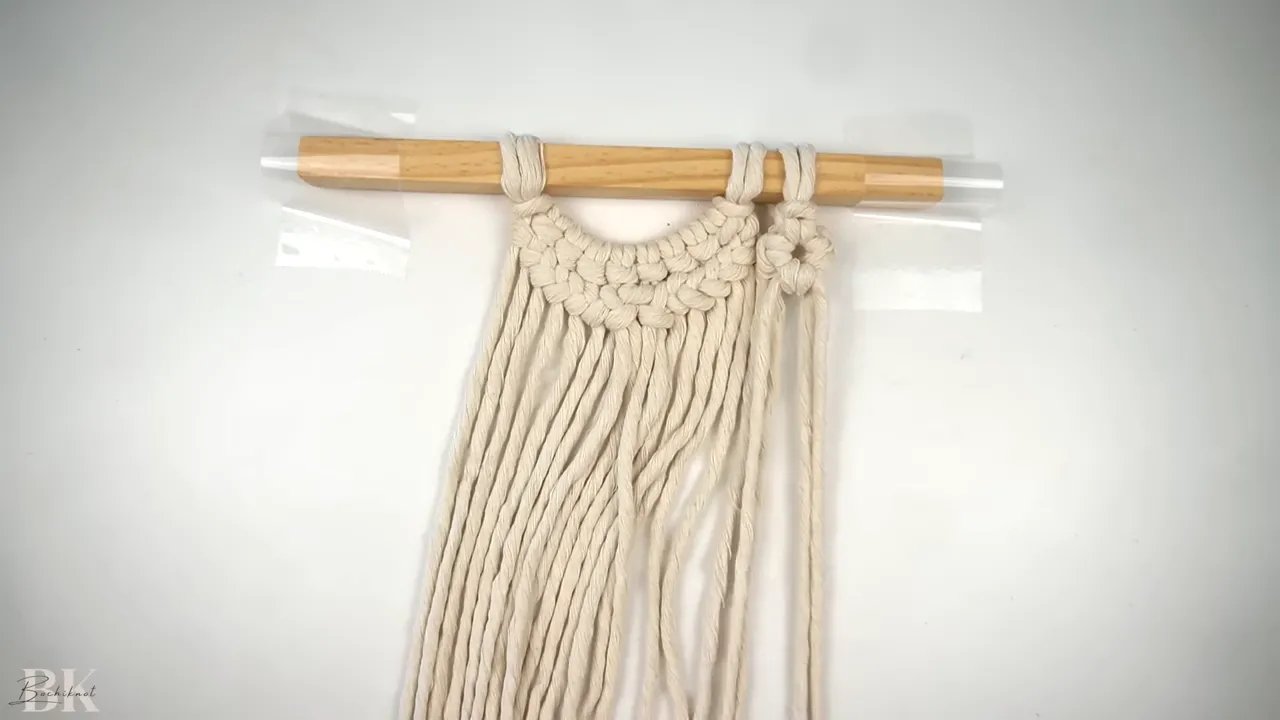
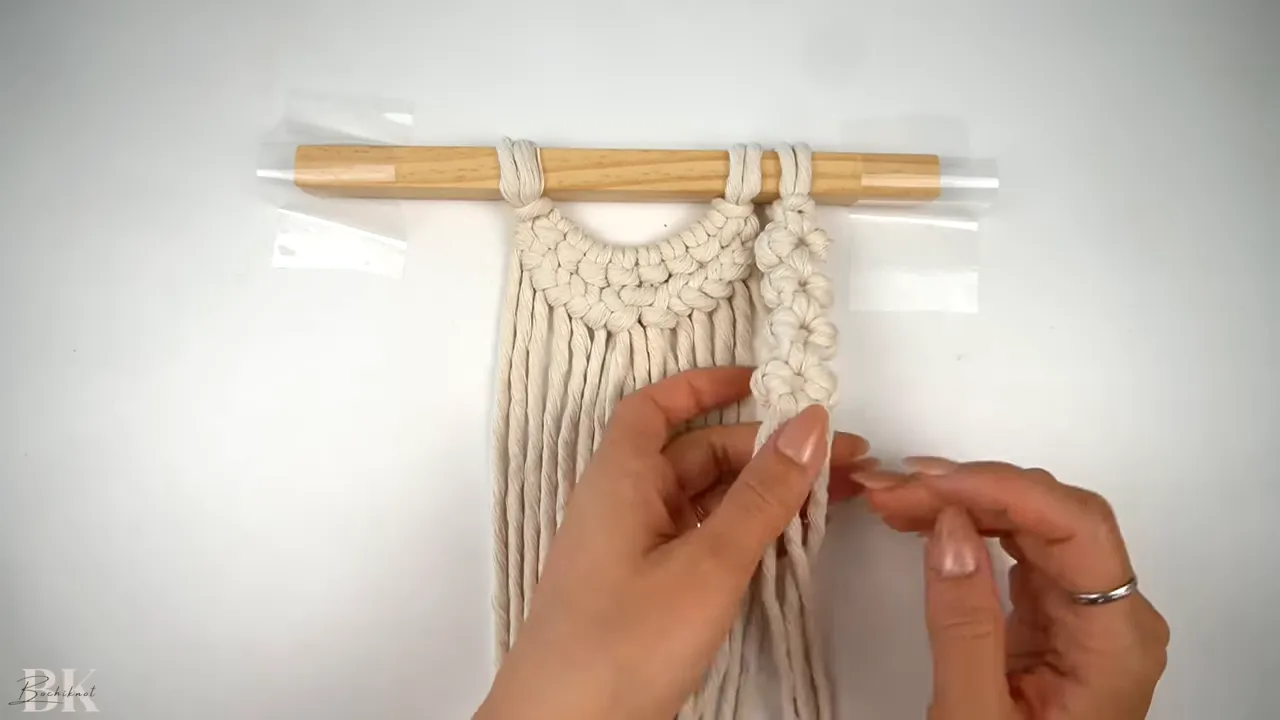
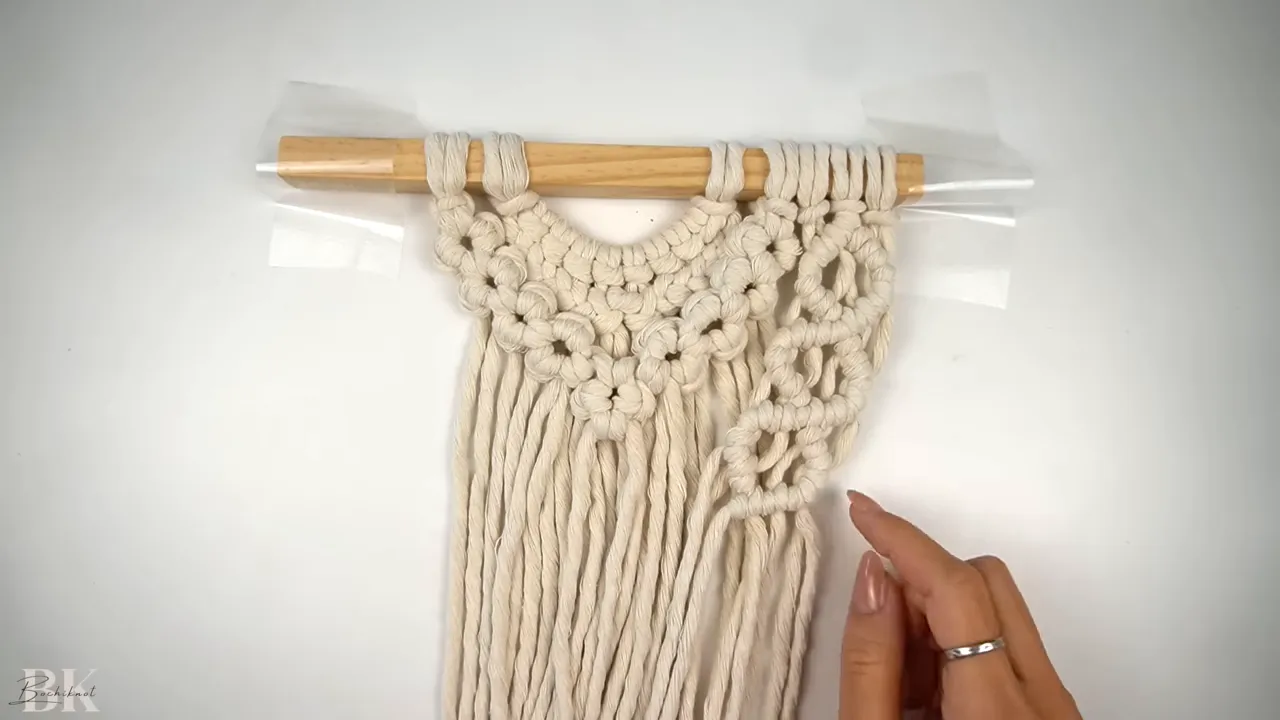
Step 5: Build consecutive Aztec Sunbar units and mirror to the left
- The Aztec sunbar unit is a small repeated module: overlap the anchor cords, weave the working cord through the overlap on each side, tighten, then make a vertical Lark's head from the behind cords and finish with a half hitch on both sides.
- Repeat until you create four sections on the right that reach toward the center.
- Mirror the same setup on the left side and then connect both sides with a central Aztec sunbar using the top two cords from each side, following the same pattern.

Step 6: Attach three 170 cm cords and make diamond DHH patterns (right side)
- Attach three 170 cm cords to the right side of the dowel using Lark's head knots.
- With the middle two cords as the working pair, make diagonal rows of double half hitch knots to form a diamond motif: tight spacing on the left side of this area, looser spacing on the right to create a gentle curve toward the center.
- Build three consecutive diamond shapes marching toward the middle.
Step 7: Mirror the diamond pattern on the left and secure diamonds to the center
- Repeat the three-diamond sequence on the left side as a mirror of the right.
- Once both sides are in place, secure the diamonds to the center by taking the top cord of each diamond and attaching it to the previous layer cords with double half hitch knots.
- Finish the center with one last diagonal DHH so the entire pattern reads as one continuous, connected design.
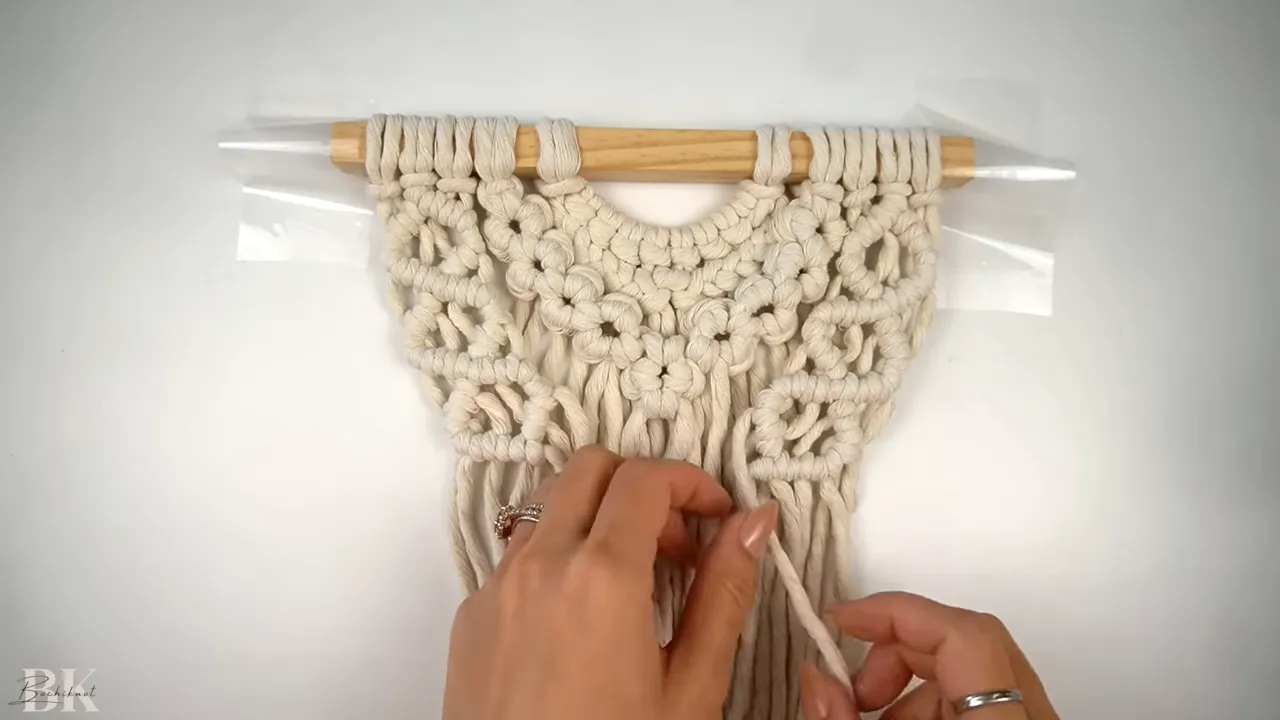
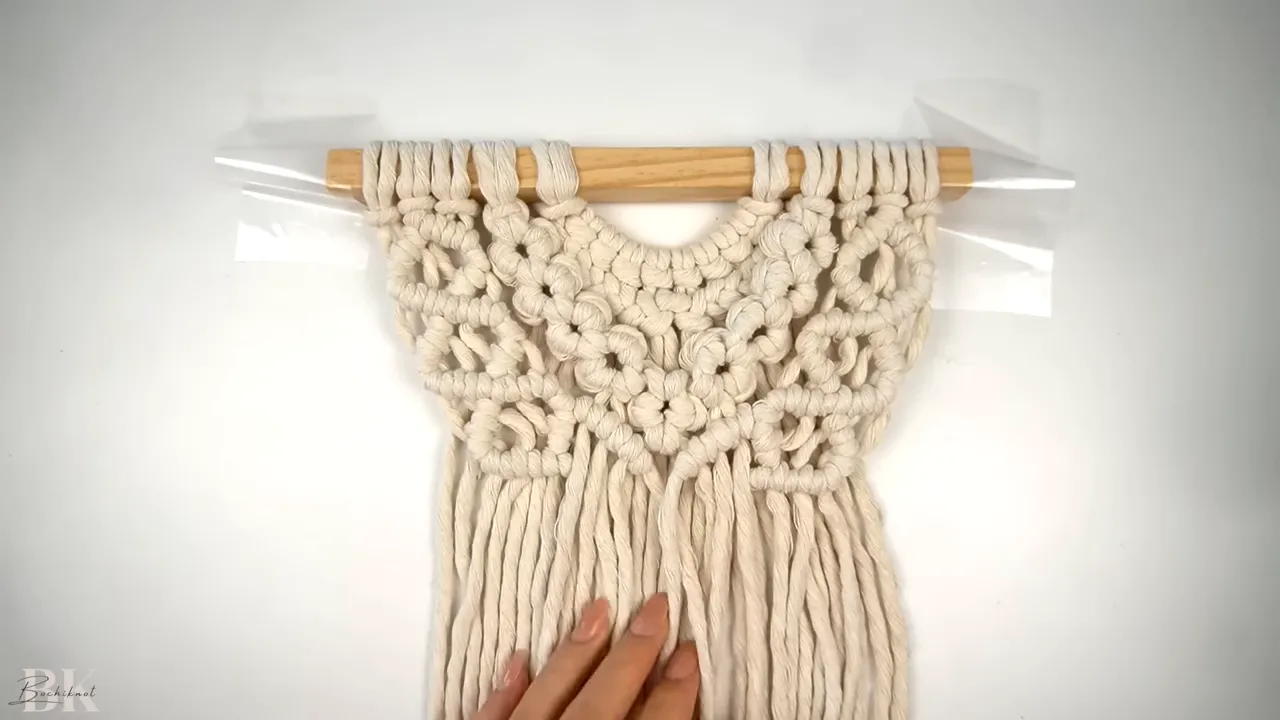
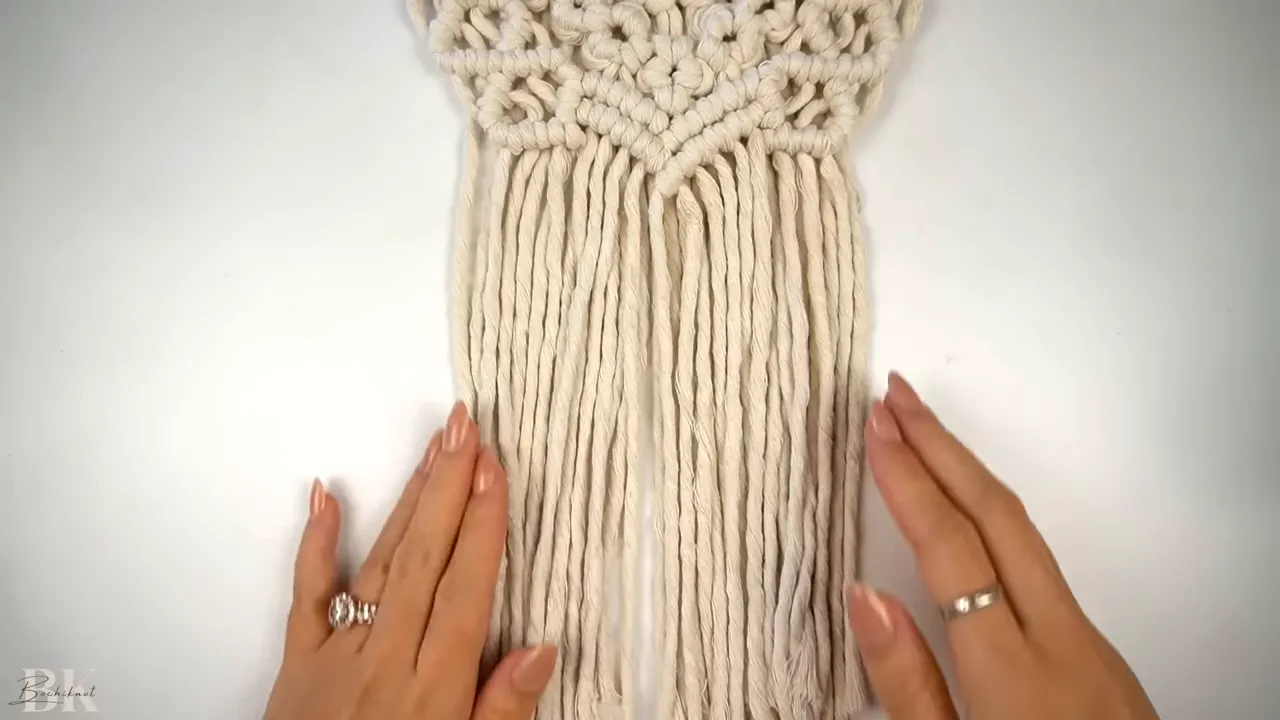
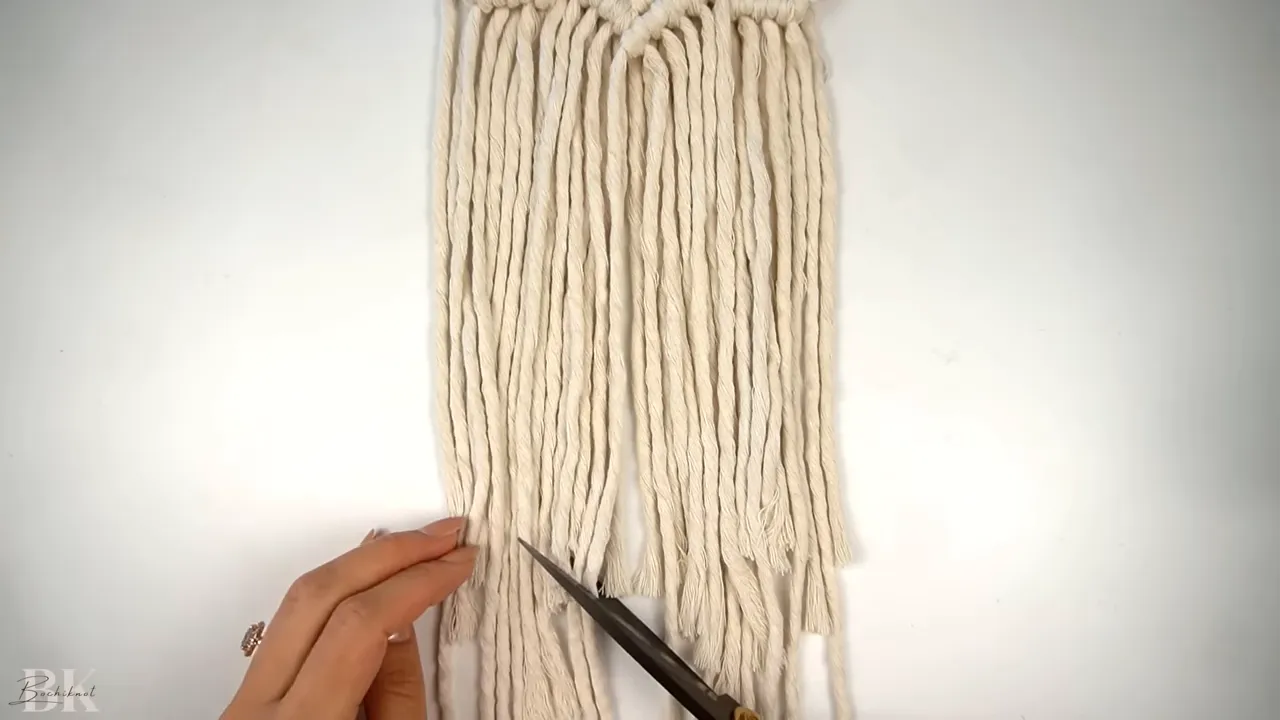
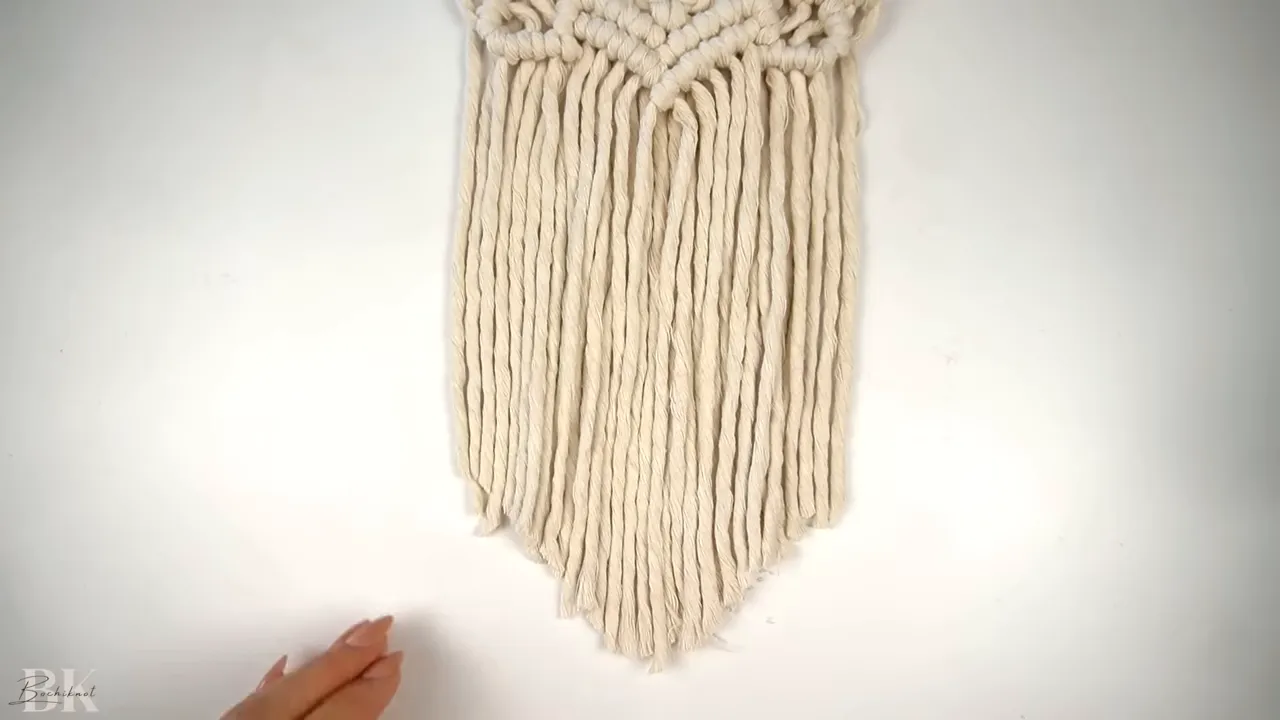
Step 8: Trim fringe and add side fringe pieces
- Trim the main fringe into a soft V-shaped bottom or a gentle curve according to preference. Save the longer scrap cords (approx 35 cm) for additional side fringe.
- Attach pairs of 35 cm scraps to the bottom loops using reverse Lark's head knots — two per loop — to fill and balance the hanging visually.
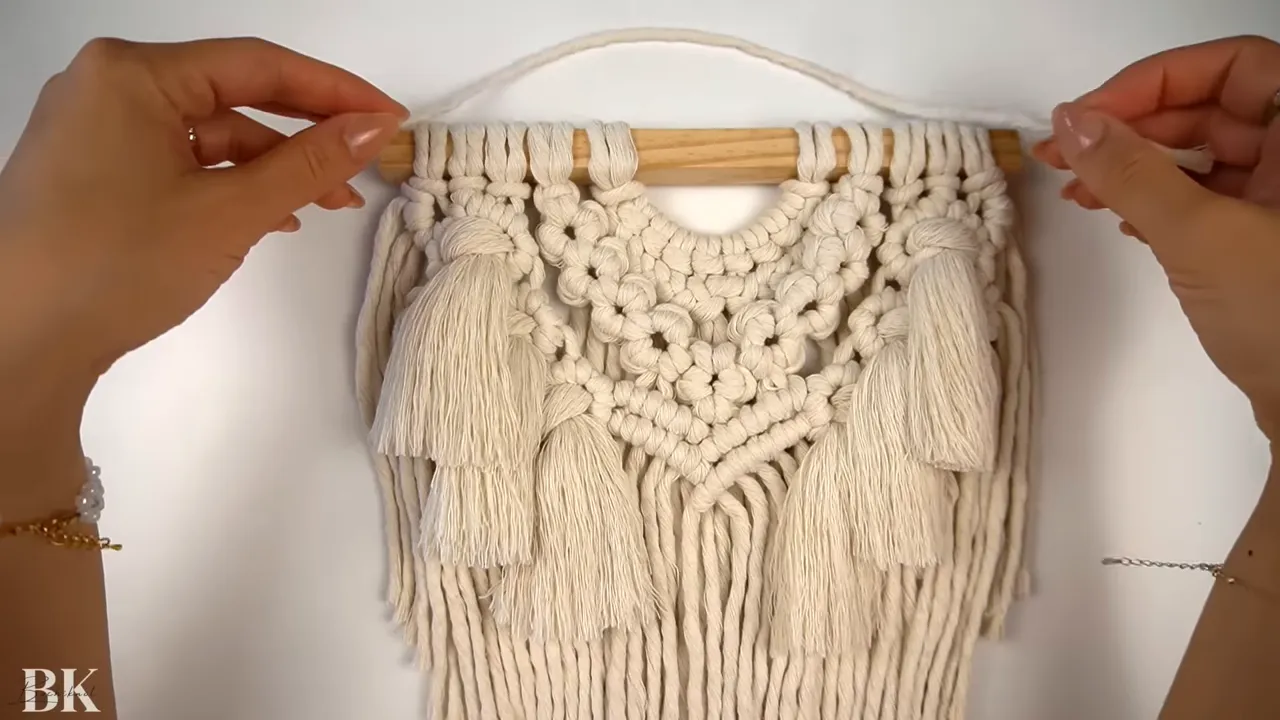
Step 9: Make tassels inside the diamond motifs and finish
- Comb four shorter scraps (about 20 cm) with a fringe comb until fluffy.
- For each diamond, weave the combed cord ends through so one end exits the left side and the other exits the right, then draw both ends down and squish them through the bottom of the diamond to sit as a tassel. Recomb and trim all tassels evenly.
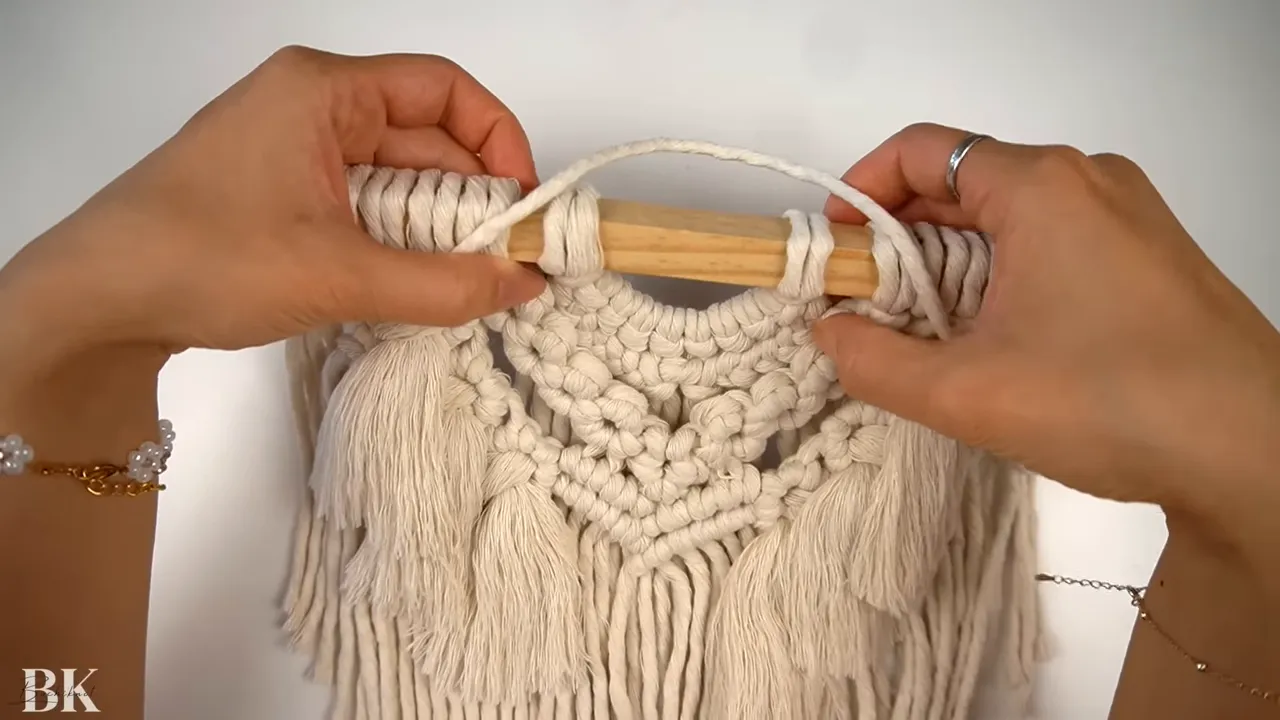
- Finally add a short handle by folding a 40 cm cord and attaching it between the first and second layer gaps, securing with double half hitch knots on each side.

Troubleshooting tips
- Uneven ends: Before continuing past each layer, flatten and retighten the Lark's head knots at the top so the working cords align.
- Braid gaps: Retighten half hitch knots or pull vertical anchor cords to reduce gaps in the weave braid.
- Fringe not fluffy: Use a metal fringe comb and comb from root to tip, then trim once all tassels are in place.
Variations and substitutions
- Use braided 3-ply cord for a sturdier, fuller look; single-strand twist is easier for beginners to knot neatly.
- Scale up the piece by using longer cords and a longer dowel to turn this into a medium wall hanging.
- Add beads into the Aztec sunbar or tassels for a boho-chic accent.
Final thoughts
With the right cord lengths, a bit of patience, and a willingness to experiment, this macramé wall hanging comes together into a piece that feels both personal and impactful. It’s a reminder that small, intentional details can completely change the mood of a space.
Once finished, hang your piece where it can be appreciated, or use the technique as a starting point to customize future designs with different sizes, patterns, or textures. Handmade décor isn’t about perfection—it’s about creating something that feels like home.
Want to share your work?
If you try a silhouette or wreath ornament, tag your photo on Instagram so others can see — it's one of the best ways to learn and get feedback.
Frequently asked questions
What is the minimum skill required to make this wall hanging?
Basic knot familiarity is helpful but not required. The pattern uses beginner-friendly knots (Lark's head, half hitch, and double half hitch). The step-by-step arrangement and troubleshooting tips make it accessible to newcomers willing to practice.
What cord thickness is recommended and can I substitute?
A 4 mm single-strand cotton cord works well for clean knots and manageable bulk. For a heavier look, use 3-ply or braided cord. Keep in mind that thicker cord will increase the finished size.
How long does this take to complete?
Expect 2 to 3 hours from start to finish, depending on knot speed and trimming. Beginners may take a bit longer.
Can I sell pieces made from this pattern?
The pattern is copyrighted and belongs to the original creator. You are free to make and gift pieces for personal use, but the pattern may not be sold or redistributed for commercial purposes without permission.
How do I care for and clean a macrame wall hanging?
Spot clean with a damp cloth for small stains. For deeper cleaning, gently hand wash in cool water and reshape while damp. Air dry flat or hang to retain shape. Avoid harsh detergents or wringing.
Happy knotting and enjoy gifting or decorating with your tiny textured wreaths this season.


Looking for Macrame Patterns and Projects?
I’ve got a fun variety of DIY macrame patterns for you to explore—whether you’re into creating unique wall hangings to spruce up your home or timeless plant hangers, there’s something for every skill level.
Each pattern is super easy to follow with step-by-step photos, clear instructions, and plenty of tips to help you along the way.
Ready to start creating?
Browse DIY macrame patterns on Etsy and dive into your next project.

Join the Bochiknot Macrame Community: Your Gateway to Exclusive Tutorials & Inspiration
Discover the art of macrame like never before! Join our exclusive community of passionate macrame enthusiasts and unlock a world of creativity.
Gain access to a treasure trove of unique patterns, expert guidance, and a supportive network of fellow artists.
Get access to our library of macrame tutorials and best practices here.


Leave a comment