 Skip to content


DIY Macrame Dreamcatcher Wall Hanging | Step-By-Step Macrame Dream Catcher Guide
Table of Contents
- What is a Macrame Dreamcatcher?
- Macrame Knots You Need to Know
- DIY Macrame Dreamcatcher Cord and Materials
- Macrame Dreamcatcher Pattern Details
- Important Macrame Terms for Beginners
- Macrame Dreamcatcher Step-by-Step Pattern Instructions
- Step 1:
- Step 2:
- Step 3:
- Step 4:
- Step 5:
- Step 6:
- Step 7:
- Step 8:
- Step 9:
- Step 10:
- Step 11:
- Step 12:
- Step 13:
- Step 14:
- Step 15:
- Step 16:
- Step 17:
- Step 18:
- Step 19:
- Step 20:
- Essential Tips You Can Keep in Mind
- Wrapping Up How to DIY Macrame Dreamcatcher Wall Hanging
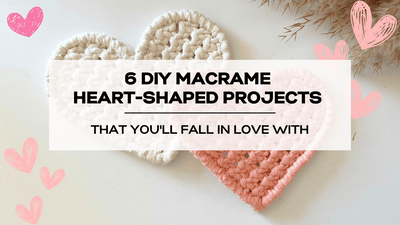
- Are you looking for more fun and simple DIY macrame dreamcatcher and wall hanging patterns?
- Are you looking to advance your macrame skills, create elegant designs, and learn unique knot patterns?

Are you looking for a stylish update to your home decor?
Look no further than the macrame dream catcher! This beautiful macrame bohemian-style dreamcatcher will look stunning on your wall and is intended to chase away nightmares and negative energy.
The delectable pattern requires just a few simple knots with basic macrame supplies – jump in and follow our step-by-step tutorial to make one of your own!
Dream catchers are believed to be effective supernatural filters, preventing bad dreams or negative energies from entering our lives.
They act as magical nets, allowing only good dreams through their lacy webbing while catching any nightmares in their intricate weave.
When designing your dream catcher, you can choose different colors, patterns, and sizes to personalize it further.
With our helpful tips, knot-tying techniques, and easy-to-follow tutorial, you'll have a beautiful dream catcher ready to hang in no time.

What is a Macrame Dreamcatcher?
If you're new to macrame, let's start by understanding it. Macrame is a beautiful traditional textile art that revolves around knotting cords to craft intricate patterns and designs.
It's a fascinating skill that opens up creative crafting and home decor possibilities.
A macrame dreamcatcher is a decorative piece that blends the traditional dreamcatcher concept with the art of macrame.
It typically features a woven web within a hoop adorned with various macrame knots, beads, and feathers.
The combination of intricate macrame patterns and the symbolic purpose of a dreamcatcher believed to filter out bad dreams, has contributed to its soaring popularity in modern interior design and bohemian-themed decor.
As DIY crafting and home decor trends continue to rise, macrame dreamcatchers have become a beloved and sought-after item, capturing the hearts of crafters and enthusiasts worldwide.
In this blog post, I'm excited to share my journey of creating a macrame dreamcatcher and guide you through the simple steps to make your own.
Discover the magical art of macrame as we weave a dreamcatcher to banish bad dreams and allow only the sweetest dreams to grace your sleep.
Let's get knotting and create a dreamcatcher that's as beautiful as it is meaningful!
Macrame Knots You Need to Know
Getting familiar with macrame knots is essential for mastering the art of Macrame. For this project, you will need to know the following knots:
- Lark's head knot
- Double half-hitch knot
- Overhand knot
- Berry knot
- Gathering knot
The above knots are five basic knots of macrame widely used in modern macrame projects.
By learning popular knots like the overhand knot, lark's head knot, and double half-hitch knot, you'll have a solid foundation for creating a wide range of macrame projects, including coasters.
The Lark's Head Knot is a fundamental mounting knot for various projects. As a mounting knot, it provides a reliable and secure attachment point for your macrame design to a dowel, ring, or other supporting structure. This knot lets you easily hang cords onto your macrame creation, providing a stable foundation for further knotting and design elements.
The Double Half Hitch Knot is fundamental and highly versatile in macrame. It is the building block for many intricate knot patterns, making it an essential technique for creating beautiful macrame designs.
The Overhand Knot is straightforward and is used to make a knob in a cord, string, or rope. It helps tie packages to prevent the ends from fraying. You make an overhand knot by crossing the rope's end around the standing part, forming a loop. This will bring the rope’s end through the loop; you need to pull the rope.
The Berry Knot, also known as the modern iteration of the vintage Square knot button, features a textured design formed by transforming Square knots into a charming berry-like shape. This stylish and decorative knot is widely used in contemporary macrame projects, adding a touch of elegance to your creations.
The Gathering Knot is a wrapping knot, a finishing knot that gathers all cords together. Usually, you will see the gathering knot at the bottom of a macrame pattern.
If you’re unfamiliar with how to make the knots above, click on the names above to practice and familiarize yourself with the knots before starting this pattern.
Practice and repetition will help you become more confident in executing these knots, allowing you to explore more intricate patterns and designs.
I have compiled a FREE EBOOK guide, "50 Macrame Knots & Sennit Guide," that goes over step by step with pictures on how to make 50 different knots and sennits (including all 5 knots listed above).

This invaluable guide will help you learn the knots and provide insights into crafting unique knot sequences and pattern designs.
DIY Macrame Dreamcatcher Cord and Materials
You'll need a few essential materials and supplies when creating this macrame dreamcatcher pattern.
Choosing Macrame Cord
The most crucial material is the cord. Macrame cords can be made from various materials such as cotton, jute, or nylon, each offering a different texture and appearance.
Choosing a cord that is soft, sturdy, and suitable for your desired coaster design is essential, ensuring durability and functionality.
We’re using 3mm 3-ply cord and 1.5mm 2-ply string from our Rainbow cord line for this pattern.
- Our Rainbow cord line is certified 100% chemical free and eco-friendly, made from recycled cotton materials.
- We love it because it’s smooth, soft, and sturdy, making it easy to work with.
If you can’t get your hands on our 3-ply cotton cord, you can substitute it with a single-strand cotton cord, which will also work well for this pattern.
Other supplies
In addition to macrame cord and string, you will need a metal ring and some feathers for this DIY Macrame Dreamcatcher Wall Hanging.
The ring is the frame that the Dreamcatcher design will be built around, while the feathers will give it a beautiful and unique look.
Essential tools
You will also need a few essential tools.
- Measuring tape
- Scissors
- Stainless steel comb (optional)
Macrame Dreamcatcher Pattern Details
Skill Level
- Intermediate
Completed Size
- 6.5” wide by 21” length
Materials Needed
- 3mm cotton cord
- 1.5mm string
- 1 x 6.5” metal ring
- Feathers
Cord Lengths Needed
String:
- 1 x 200 cm (79”)
- 8 x 25 cm (10”)
Cord:
- 1 x 200 cm (79”)
- 16 x 90 cm (35”)
- 8 x 140 cm (55”)
Completion Time
It will take approximately 1.5 hours to complete this project. Depending on your skill level, the actual time may vary.
Important Macrame Terms for Beginners
Here are some helpful macrame terms you should know when following this pattern:
- Knots: Macrame involves various knots, such as the square knot, double half hitch, and Lark's head knot. Understanding these basic knot patterns creates the foundation of macrame.
- Cords: Cords are the primary material used in macrame. They are made of cotton, jute, nylon, or synthetic fibers. Macrame cords come in various thicknesses and colors.
- Fringe: Fringe refers to the loose ends of cords that hang down, adding a decorative element to beginner projects. The fringe can be left as is or trimmed to a desired length. If you like to learn more about macrame fringe, check out my blog post: The Ultimate Guide to Macrame Fringe | 5 Top Tips for Creating Perfect Fringe
- Anchor cord: Refers to the fixed cord or structure to which other cords are attached or knotted, providing stability and support to the design.
- Working cord: This is the piece of cord that is actively used to create knots and patterns, manipulated and moved throughout the project to form the desired design.
Macrame Dreamcatcher Step-by-Step Pattern Instructions
Once you have the right tools and materials, you can now start. Follow these steps to create your diy macrame dreamcatcher wall hanging:
Step 1:
- Take a strand of 200 cm cord and make an Overhand knot onto the ring with one end.
- Then start wrapping around the ring until you have approximately 3" of string left.

Step 2:
- Make an Overhand knot with the other end.

Step 3:
- Attach all 16 cords at 90 cm long on the bottom of the ring using Lark's Head knots.

Step 4:
- Take a strand of 200 cm string and make a Double Overhand knot in the bottom middle section of the ring.

Step 5:
- Skip about 2.5" and make and Overhand knot with the longer end of the string.
- Repeat around the ring.

Step 6:
- Take the string and attach it to the center of the first row with an Overhand knot.
- Repeat all around until there is hardly any space left to make the Overhand knots.

Step 7:
- Finish with a Double Overhand knot.

Step 8:
- Skipping 6 Lark's Head knots from the left, take a strand of 140 cm cord folded in half and attach it onto the ring using a Reverse Lark's Head knot.

Step 9:
- Make a diagonal DHH knot to the left. Then take another strand of 140 cm cord and make a RLHPHH knot onto the left cord.


Step 10:
- Make 2 rows of DHH knots to the left then 2 rows back over to the right.

Step 11:
- For the last row, include the working cord with the anchor cord group for the next DHH knot.


Step 12:
- Take a strand from the anchor cord group and weave it through the ring.
- Tie a Double Overhand knot at the back.

Step 13:
- Repeat the same pattern on the right side.

Step 14:
- Make a Berry knot with the middle 4 cords.

Step 15:
- Pull the cords from the 2 petals to the centre. With the middle 2 cords make a diagonal DHH knot to the left.
- Then make 3 more.

Step 16:
- Use the middle left cord for 2 rows of DHH knots to the left.
- Repeat on the right side.

Step 17:
- Take the bottom 2 cords and make one last DHH knot.

Step 18:
- Skip 2 Lark's Head knots on the left side and add a left-petal.
- Then repeat on the right-side.


Step 19:
- Trim the middle 8 shorter cords to the same length and then trim the bottom fringe into a V-shape.

Step 20:
- Take a strand of 25cm long string and use it as a working cord for a Gathering knot onto a feather and cord.
- Do this for the middle 8 shorter cords.

Essential Tips You Can Keep in Mind
- Choose the right cord: Choosing the right cord is essential to macrame. Materials like cotton cords are commonly used for macrame dreamcatcher wall hangings.
- Practice your knots: Practice the knots on a small cord piece before starting your project. This will help you become familiar with the techniques and gain confidence in your knotting skills.
- Consider the size of your dreamcatcher: Consider the size of the ring that you want to use and when determining the length and strength of your cords. Bigger rings may require thicker or more cord.
- Take breaks and step back: Macrame can be time-consuming, so it's essential to take breaks when needed. Step back to observe and admire your work from a distance.
Wrapping Up How to DIY Macrame Dreamcatcher Wall Hanging
Voila! Your very own macrame dreamcatcher wall hanging, ready to adorn your living space.
Simply secure it using a nail or wall mount, selecting the ideal location within your home to showcase this artisanal creation — be it a snug nook, a sun-kissed window, or an empty wall.
Allow the allure of nature and the craftsmanship of macrame to enhance your environment, infusing it with delight. Happy knotting! 🌿🧶
Youtube DIY Macrame Dreamcatcher Video Step-by-Step Tutorial
Are you looking for more fun and simple DIY macrame dreamcatcher and wall hanging patterns?
I have numerous diverse DIY macrame patterns and knot craft projects that you can explore, ranging from distinctive wall hangings for home decor to timeless plant hangers suitable for all skill levels.
Browse my collection of DIY macrame patterns on Etsy.

The patterns come complete with step-by-step photos, written instructions, and helpful tips and tricks to assist you throughout your macrame journey.
Are you looking to advance your macrame skills, create elegant designs, and learn unique knot patterns?
Grab your pieces of cord, and let's start knotting!
Discover the art of Macrame like never before.
Join our exclusive community of passionate macrame enthusiasts and unlock a world of creativity.
Access a treasure trove of unique patterns, advanced and straightforward projects, expert guidance, and a supportive network of fellow artists.
Whether you're a beginner or a seasoned knotter, our community is your gateway to mastering the art of Macrame.
Elevate your skills, share your creations, and embark on a journey of inspiration together.
Take advantage of this incredible opportunity.
Join our exclusive macrame community today!

Have fun knotting!


Leave a comment