

































Your First Original Macrame Design Starts Here

YOUR MACRAME JOURNEY · DESIGN WITH NICOLE
Turn the knots you know into a design that feels like you. Start with one idea, test a small sample, and build with confidence.

Nicole Woo
Macrame teacher & founder of Bochiknot
You can follow a macrame tutorial. But when it’s time to make something of your own, where do you start? Which knots belong together? How much cord should you cut? And how do you know your idea will work before you spend hours knotting?
I’m Nicole, and I want to help you work through those decisions one at a time. You don’t need a sketchbook full of polished drawings. You need a small idea you can test, a few knots you can tie comfortably, and room to make adjustments.
To design your own macrame, choose a purpose and finished size, sketch the main sections, select your cord and knots, test a sample, then plan your cord counts and lengths before building the full piece. Keep notes as you go so your next version is easier to make.
Are You Ready To Design Your Own Macrame?

You can begin experimenting before you feel like an expert. The easiest first design is a variation on something you already understand: a small wall hanging, keychain or decorative sampler. Start with a flat piece before adding the construction challenges of a bag, pocket or plant hanger.
- You can tie the knots you want to use with reasonably consistent tension.
- You can identify the working cords that form a knot and the filler or anchor cords they travel around.
- You can follow a short pattern and explain what happens to the cords between sections.
- You are comfortable undoing a few knots to test another version.
If those steps still feel unfamiliar, begin with the complete beginner’s guide to macrame. For your first original piece, choose two or three familiar knots rather than learning several new techniques at once.
For a quick preparation check, use Nicole’s five macrame tips for beginners to review your tools, tension and cutting habits before starting.
How To Design Your Own Macrame: A Practical Process
1. Decide What The Piece Needs To Do

Write a one-sentence brief: “I’m making a small wall hanging for a narrow space beside my desk, with a simple diamond and soft fringe.” This gives you a useful filter for every decision that follows.
Record the intended width and total length, the available display space, and any functional requirements. For a wall pocket, think about the opening and depth. For a plant hanger, the pot and its weight matter as much as the look. Use a tested construction pattern when designing something that must support weight.
Choose your units now and use them consistently. Label knotted length, fringe length and overall length separately. A photo alone is not a reliable way to estimate finished size.
2. Gather Inspiration And Choose One Direction

Collect a small group of references: a leaf shape, a color palette, a woven texture, or an architectural line. For each, write what you like. “The repeating curves” gives you a design direction; “I want to make this exact piece” gives you a different task.
Look beyond macrame as well as at knotwork. A shell might suggest a fan of diagonal lines; a flower might suggest repeated rounded sections. Reduce your references to one main shape, one texture and a limited color palette before moving on.
Want to explore a small floral detail? The macrame flower add-on tutorial gives you a motif to practice on its own before deciding where it belongs in a larger composition.
Keep the source of your references in your notes. When working from another maker’s pattern, follow its usage terms and credit the source where appropriate. For original exploration, experiment with the underlying idea rather than reproducing a whole design and presenting it as your own.
3. Sketch The Silhouette And Sections

Draw the outside shape first. Mark the mounting point, center line, widest area and fringe. Then divide the interior into simple blocks: mounting, main motif, connecting rows and finishing. Use circles, lines and diamonds; you do not need to draw every knot.
Add arrows for the direction of diagonal rows. Label each block with its planned knot and note where the cords will continue. Sketch the back or side too if the piece has depth or hidden joins.

4. Balance The Design Before Adding More Knots

| Design Principle | Try This | Check Your Sketch |
|---|---|---|
| Focal point | Choose one main motif, texture or accent. | Where does your eye land first? |
| Balance | Start with mirrored sections if symmetry helps you plan. | Does one side feel visually heavier? |
| Repetition | Repeat a knot group or shape. | Do the repeats feel connected? |
| Negative space | Leave deliberate gaps between dense areas. | Can the main motif be seen clearly? |
| Proportion | Compare the motif, mounting width and fringe. | Does any section overwhelm the rest? |
Try two small sketches of the same idea: one with dense knotwork and one with more open space. Pick the version that best fits the purpose. More knots do not automatically make a stronger design.
5. Choose Cord And Materials For The Result You Want

Cord is part of the design. Its construction affects how the knots look, how the piece hangs and how the fringe finishes. Changing cord can change the finished dimensions even when you repeat the same knot sequence.
- Single-strand cotton cord is a useful choice when you want soft texture and brushed fringe.
- 3-ply macrame cord gives a visible twisted texture. Make a sample to see how that texture interacts with your motif.
- Choose the dowel, ring or other mount to suit the shape and intended use. Include a ruler, scissors and a way to hold your work securely.
- For beads, check the hole against the actual bundle of cords, not just the outside bead diameter.
Use the macrame cord guide to compare options. Add finishing details with the beads, sequins and feathers guide once the main structure works.
6. Choose Knot Groups And Trace The Cord Path

Square knots are useful for repeated panels and connecting groups. Double half hitch rows can outline diagonals and shapes. Gathering knots can provide a wrapped finish. Choose each knot for the job it does in your piece.
A standard square knot uses four strands. If you plan four separate square knots across a row, that row needs 16 hanging strands. With each cut cord folded once over a dowel, eight cut lengths provide those 16 strands. This is a count example, not a cutting list: your border, alternate rows and other motifs may need a different arrangement.
Check every transition. Which cords become anchors? Which remain fillers? Are there enough strands for the next motif? Cord groups can change between sections, so do not assume one multiple works for an entire design.
Explore mounting knots for your top edge, or revisit tips for neater double half hitch knots before sampling a detailed border.
How Much Cord Do You Need For Your Own Design?
There is no single multiplier that accurately predicts every original design. Ring diameter alone does not tell you how long a pocket or hanging will be, how densely it is knotted, or which strands will do the most work.
7. Make A Sample And Measure Consumption

- Use the actual cord. Tie a representative section at the tension you intend to use. Include a transition if it changes the cord roles.
- Record starting lengths. Label the strands and measure the free length available before tying.
- Measure after tying. Record the sample’s finished height and width, plus the remaining free length of each strand. Starting length minus remaining free length gives the strand length used in that sample.
- Scale only comparable sections. Use the sample to estimate repeated rows with the same knots and spacing. Sample a different motif separately.
- Add the other allowances. Include mounting, open sections, fringe, joins and finishing, plus extra cord for testing and adjustments.
For folded cords, plan both hanging ends. Equal folding works when both ends need similar lengths; some patterns require unequal ends. Write the actual cut length for each cord, rather than confusing one hanging end with the whole folded piece.
Keep a cutting list with cord role, cut length, quantity and total. Length multiplied by quantity gives the total for that group. Add the groups together for your estimated supply requirement. For more detail, use the macrame cord measuring guide.
8. Build In Sections, Then Refine

Work one section at a time and compare it with your sketch. Measure width at several points, check the center line and look at the piece hanging upright. It is easier to correct a transition now than after several more rows.
If uneven tension or untidy ends are distracting from your design, work through Nicole’s tips for improving your macrame skills, including spacing, adding cord and finishing fringe.
For brushed fringe, separate the cotton fibers with our stainless steel macrame fringe comb, then trim gradually with our rose gold macrame scissors. Check the hanging shape before making the final cut.
Record deliberate changes, including the row count, spacing or cord role. Photograph the front and back before hiding ends. Secure the construction and settle the hanging shape before combing and trimming the fringe. Leave it longer at first; shorten gradually.
From Sketch To Piece: What Nicole’s Wall Pocket Can Teach You
The wall pocket in the original guide is a useful design study: it has a ring mount, a textured front, a pocket opening and a lower section that must work together. These photos show the project and its planning process. They are not a complete construction pattern or a verified cutting list.

| Decision | Question To Ask In Your Design |
|---|---|
| Purpose | What must fit inside, and how wide should the opening be? |
| Shape | How does the piece widen below the mounting point? |
| Texture | Which section should draw attention, and where can the knotwork stay simpler? |
| Construction | How will the front, back and sides connect? |
| Testing | Does the sample give the width, drape and stability you need? |
For your first design exercise, borrow just one planning idea from this example. Try a diamond motif in a flat sampler before adding a pocket. That lets you explore the look without solving every construction problem at once.
A Worked Example: Plan A Small Macrame Sampler
A narrow square-knot sampler is a useful first design exercise: you can practice planning one repeated section before combining several motifs. Here is how to fill in your planner, from the first idea to a provisional cutting list.
Illustrative example: The measurements below demonstrate the planning method. They are not tested measurements from Nicole’s wall pocket or a finished Bochiknot pattern. Replace them with measurements from your own sample before cutting.
1. Choose And Sketch
Project: a small decorative sampler on a wooden dowel, using 3mm single-strand cotton cord. Sketch one vertical column of square knots, with four hanging strands: two outside working strands and two middle filler strands. Label a target of 15cm of knotwork and 15cm of fringe. Leave the width blank until you measure your sample.
Knot order: mount two cords with Lark’s Head knots, repeat square knots down the center, then comb and trim the fringe. Check the square-knot tutorial if you need to revisit the cord positions.
2. Test The Cord You Will Use
Make a short sample with the same cord and tension. Measure the free length of each strand before and after knotting, excluding the mounted section from this measurement. Suppose a 5cm-high sample uses 30cm of each working strand and 5cm of each filler strand.
| Planner Entry | Example Calculation |
|---|---|
| Matching repeats | 15cm target knotwork ÷ 5cm sample height = 3 repeats |
| Each working end | 30cm × 3 = 90cm for knotwork |
| Each filler end | 5cm × 3 = 15cm for knotwork |
| Other allowances per end | 5cm for mounting + 15cm fringe + 10cm adjustment margin = 30cm |
| Planned end lengths | Working: 90 + 30 = 120cm. Filler: 15 + 30 = 45cm. |
The 5cm mounting allowance and 10cm adjustment margin are example choices, not universal rules. Check your dowel, mounting knot and finishing method. If your sample uses more cord, revise the plan now.
3. Turn End Lengths Into Cut Lengths
Each of the two mounted cords supplies one outside working end and one inside filler end. That means each full cord needs 120 + 45 = 165cm. Round up to 170cm for this example, keeping the extra 5cm on the shorter end.
| Cord / Role | Quantity | Full Cut Length | Group Total |
|---|---|---|---|
| 3mm cotton; one working end + one filler end per cord | 2 cords | 170cm each | 340cm / 3.4m |
Important folding detail: fold each cord with approximately 120cm on one side and 50cm on the other before mounting. Mirror the cords so the longer ends sit on the outside. Folding both cords in half would leave less length on the working ends than this plan allows.
The 3.4m total covers the two project cords only. Allow additional cord for your test sample and any separate hanging loop.
4. Check, Make And Record
- Before cutting: confirm your sample looks right, four hanging strands are available, and every allowance is included.
- While making: compare the width and length with your plan. Leave fringe long until the knotwork is settled.
- After making: record the actual finished dimensions and leftover cord. Write one change you would make next time.
Now try the same process with your own idea. Get your free planner below and start with one small section you can test.
A PLACE FOR YOUR NEXT IDEA
Your Free Macrame Design Planner
Turn your next idea into a plan you can follow. Sketch your design, choose your materials, test your cord lengths and keep notes for next time—all on one printable page.
Subscribe below to unlock your free planner and receive macrame tutorials, project ideas and offers from Bochiknot. Unsubscribe anytime.

Free PDF · US Letter · Print at actual size, or fit to A4.
Common Macrame Design Problems And What To Check
| What You See | What To Check | Your Next Move |
|---|---|---|
| The panel narrows unexpectedly | Changes in spacing, tension or strand grouping. | Compare against the sample; undo to the first change and retie evenly. |
| One side hangs lower | Row counts, anchor angle and tension on each side. | Align the mount and compare corresponding rows before trimming. |
| A section twists | Whether you are repeating half knots or alternating them into square knots. | Check the intended knot sequence; a spiral may be part of the pattern. |
| Working cords run short | Whether the estimate used filler consumption instead of working-cord consumption. | Stop early; re-plan that group or use a suitable joining method for the project. |
| The design feels crowded | Too many competing motifs, textures or accents. | Remove one detail or increase deliberate open space in the next sample. |
| The result differs from the sketch | The actual sample width, drape and mounting arrangement. | Revise the sketch from the sample; treat it as a working plan. |
Build A Small Design Library Of Your Own

For a guided practice piece, try the macrame coaster tutorial. Its textured center and double half hitch border let you study how a motif and its edge work together on a manageable scale.
Keep the samples you find useful. Attach a note with the cord brand, thickness and construction, the knot sequence, starting lengths, finished sample size and date. A photograph with a ruler helps you compare later.
Try three versions of one small motif: closer spacing, more open spacing and a different cord construction. Photograph them together. This is how you begin replacing guesswork with choices you understand.
When a version works, write down enough detail to make it again. Include the mounting method, cutting list, row counts, transitions, joins, fringe and finished dimensions. Your notes are the beginning of your own macrame pattern.
Designing Your Own Macrame: FAQs
Select a question to see the answer.
Can A Beginner Design Their Own Macrame?
Yes. Start with a small flat piece using knots you already know. Test one change at a time and make a sample before planning a larger piece.
Do I Need To Know Lots Of Macrame Knots?
No. A few familiar knots can create many designs through changes in spacing, direction and repetition. Understanding how the cords move between sections matters more than using a long list of knots.
How Do I Sketch A Macrame Pattern?
Draw the outline, mounting point and center line. Divide the design into sections and label the knots, dimensions and fringe. Add arrows for diagonal rows and notes about strand groups.
How Do I Work Out The Number Of Cords?
Plan the hanging strands required by each motif and transition. Then convert those strands into cut lengths for your mounting method. A cord folded in half gives two hanging strands, but not every design uses equal folds.
Can I Use A Different Cord Size?
You can experiment, but the same knot sequence may produce a different width, length, texture and drape. Make a new sample before reusing the old cutting list.
How Do I Make A Design Bigger?
Decide whether you need more repeats, longer sections or a different cord. Increasing every cut length alone will not necessarily make the design wider. Recheck cord counts, dimensions and consumption with a sample.
What Should I Do Before Cutting The Fringe?
Finish and check the joins, hang the piece upright, and compare both sides. Comb if that suits your cord, then trim gradually. Confirm that the shape works before making the final cut.
KEEP DEVELOPING YOUR STYLE
Your Next Design Can Come With More Guidance
You have a plan. Give yourself a next step to look forward to: explore a guided project, try a creative challenge, and keep developing your style with Nicole. Inside the Bochiknot membership, you can learn alongside a community of knotters who share your love of making.
Make With A Plan
Follow patterns and video tutorials to understand how a complete project comes together. Build a reference of techniques you can practice again.
Explore A Technique
Use lessons and challenges to experiment with knotwork, notice what changes, and develop your confidence one decision at a time.
Keep Showing Up
Make space for a regular creative practice and connect with other knotters. Choose the membership tier that fits the support you want.
Benefits vary by tier. Compare current lessons, community features, prices and kit options on the membership page.
A Knot Reference Beside Your Planner
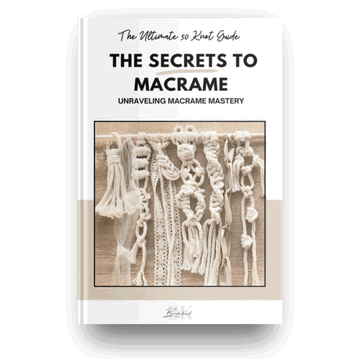
Not sure which knot to try? Keep the free 50 Macrame Knots & Sennits guide beside your planner for inspiration and a handy technique reference.
Get The Free Knot Guide →
A NOTE FROM YOUR MACRAME TEACHER
Start With One Detail That Feels Like You
You don’t have to solve the whole design today. Choose a shape you love, tie a small sample, and see what it teaches you. Let that first experiment guide the next one.
What would you like to design? Share your idea in the comments. I’d love to hear where you’re starting.
Much love,
Nicole Woo
Founder & macrame teacher, Bochiknot

Leave a comment